

Destiny, for everything that the game has gone through, and all the criticism it gets, is one of my favorite games. And of course, one of the first things I found when browsing 3D print models online was the Destiny Hunter Knife replica. I absolutely had to print it, and it made a for a really cool print and painting project. Still relatively new to the whole 3D printing and prop making hobby, I was pretty proud of it.

A while after completing the Hunter Knife though, I realized I wasn’t as happy with it as I thought I was. It was close to the in-game model, but wasn’t quite as accurate as I wanted it to be. And after perusing through more version of the knife posted online, I decided to try my hand at modelling and printing my own version.
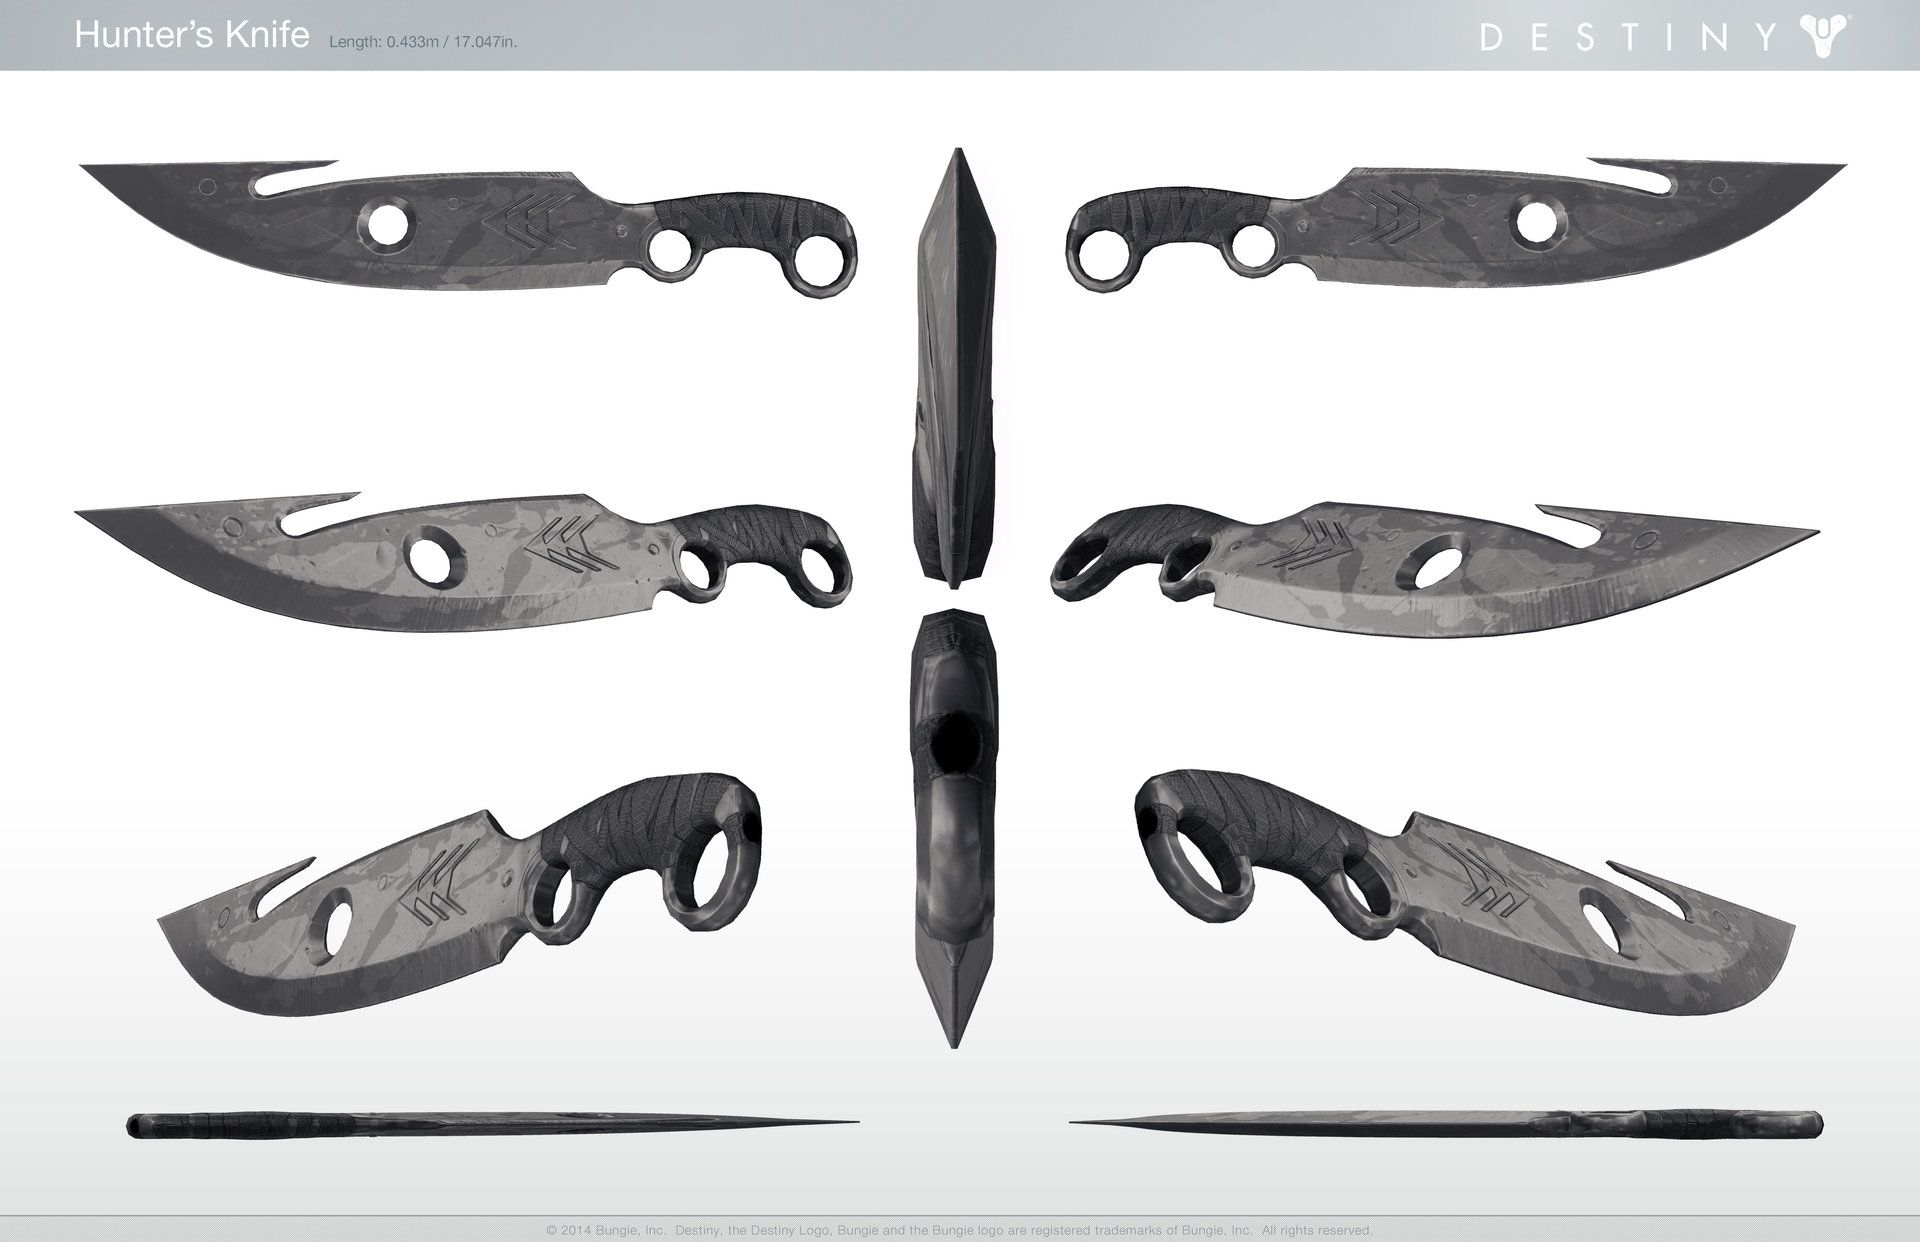
First, I had to gather references, and lucky for me, there was some really nice concept art floating around online.
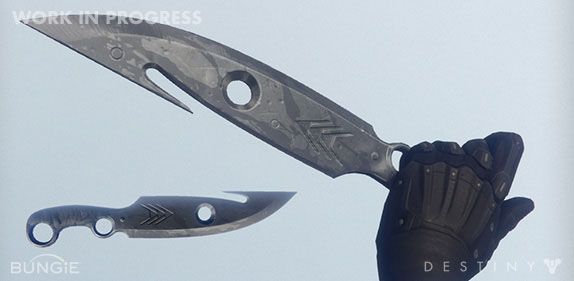

This was one of the first models I made myself using Fusion 360. While not an overly complex model it did take some work to get correct learning how Fusion worked in the process.
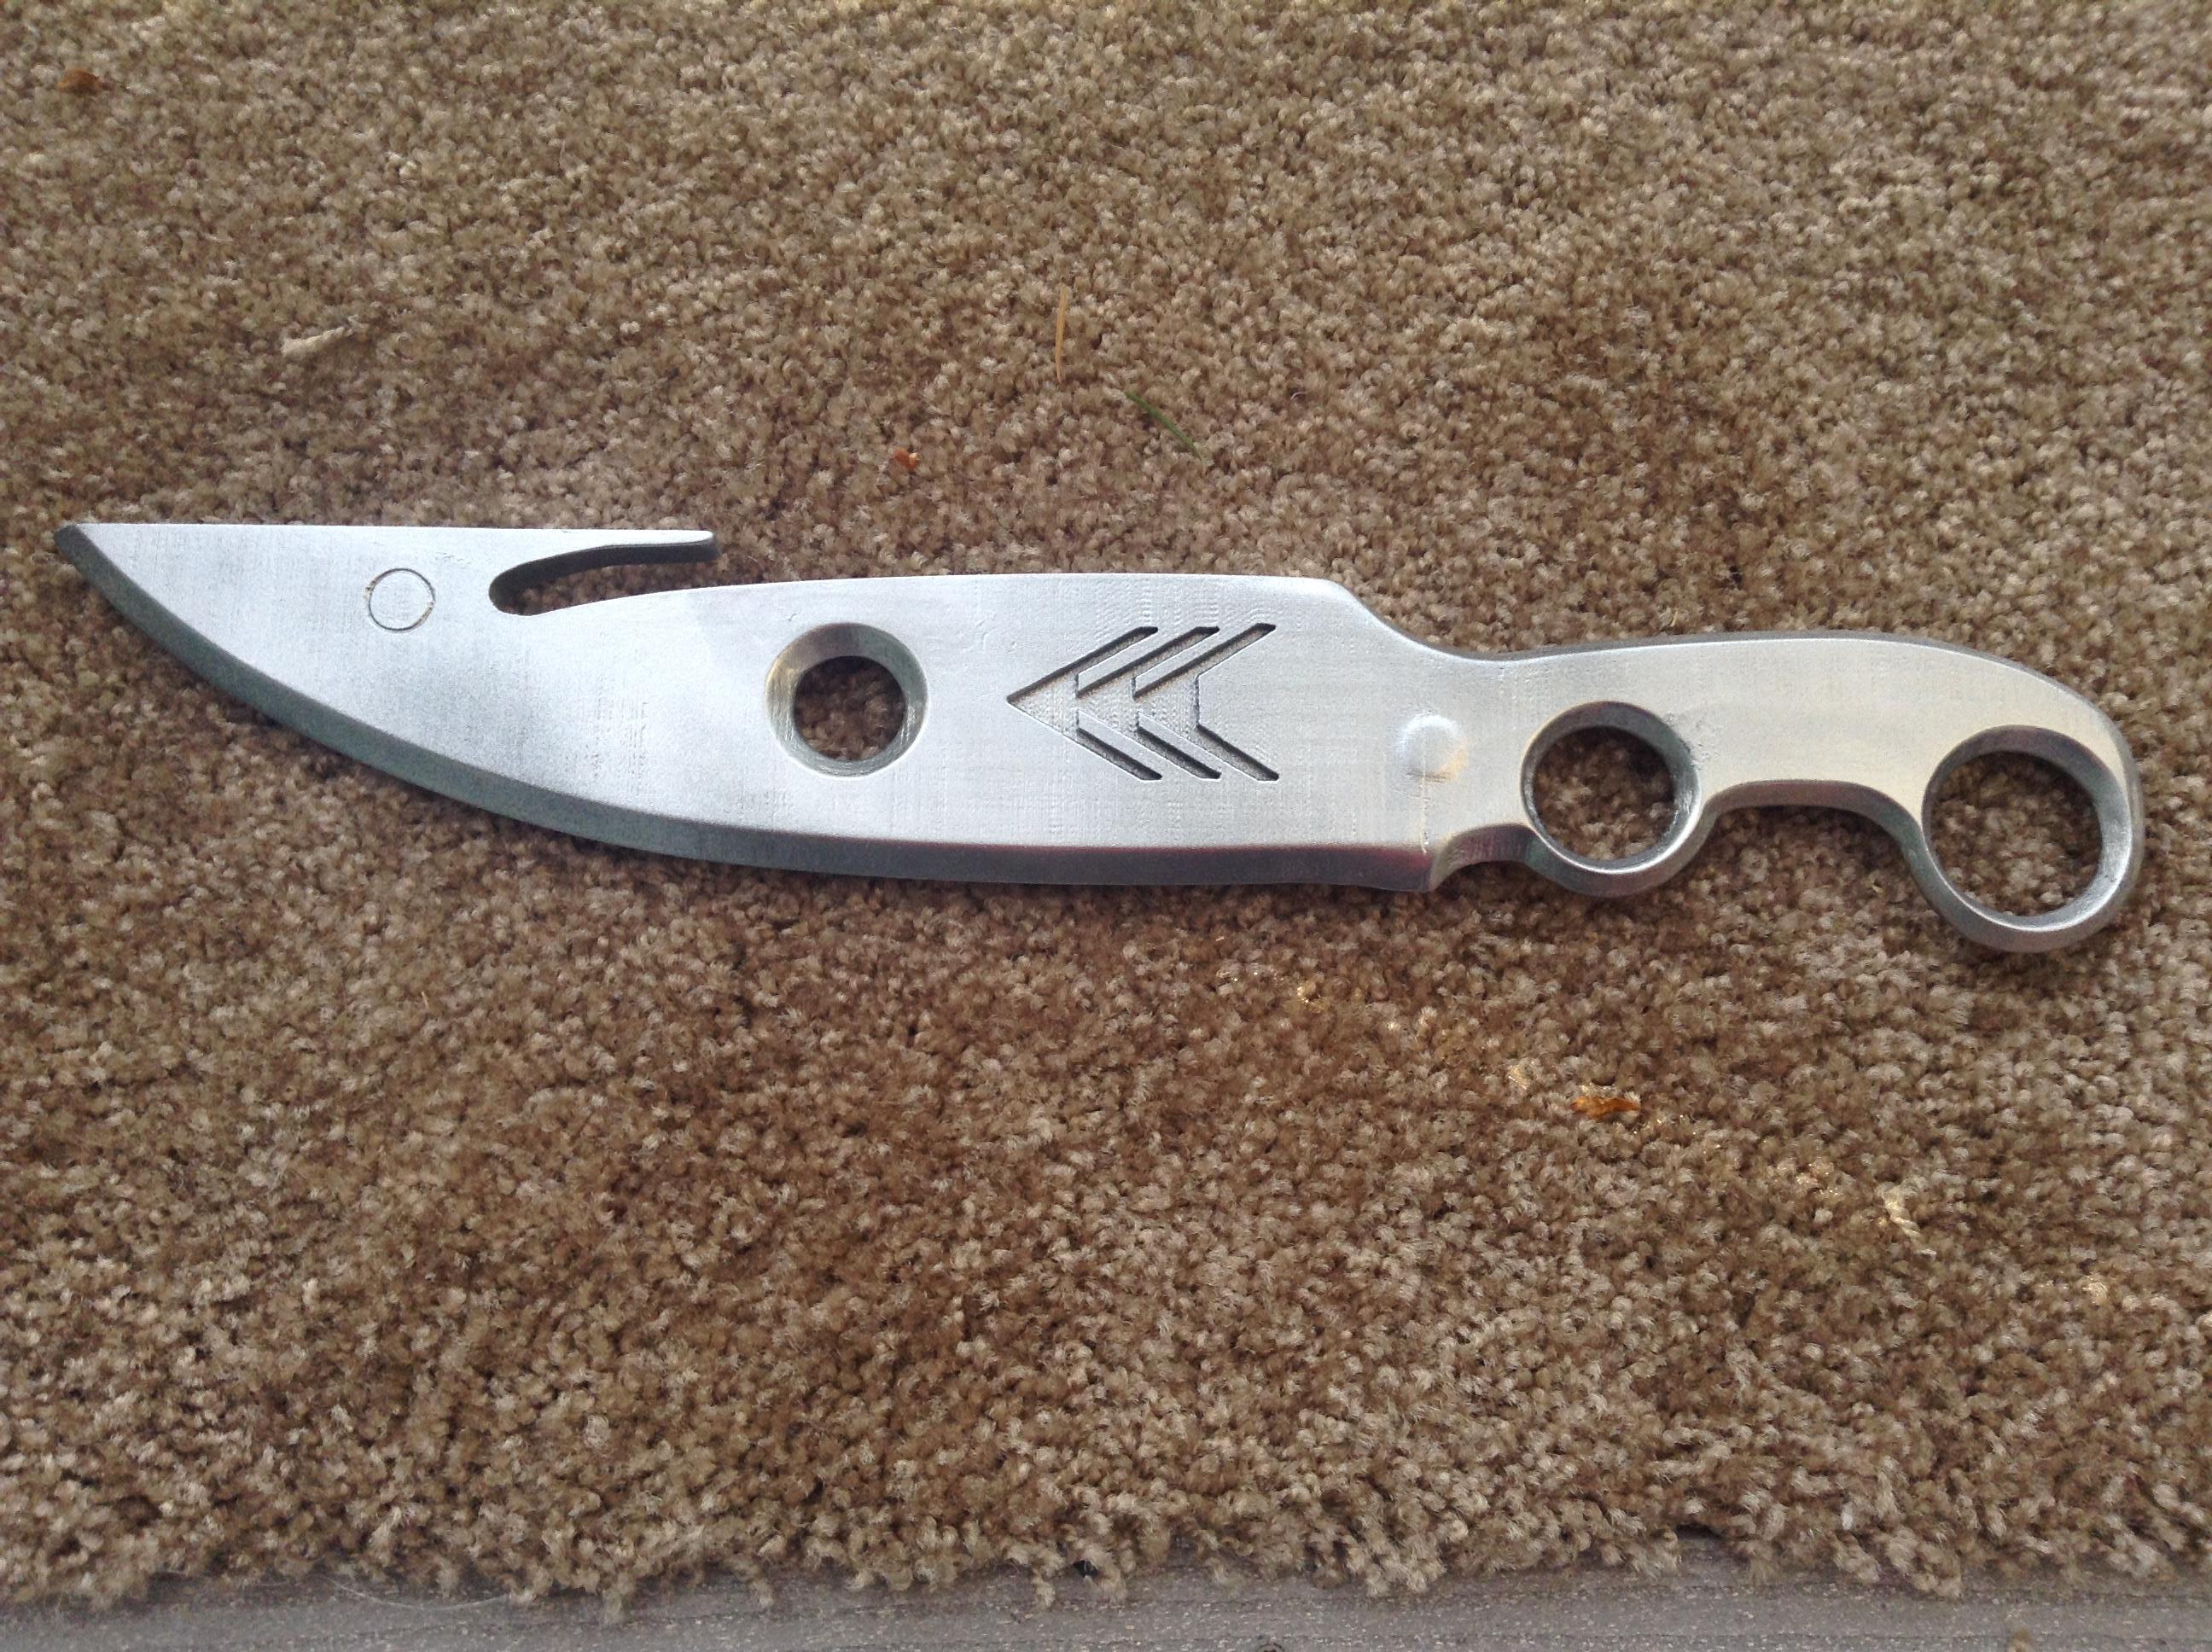
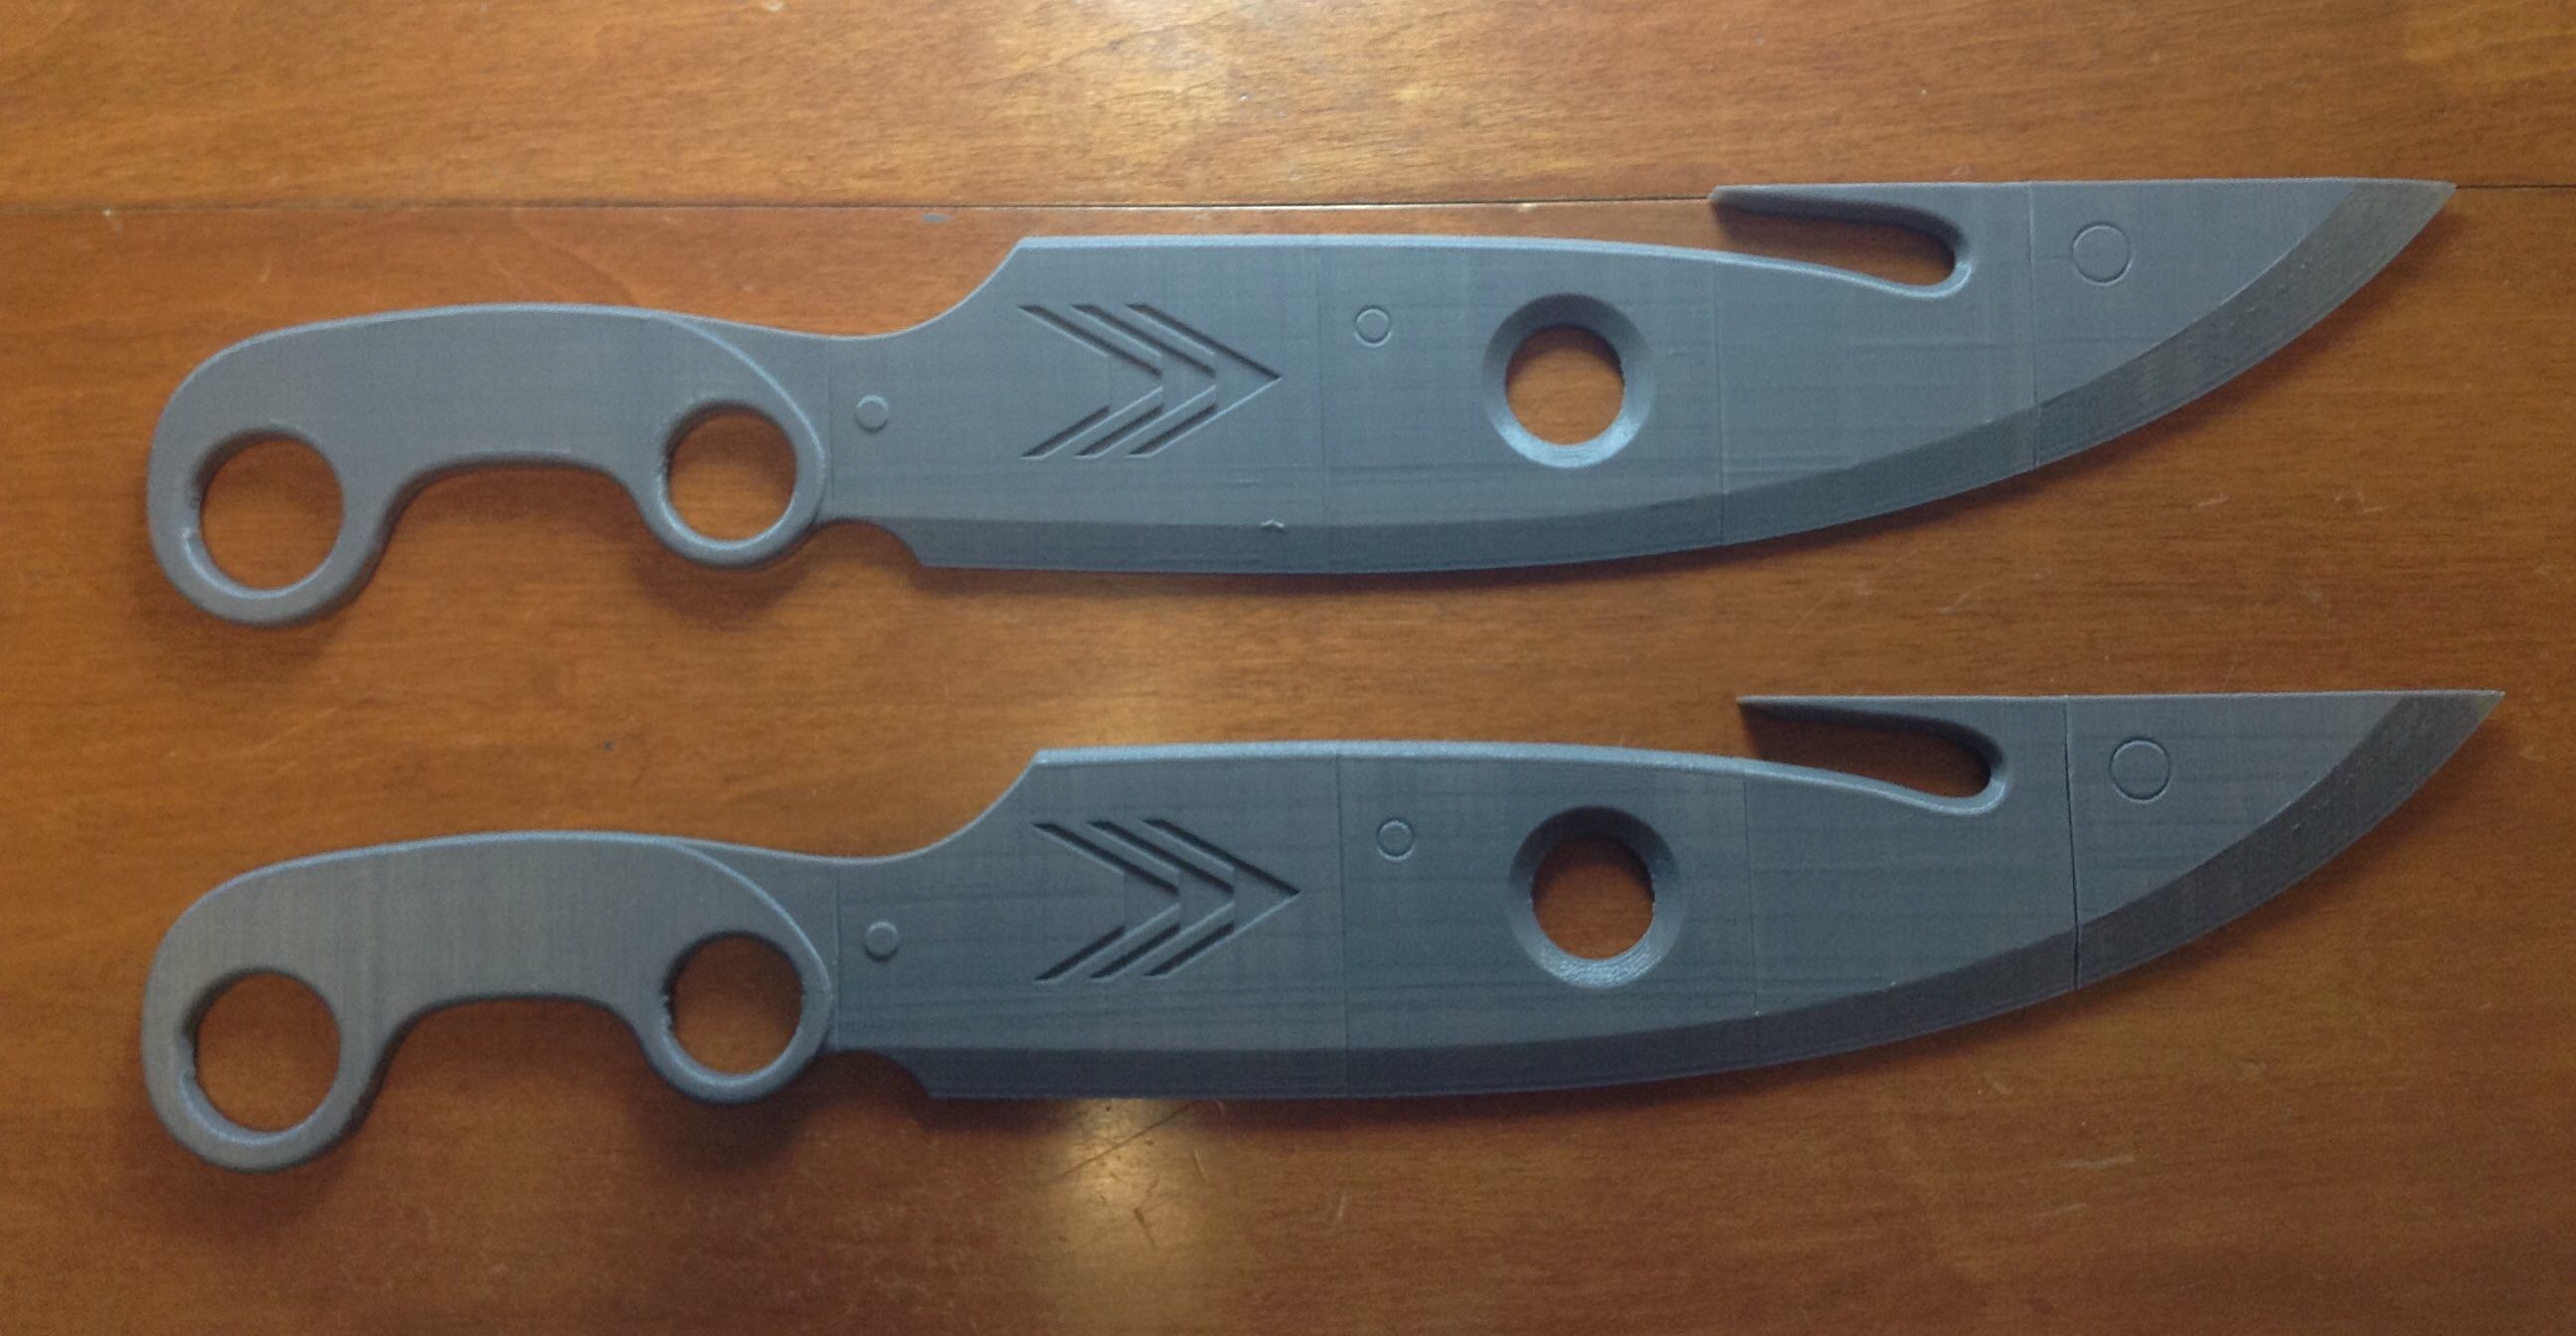
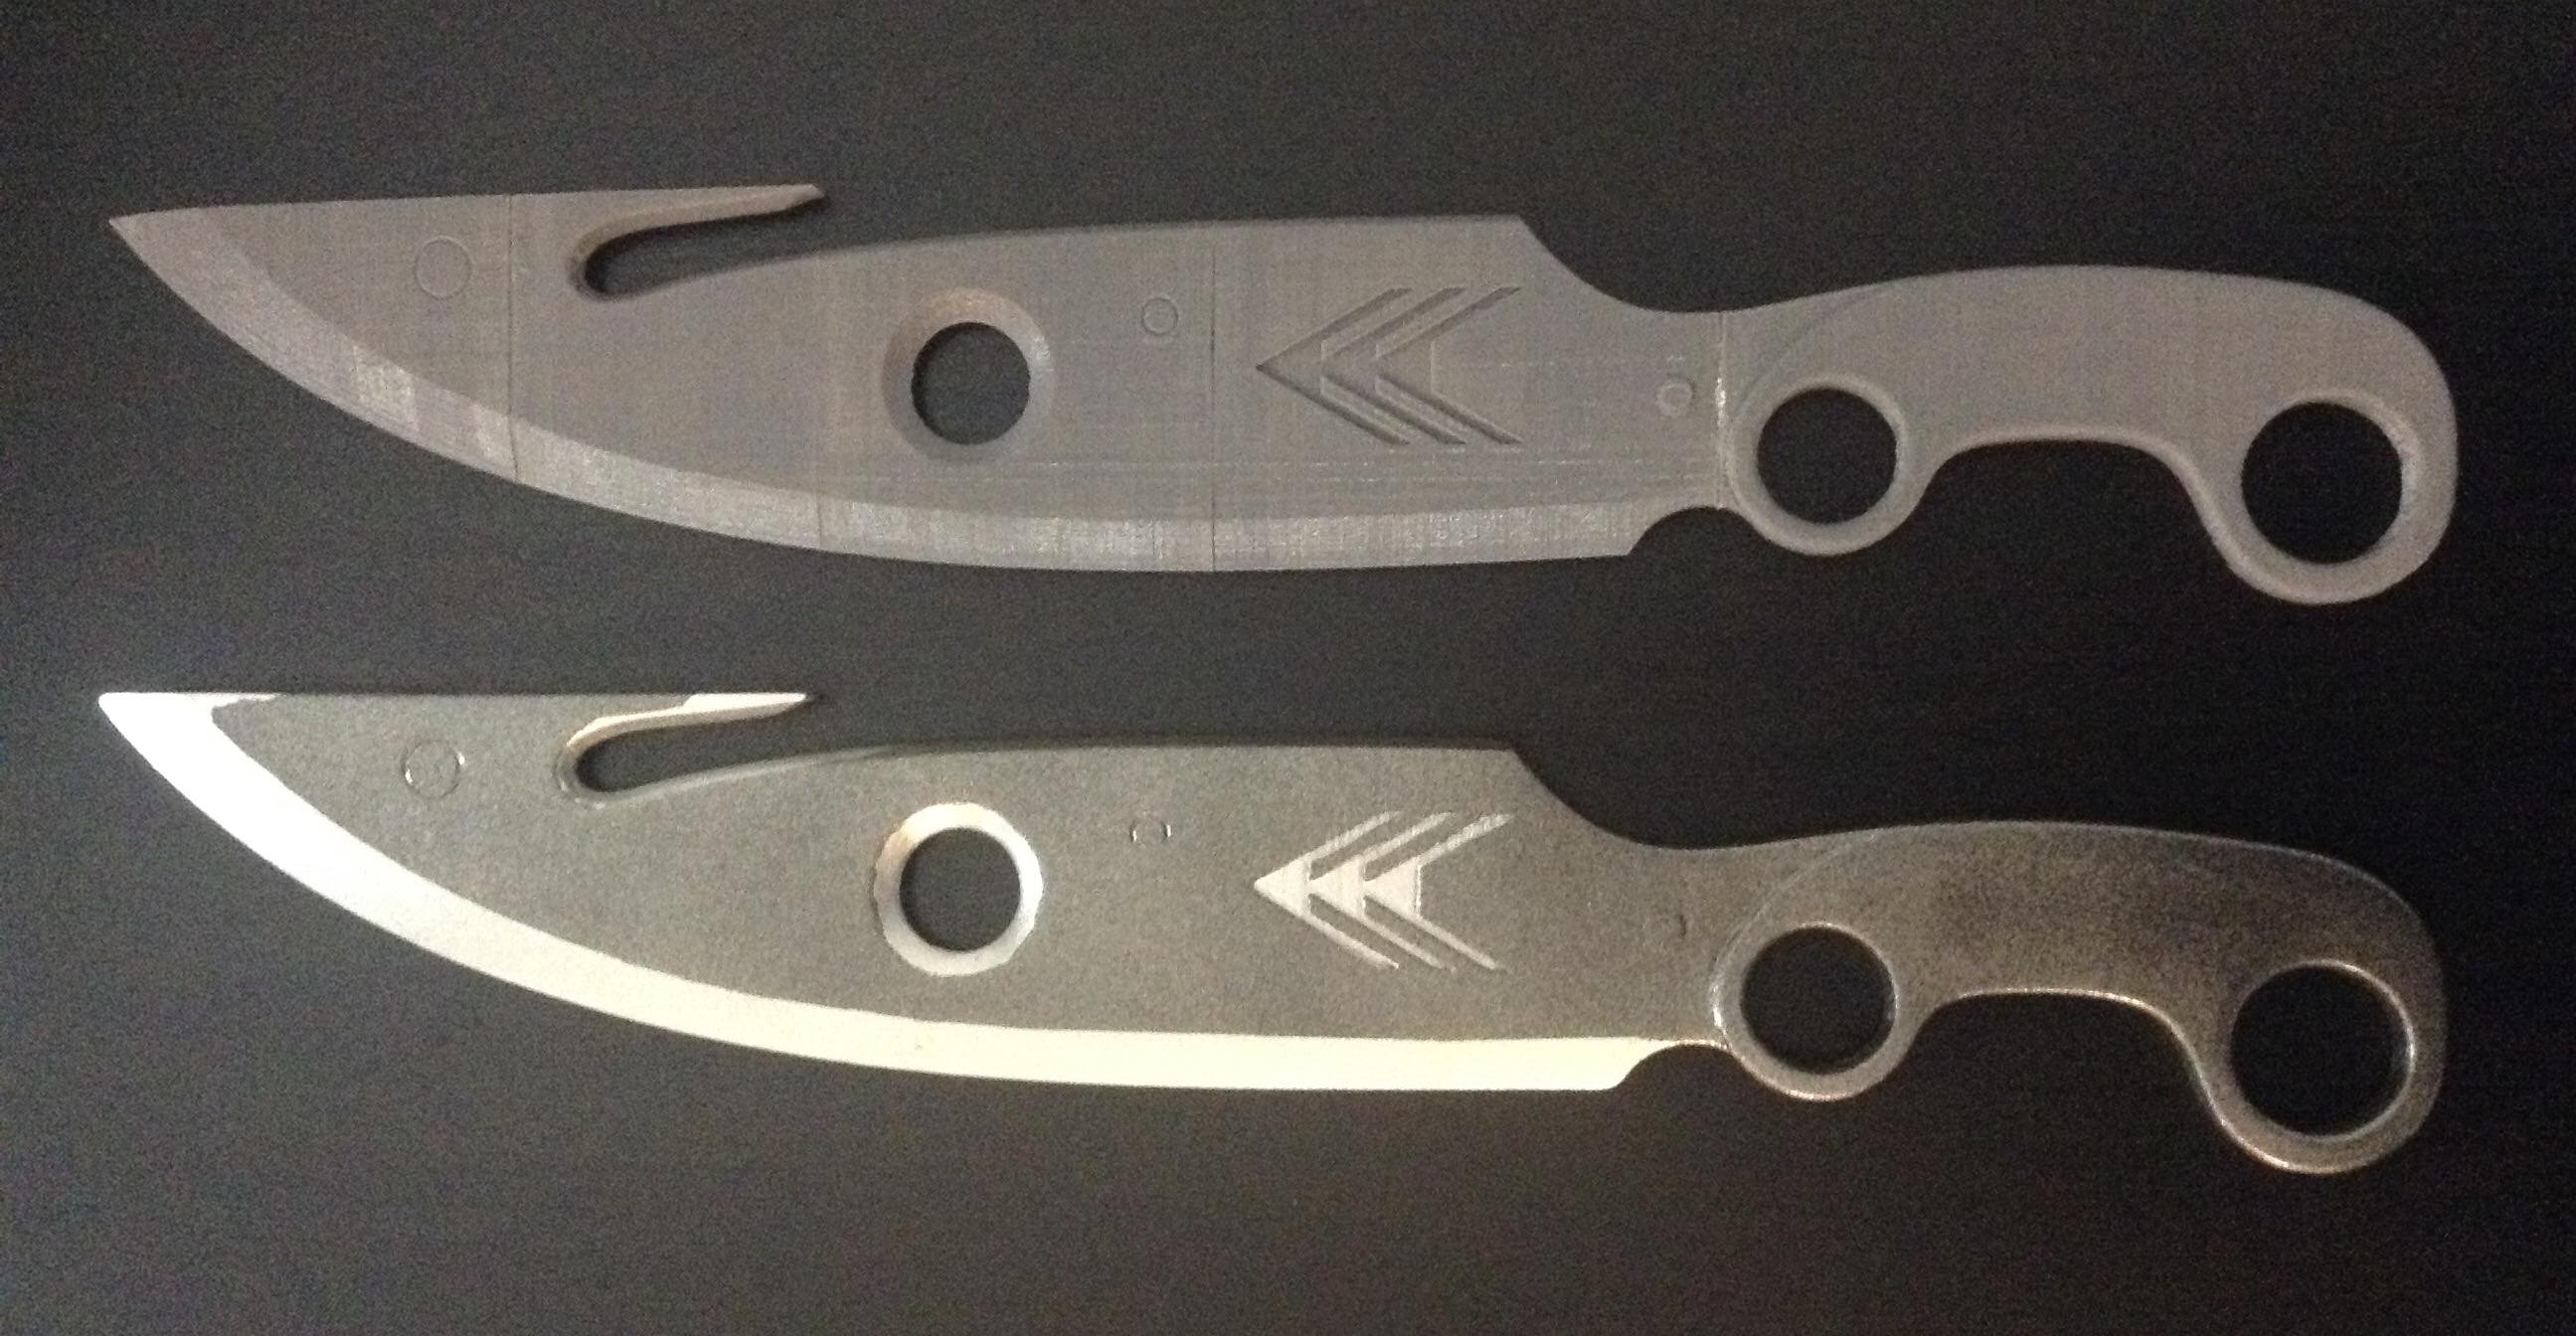
The first of several things that I didn’t like about the models I’d found previously, was how the bevels for the cutting edge of the knife were modeled. After staring at the concept art for far too long, one thing I noticed was that it looked like there were two bevels that made up the blade of the knife; a subtle primary bevel that spanned full face of the blade and a secondary bevel that made up the knife edge. Almost all models I saw were missing this primary bevel.
The other part that I noticed was that the handle didn’t have a bevel, and that the bevel across the face of the blade blended into the handle creating the circular “etch” around the first finger hole. If you look super close at the first finger hole and the etch around it, it looks like the etch doesn’t quite follow a consistent radius around the finger hole, like it would it if was outlining it, but instead looks like it strays away toward the top of the handle.
Finally, many of the models captured the shape of the knife fairly well, but it just didn’t feel accurate enough for me. I wanted it to feel like it had been ground from a piece of steel. Hopefully that makes sense.

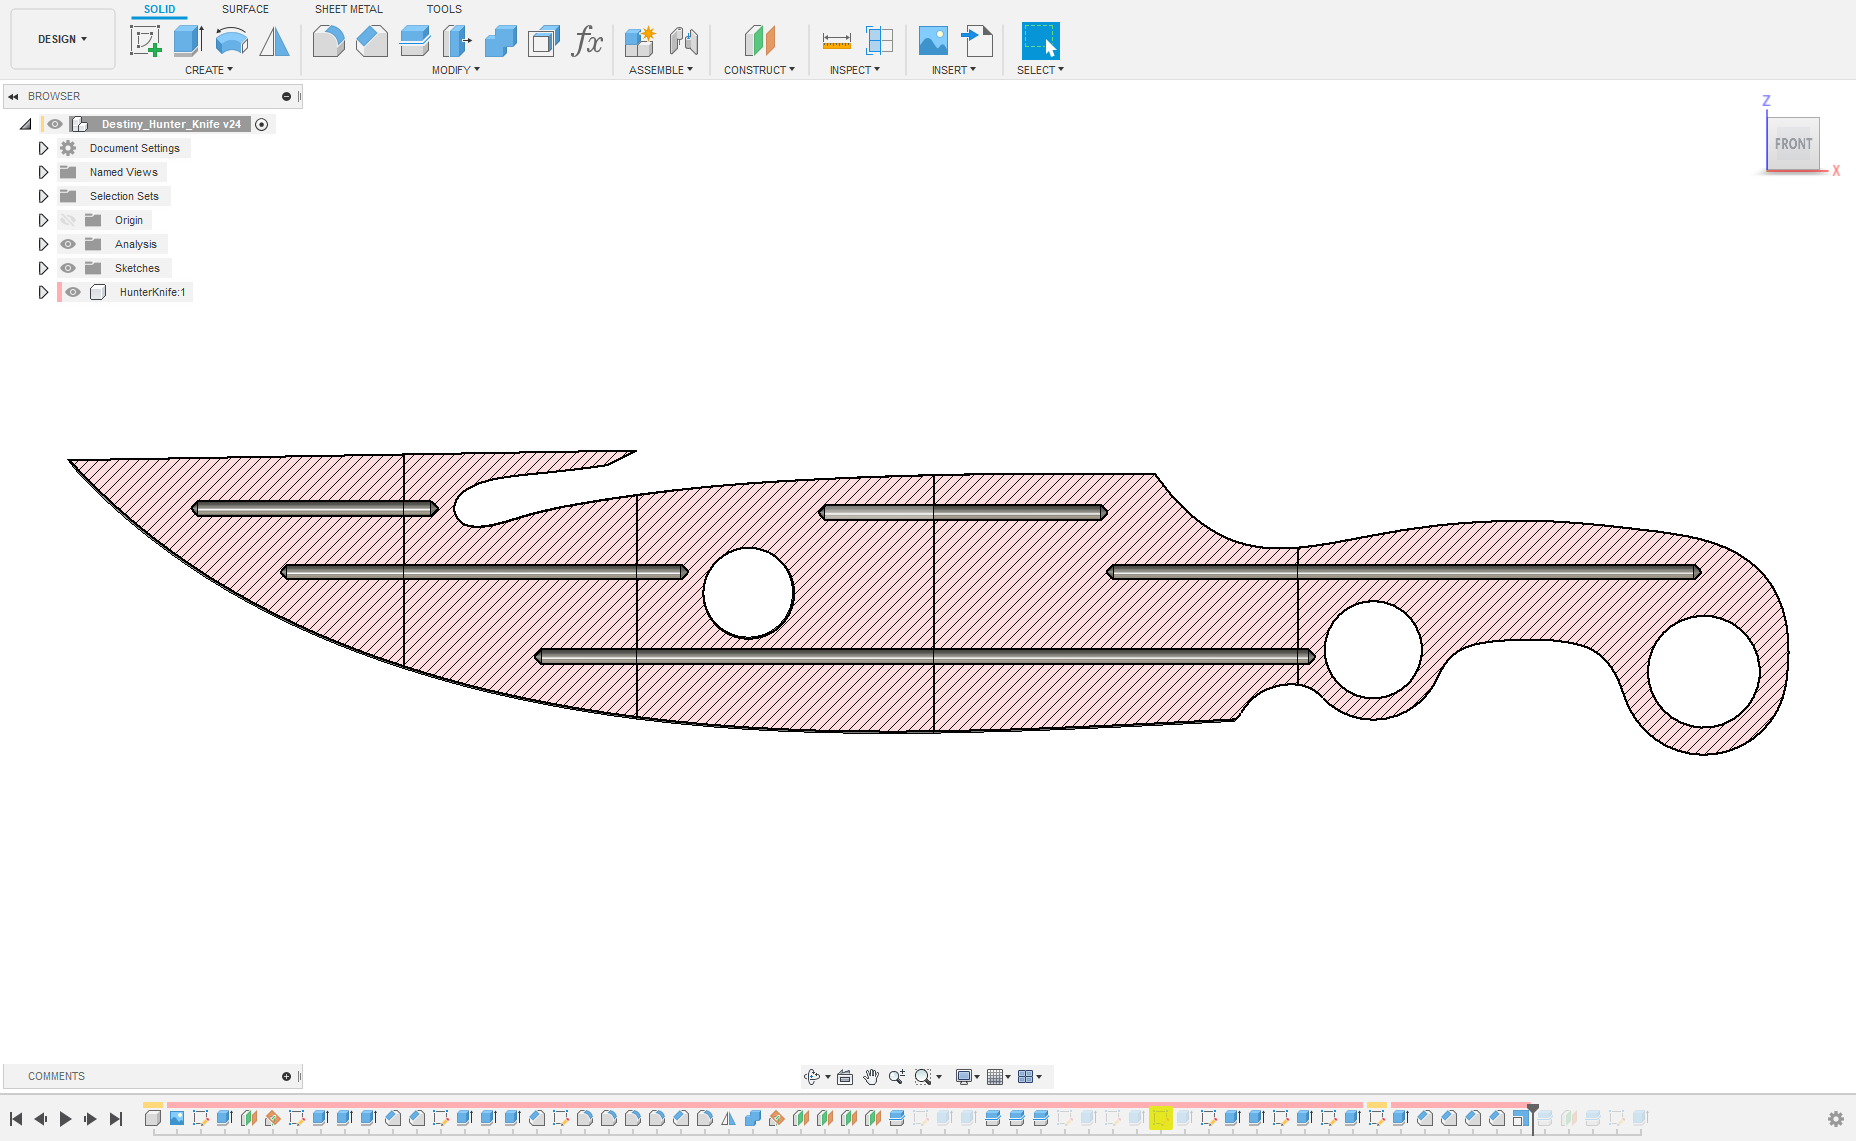
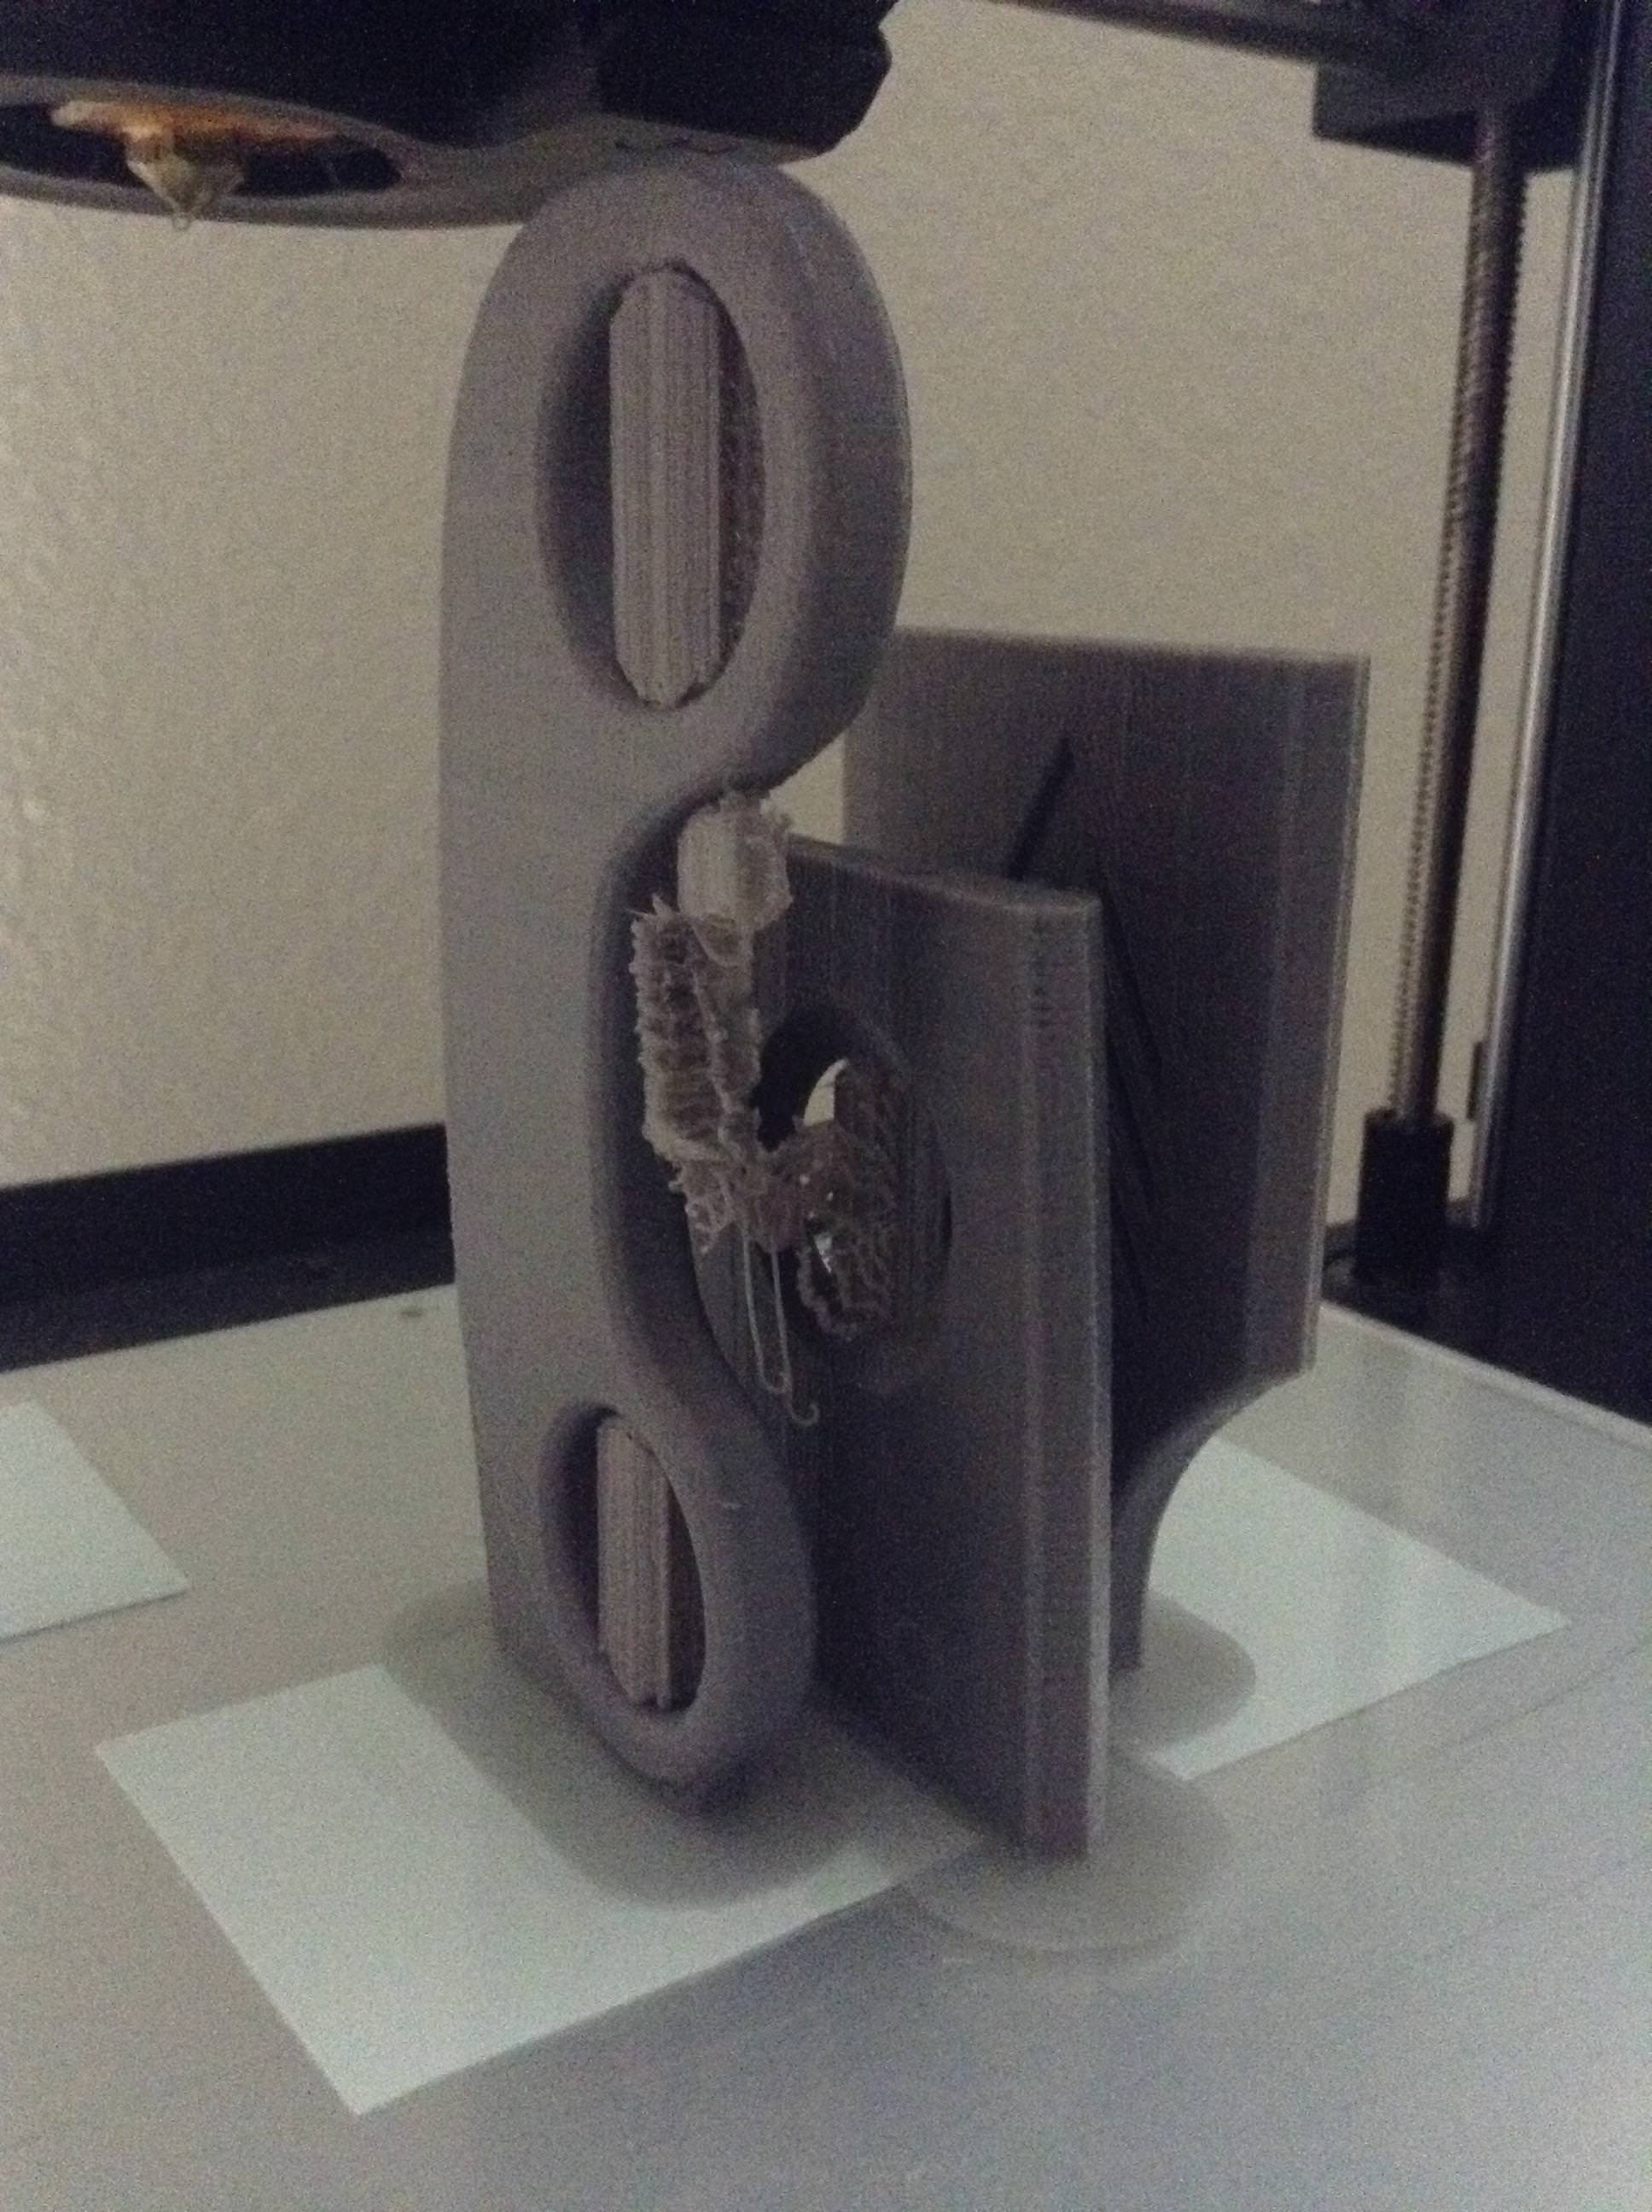
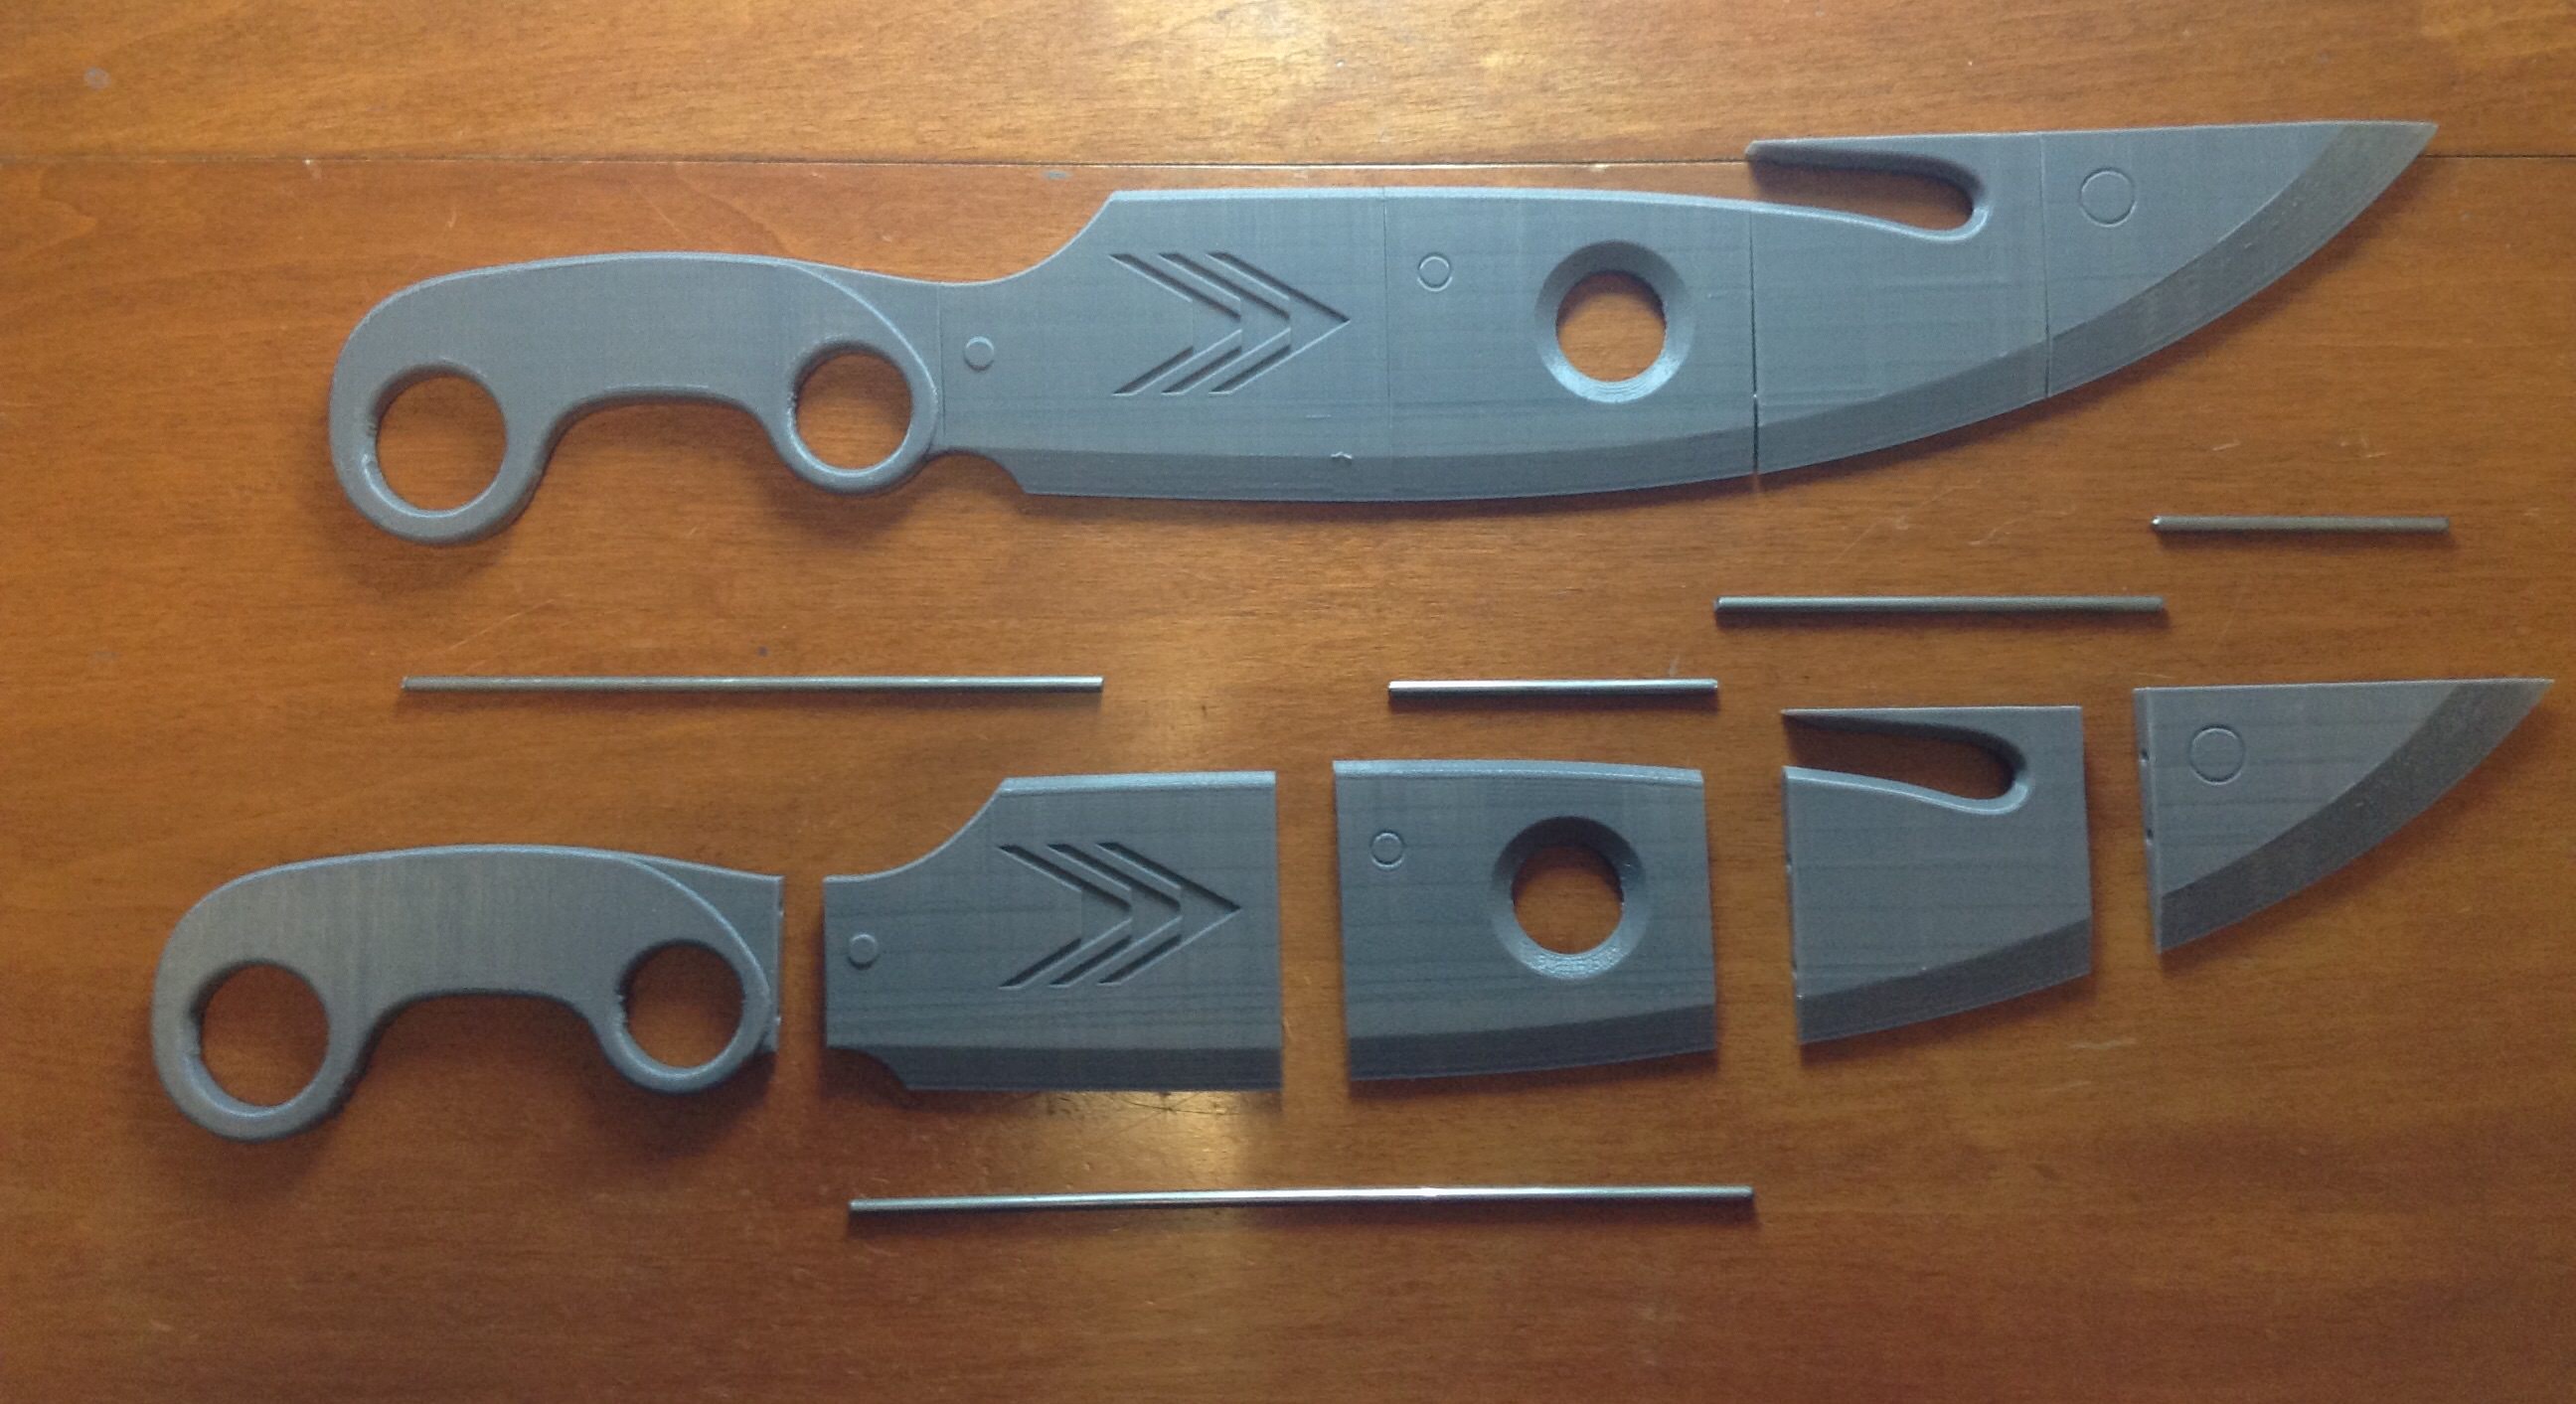
After some CAD work, scaling of the concept art, tracing the shape, and modeling it out, I ended up with a solid looking knife with a nice sharp edge. To make it more 3D printing friendly, I designed the model to be split into multiple sections and assembled using an ~3mm diameter metal rod to connect all the pieces. After that, it was off to the printer!
And with it printed, time to glue, fill, sand, and paint!
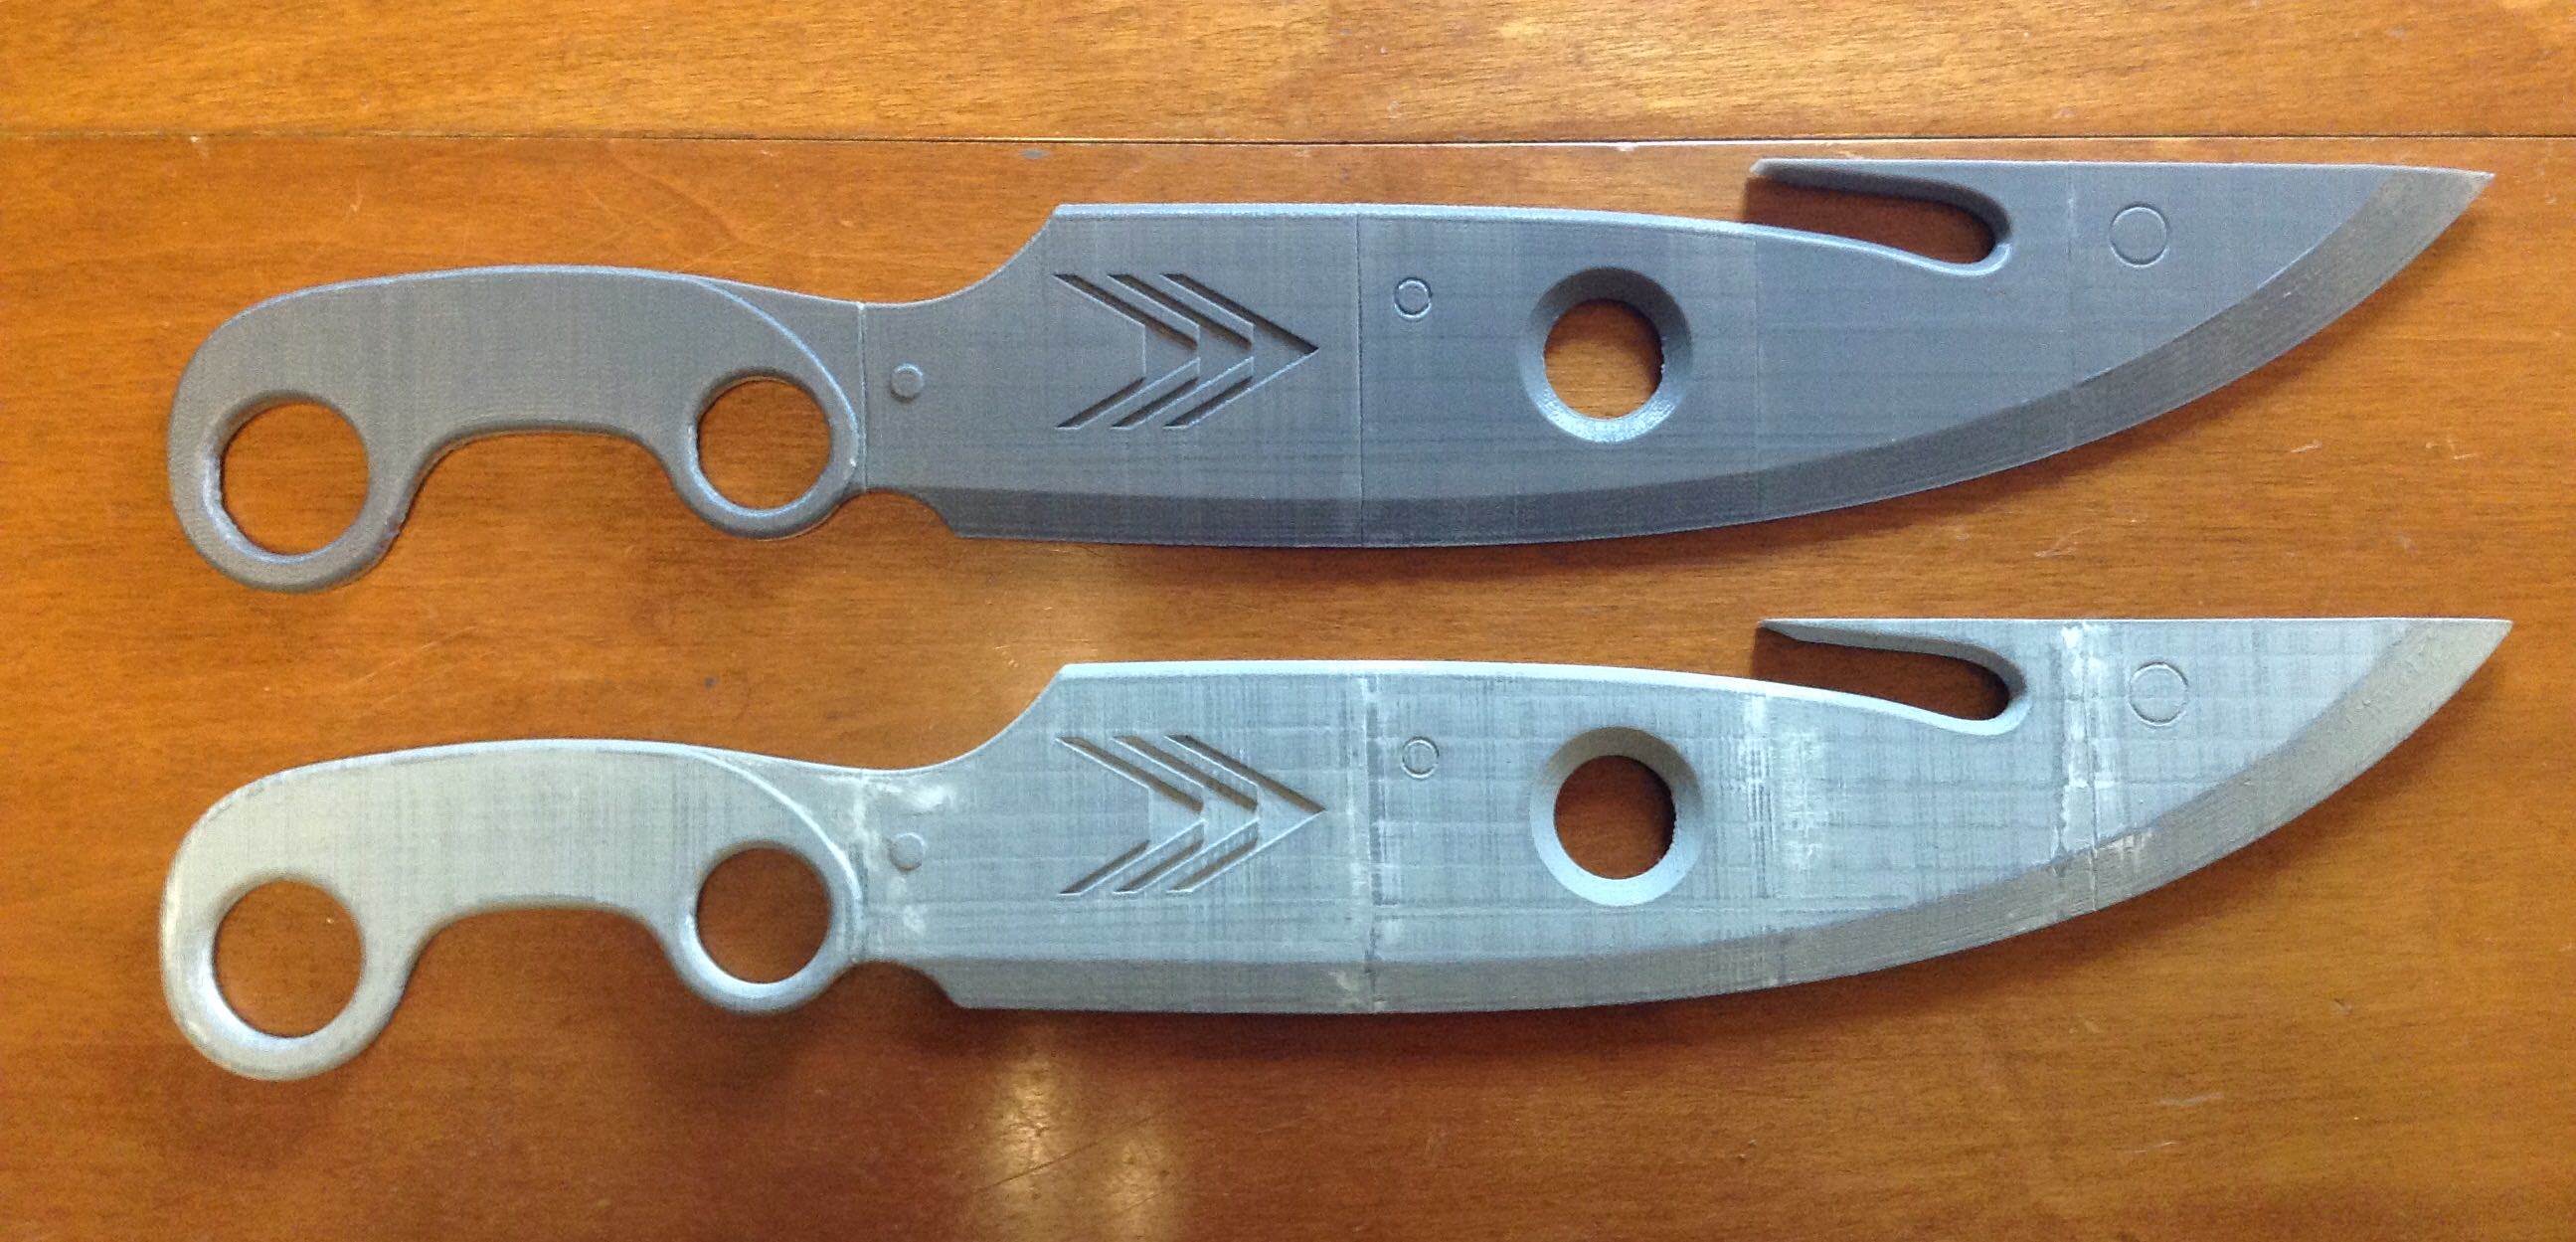
During the finishing process I forgot to take pictures of the layers of filler-primer, most of the sanding that it went through, and the first layer of silver metallic paint that it got. Instead, you get pictures of it taped up and ready for a coat of dark metallic paint.
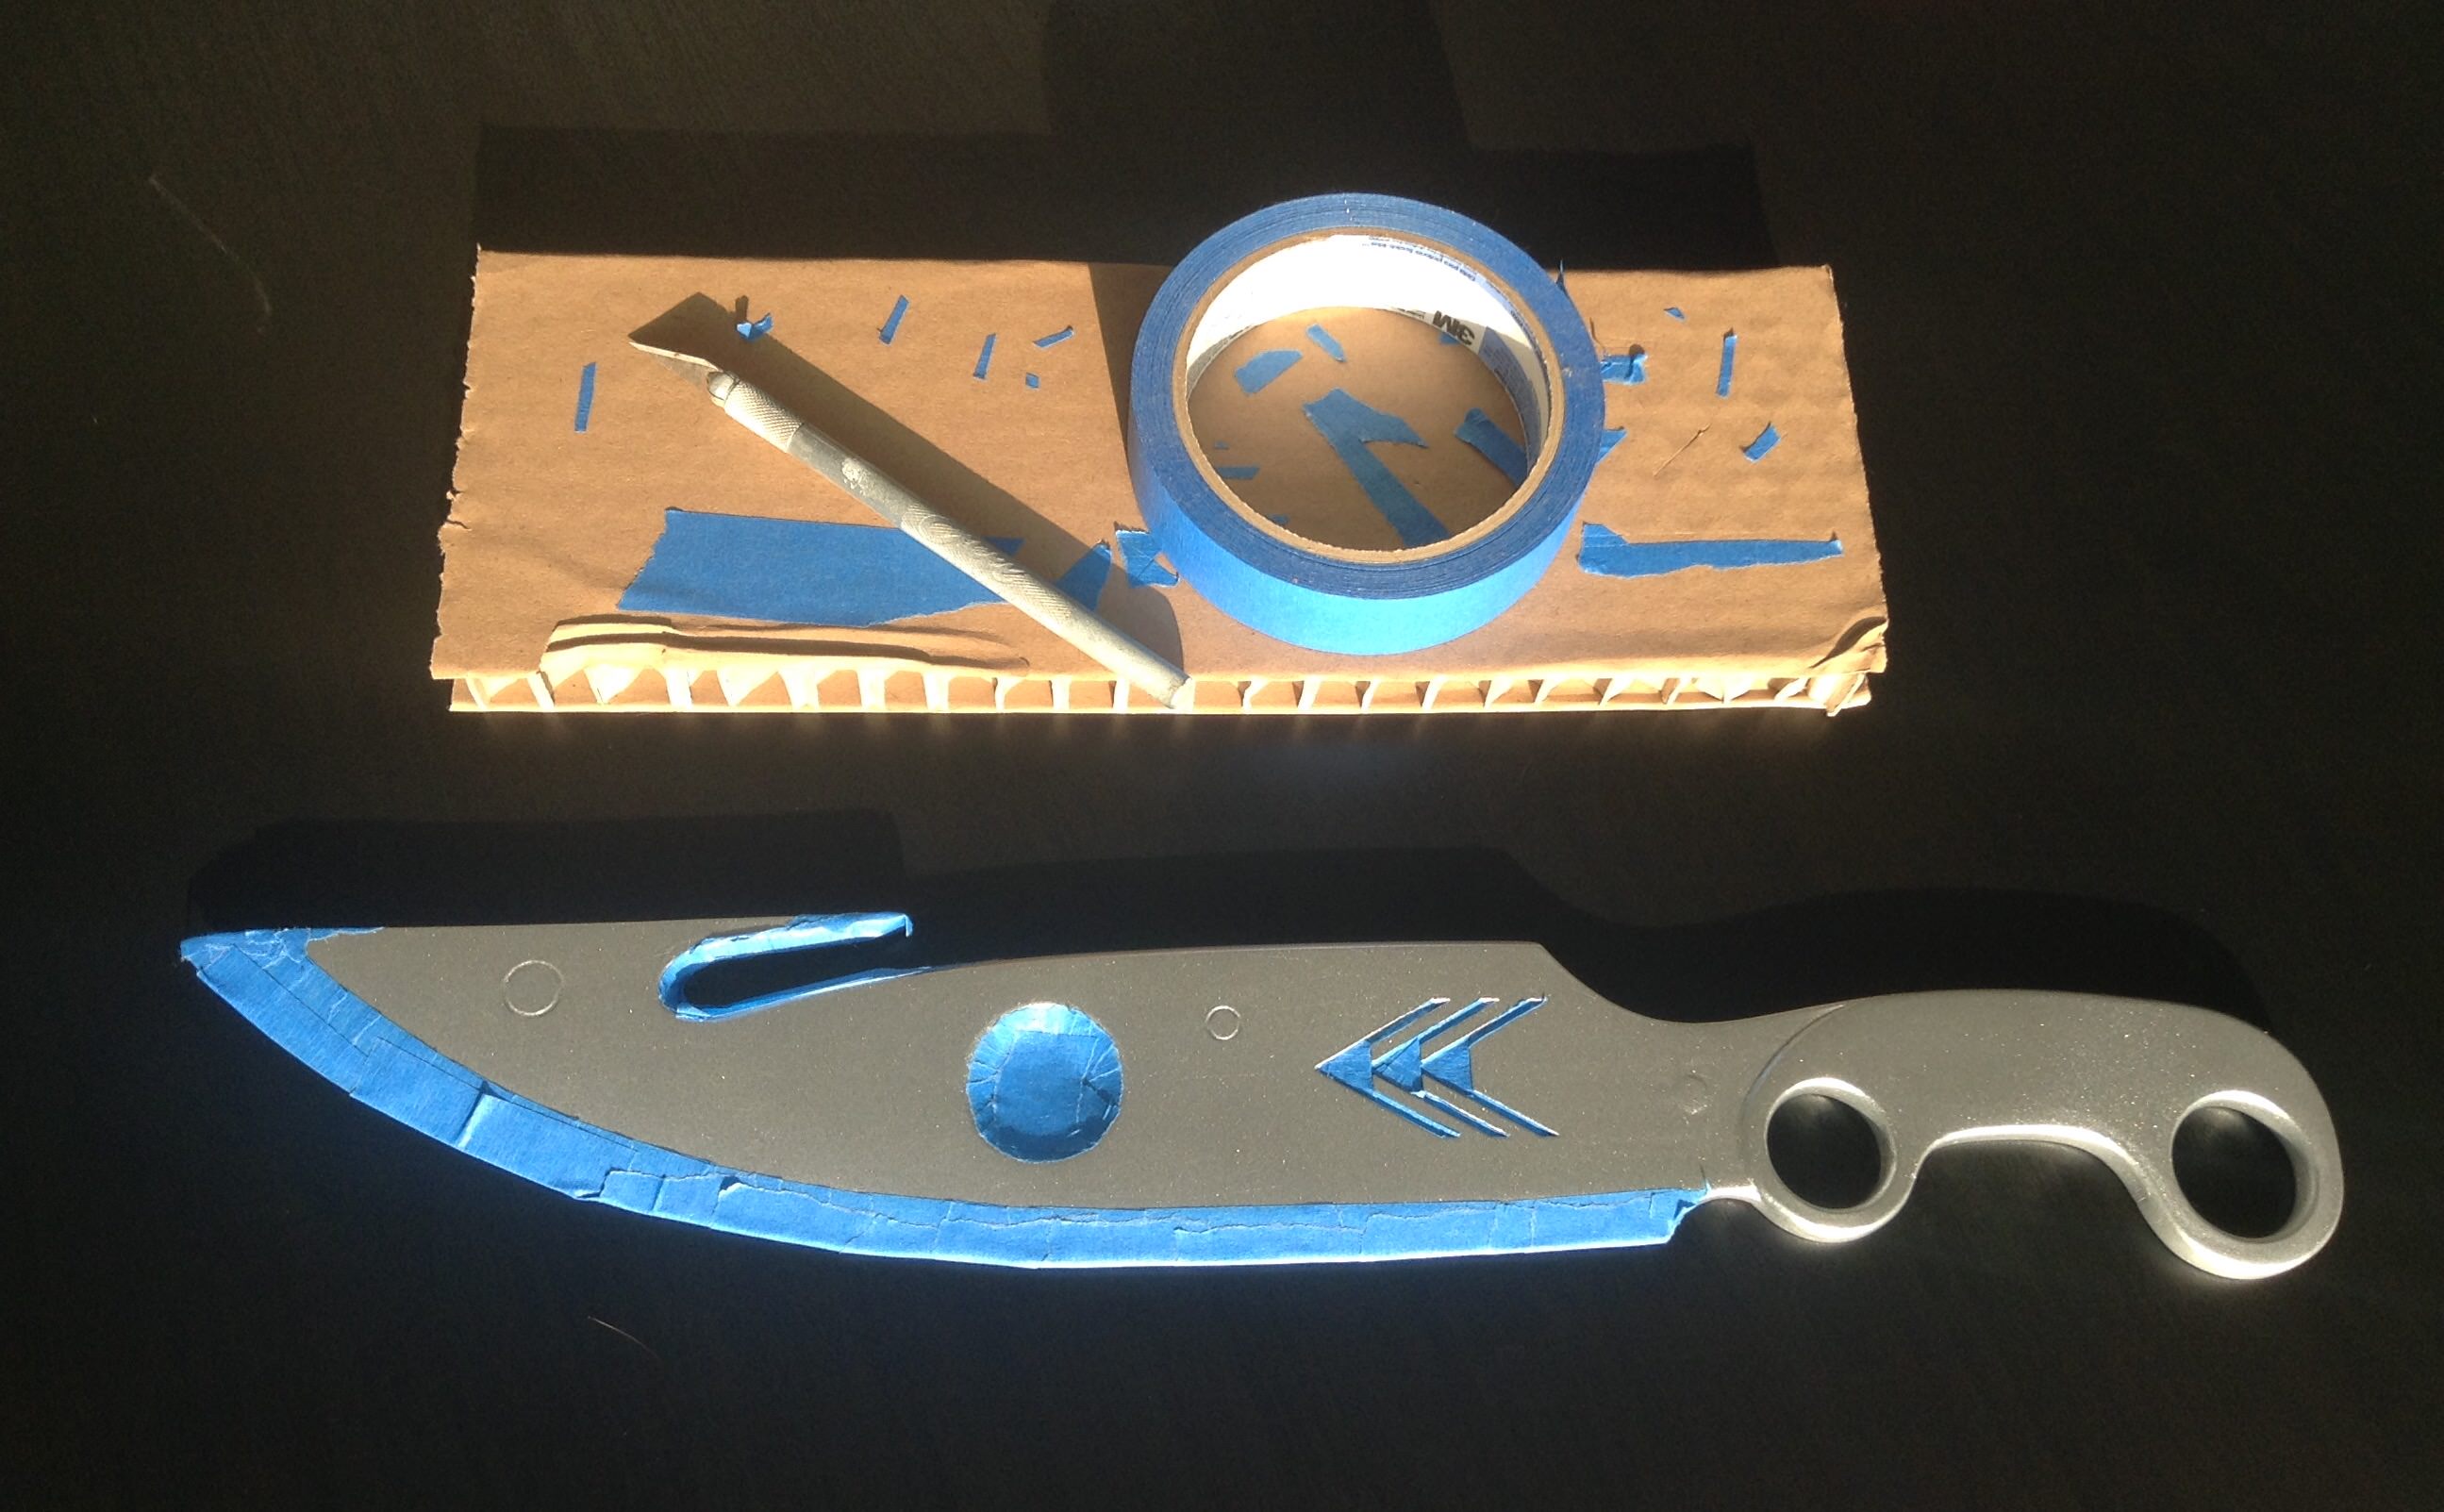
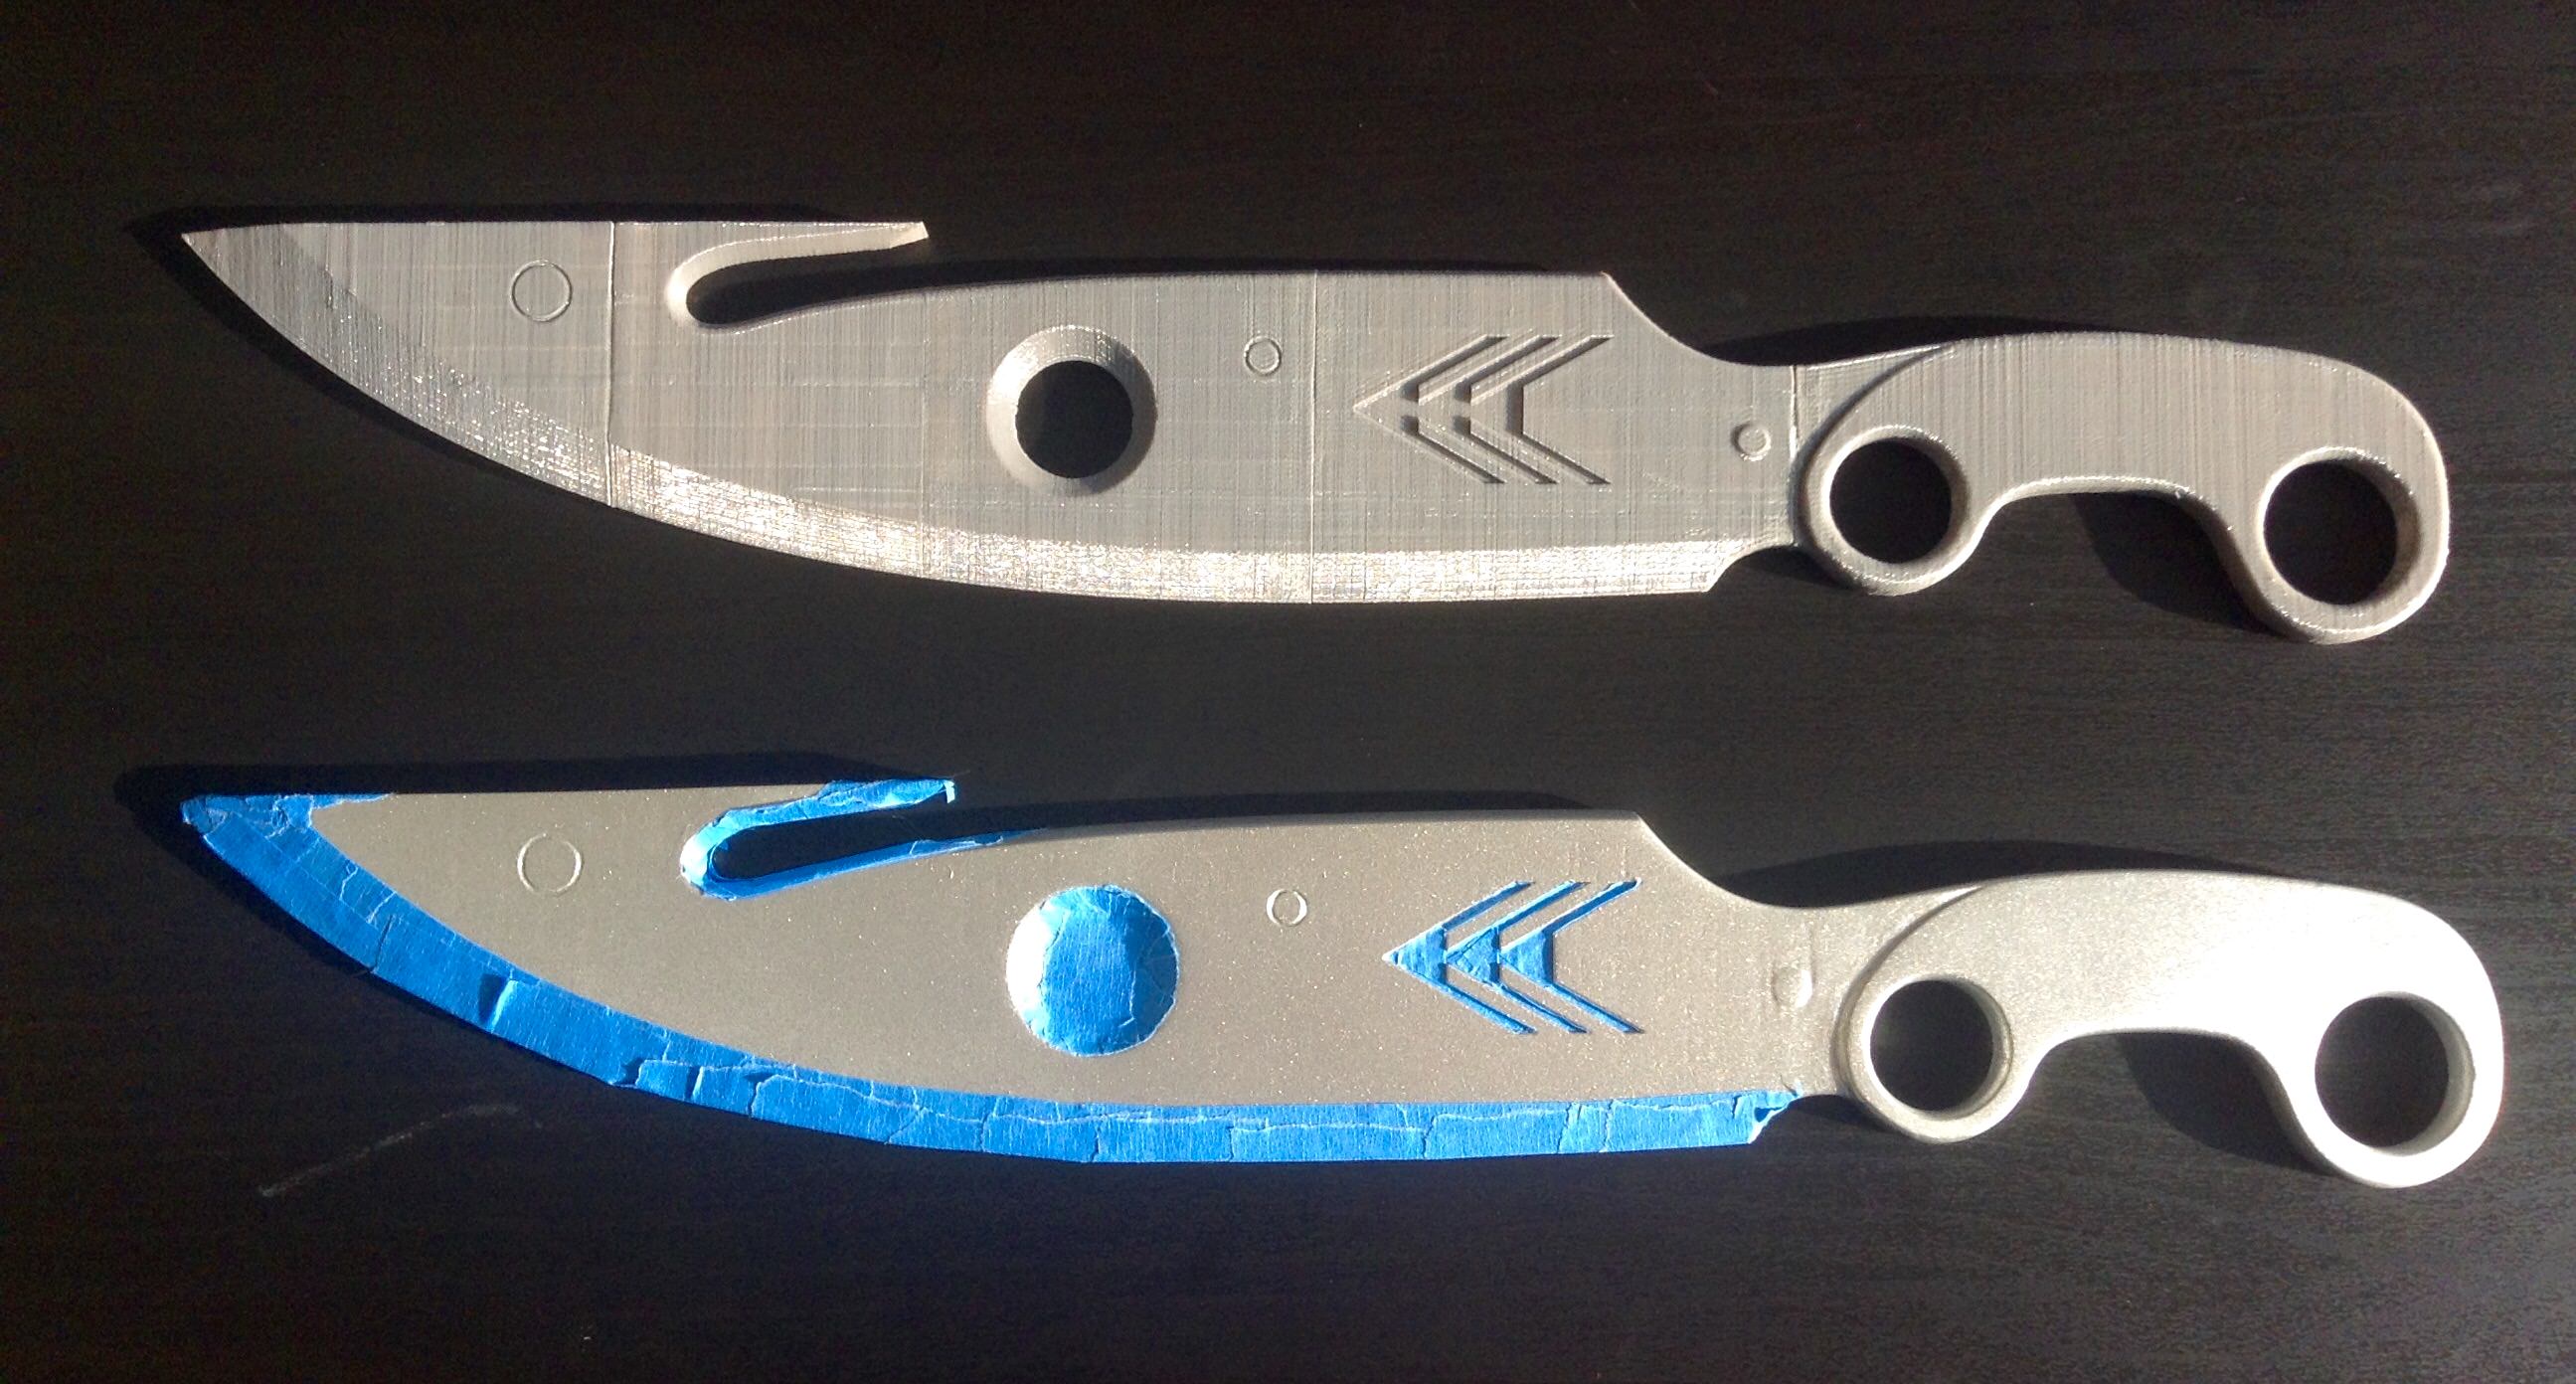

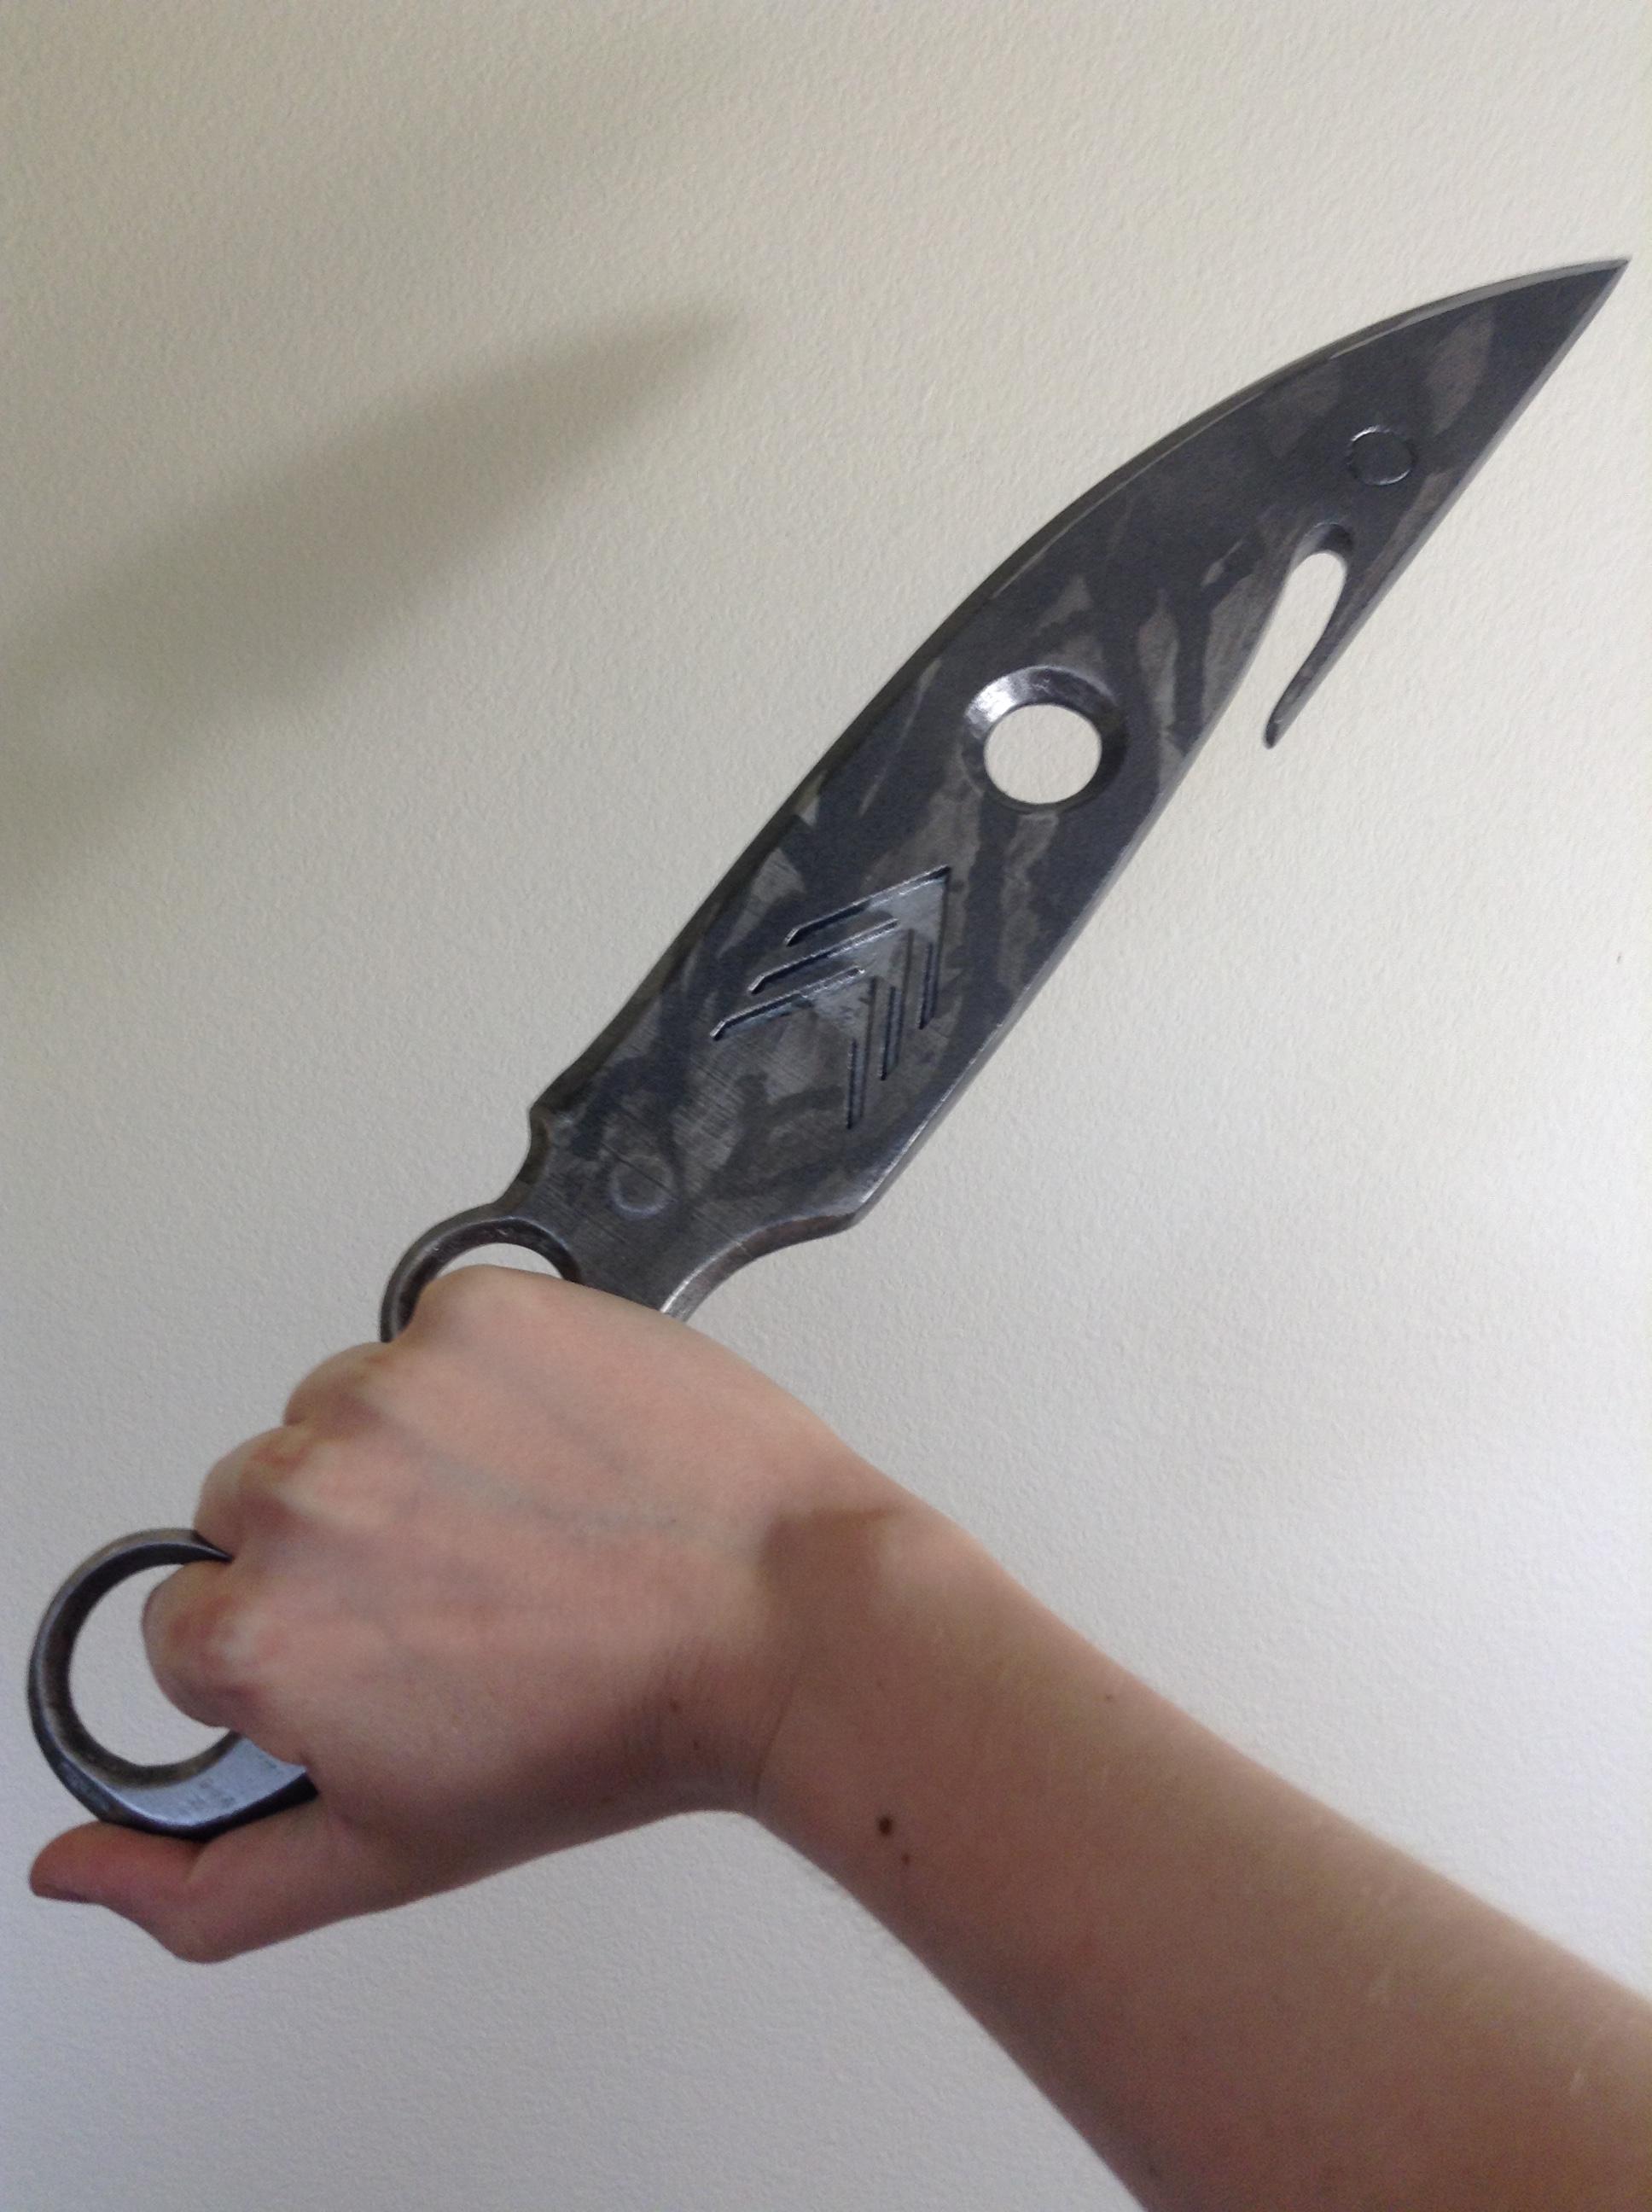
Dousing it with a coat of the dark metallic paint, I let it dry and then went about removing the blue tape. And what a difference that made. On the first knife I’d used a silver Sharpie to attempt to weather the edges where the knife would see the most wear and I’m much happier that I was able to achieve that effect, to a much better degree in my opinion, using the tape instead. I followed up with a light dusting of silver metallic paint over everything to blend the colors a bit and a clear coat to protect everything. Then, I just needed to find something to wrap the handle with and it would be complete.
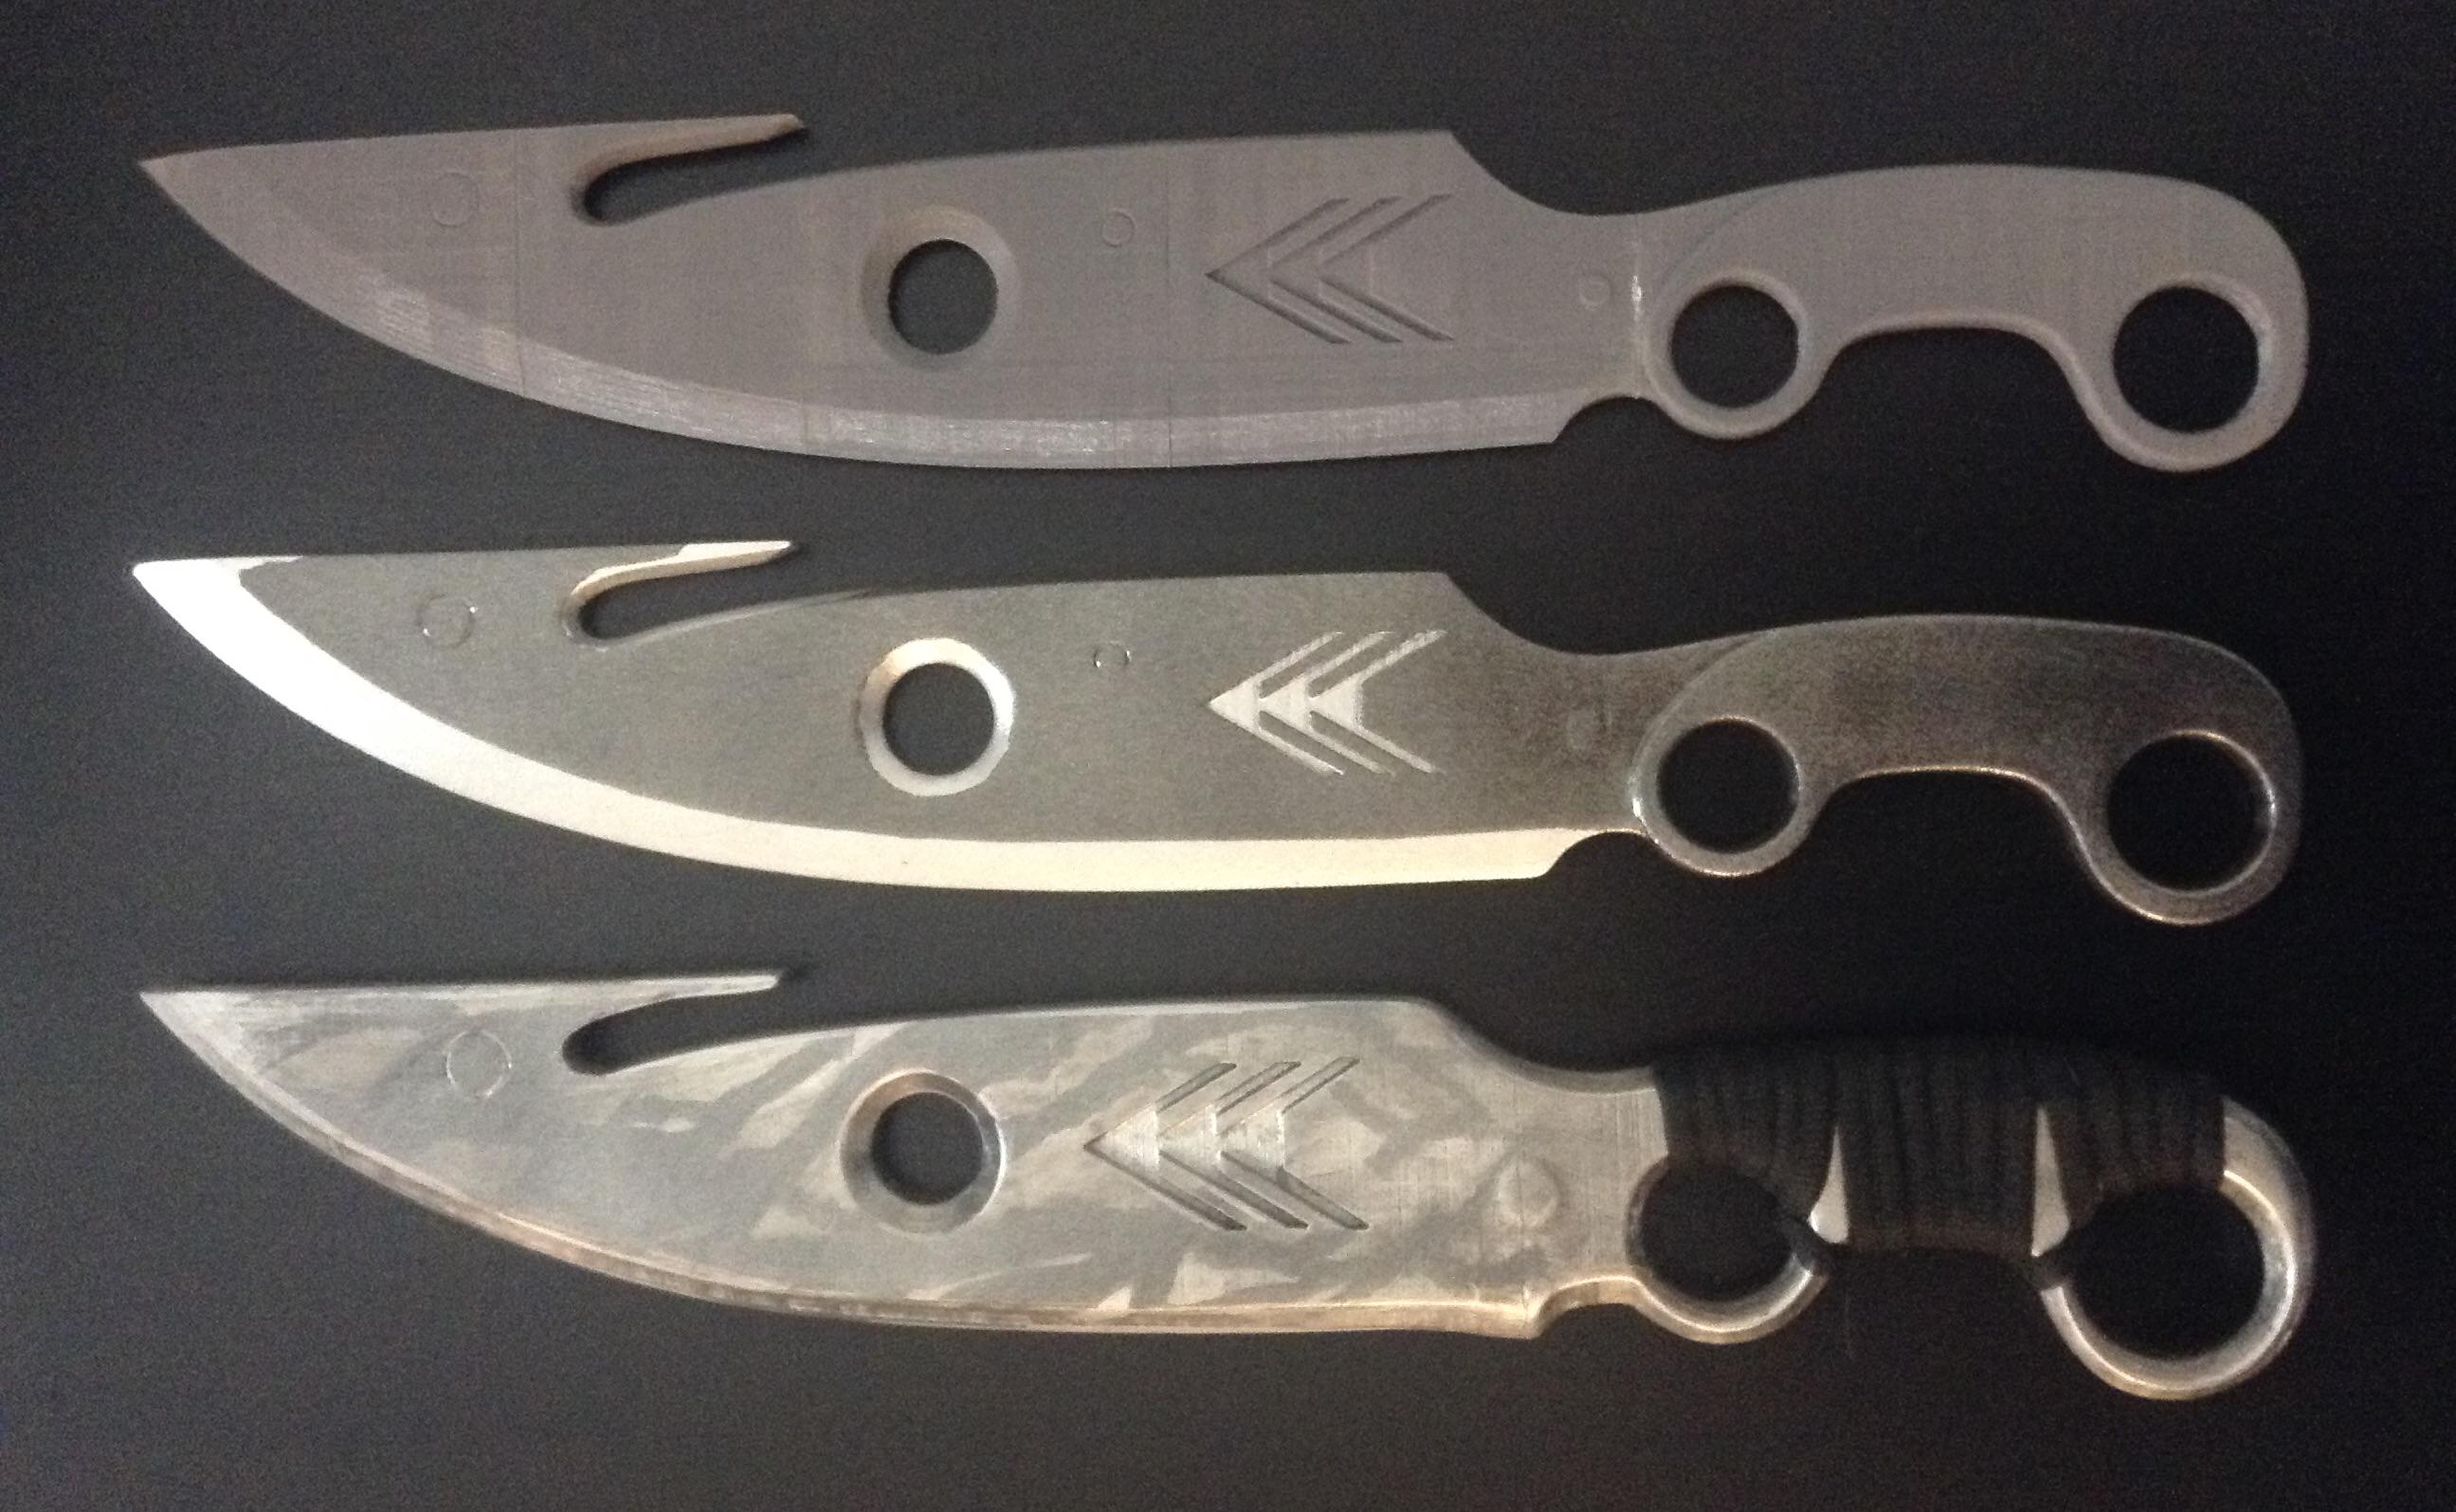
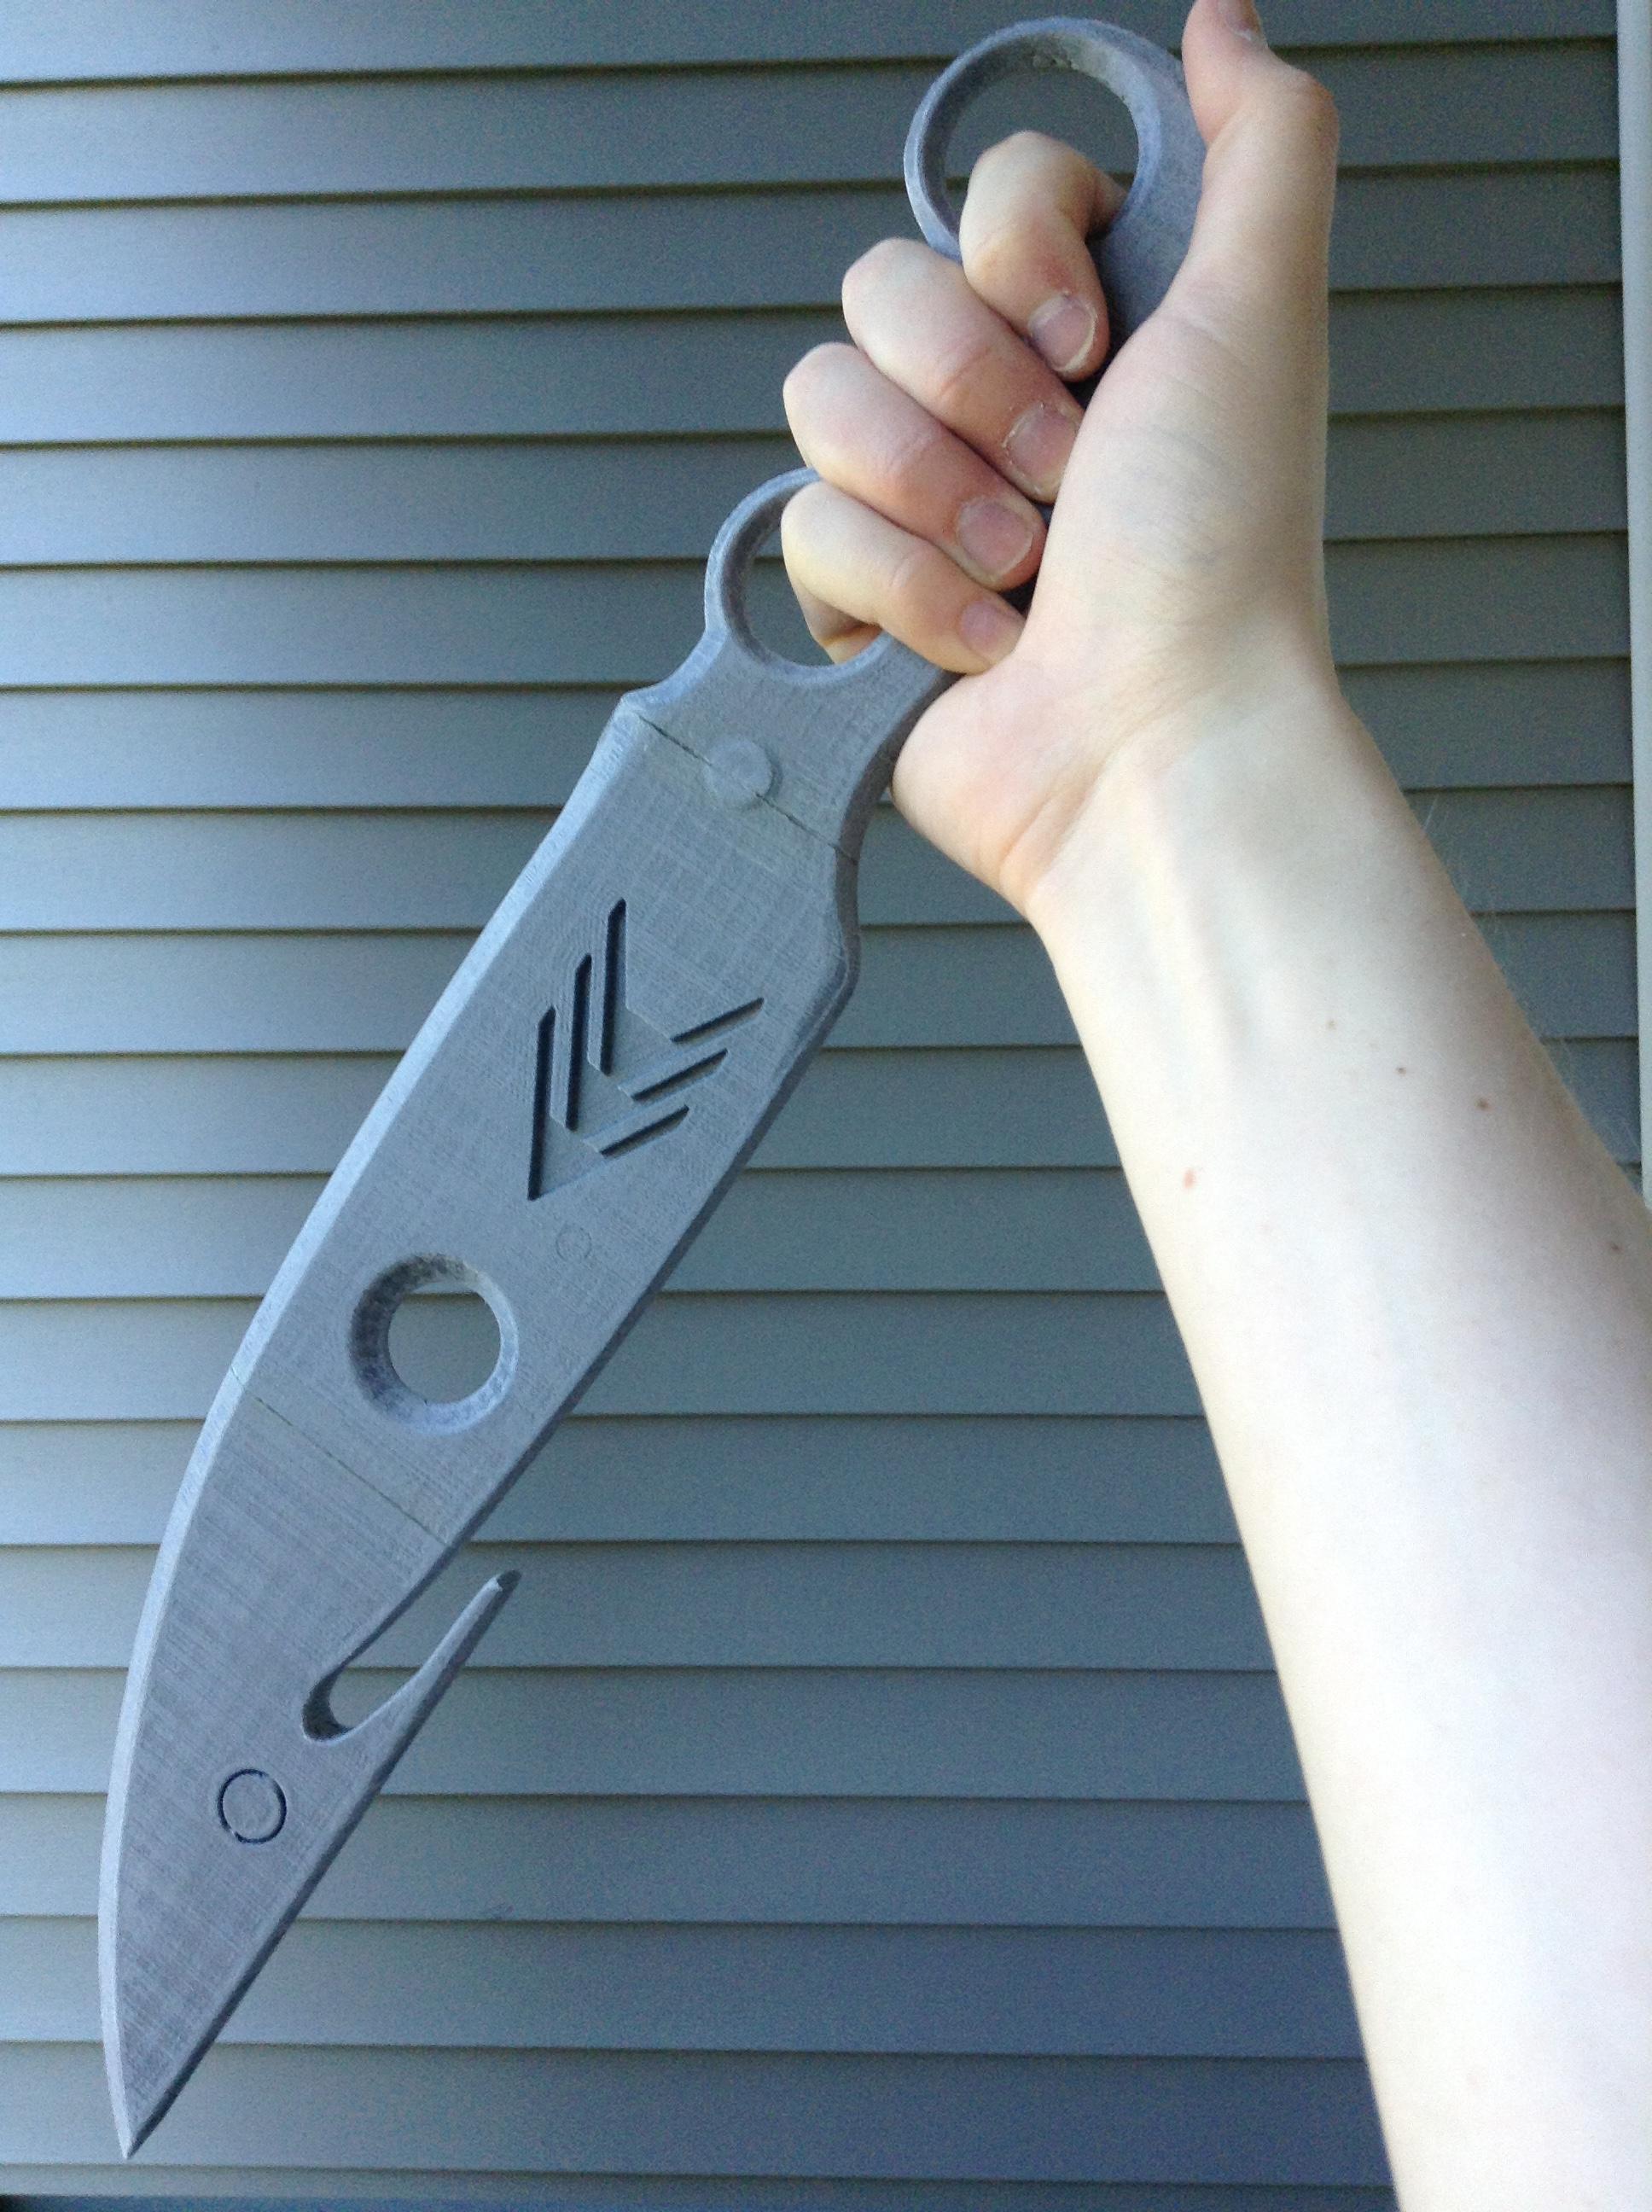
Holding it in my hands, the scale was just about right for both length and grip. The blade is quite long, and with the metal alignment rods inside it, it has the perfect heft to it as well. Overall the model felt more accurate, more right, to me. And, as you can see, I printed two of them, now I just need to finish the other one and find a way to mount them.
