

The Halo series, developed by Bungie, holds a special place in my heart. Halo was one of the first games I got on console when I was younger, and I’d followed the series and many of the books for far longer than I’d stuck with most others. And while I stopped following it as closely when 343 Studios took over, I did at least jump at the chance to get all the Halo games for PC when the MCC came to Steam. One of the games that didn’t get nearly as much love as some of the other games, Halo 3: ODST, was one of my favorites in the series. It was a great side-story and addition to the franchise in my eyes. And even to this day, I still have fun playing it. So, having gotten to play it again on PC, I’d decided to look into what replicas I could 3D print from it. Lo and behold, I found many models of the M6C/SOCOM pistol and the silenced M7/Caseless Submachine gun available for 3D printing. But, as always, after taking a look at them, they didn’t quite have the features that I wanted from the models, so… I figured I’d attempt to create my own version of these replicas, starting with the M6C/SOCOM pistol.
As with all 3D modeling projects, first I had to gather reference material. I scoured the internet searching for as many pictures from the game as I could download, as many images of other replicas I could lay my eyes on, and even stumbled across a 3D model designed for use with a mod for a different game. There was quite a bit for me to go off of and I was pleased that I was able to find so much material.
Similarly to my replica of Vash’s Revolver from Trigun, I decided to start with the ammo, as it had known dimensions IRL. However, after some research, and serious thought, I’d decided to go with a smaller caliber, as scaling the pistol to fit a 12.7x40mm round, roughly the equivalent of a 50cal handgun round, seemed ridiculous. And oh yes, this model is scaled down from the original dimensions of the pistol in the Halo universe. In the Halo universe, this pistol is massive, which makes sense when a 6ft super-solider has to wield it. But for us lowly ol’ regular humans, it looked better and was much more comfortable to hold at around 80% scale, though it took me a few tries to get it correctly modeled to this scale.
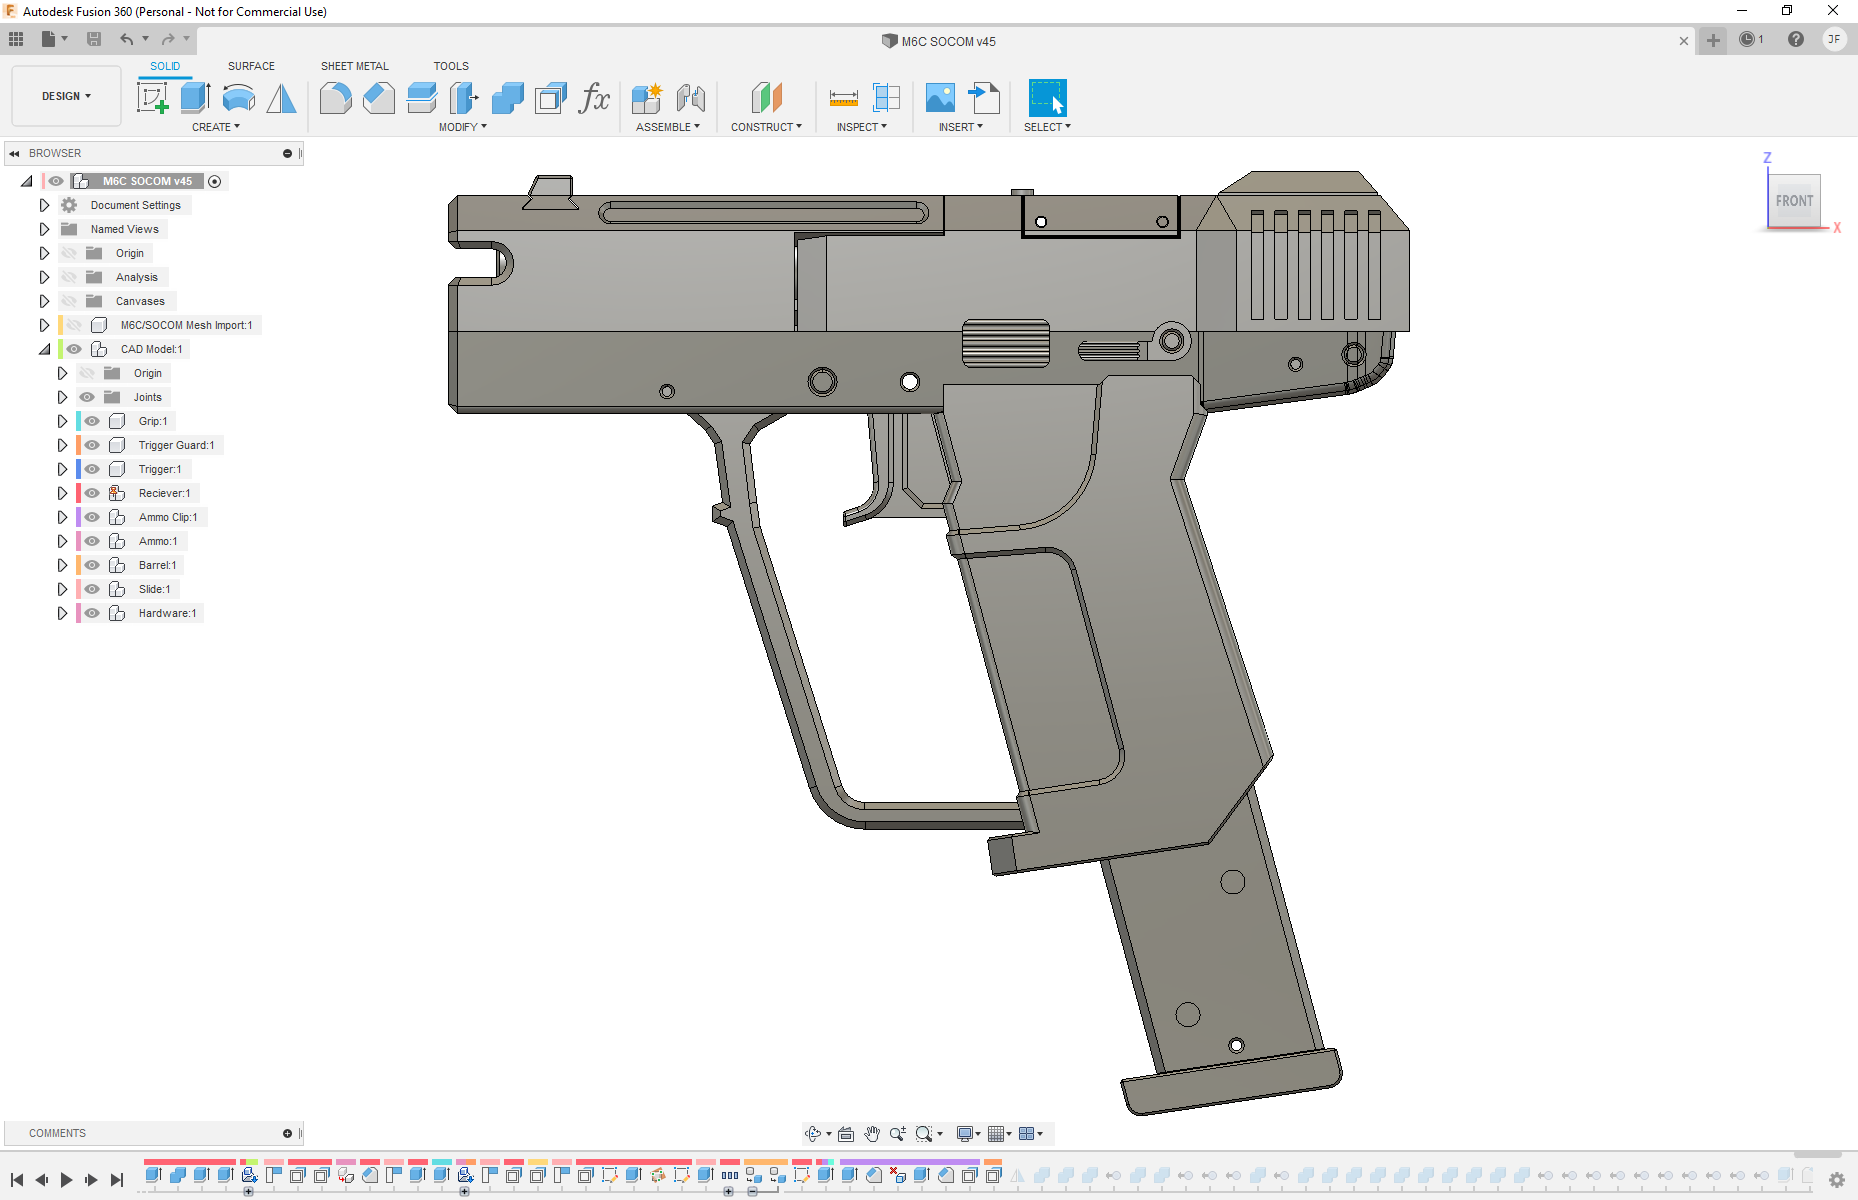
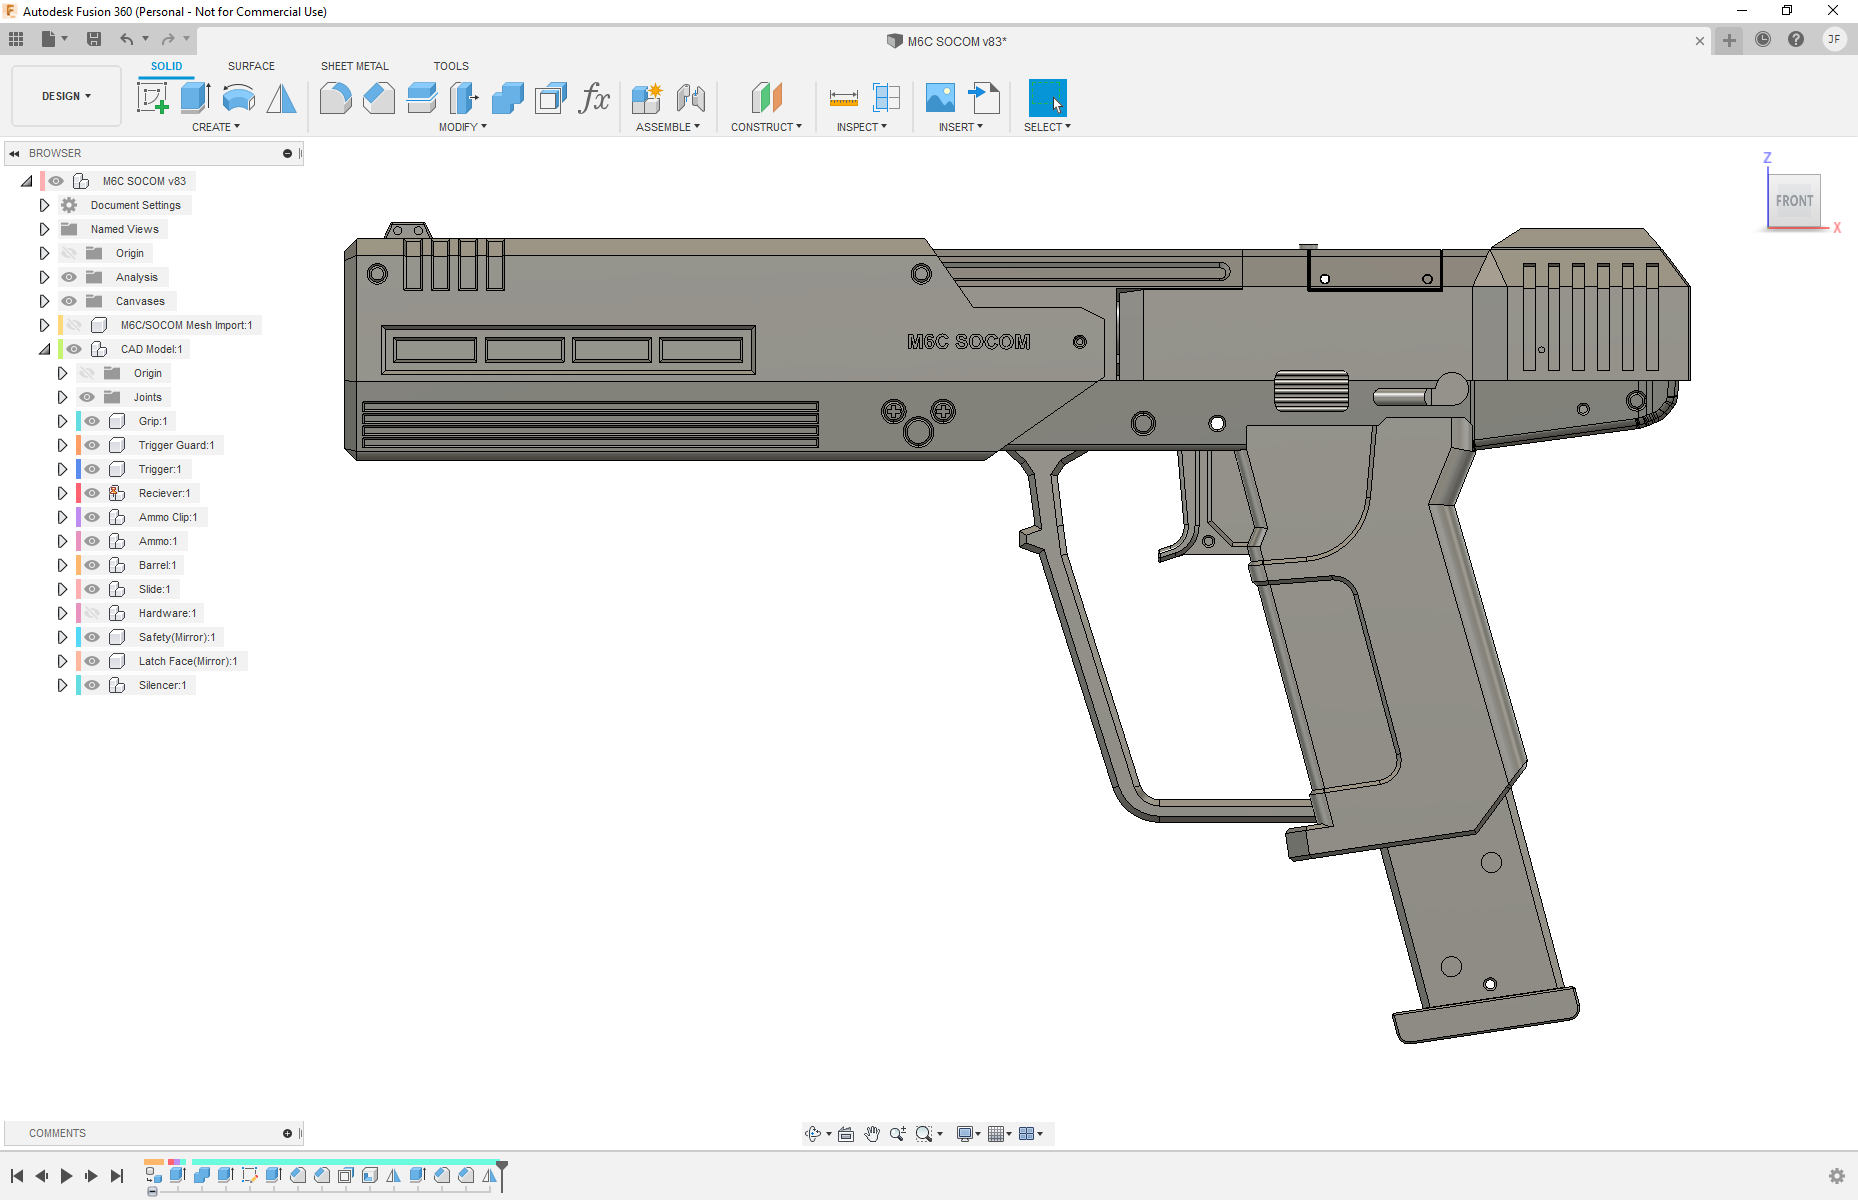
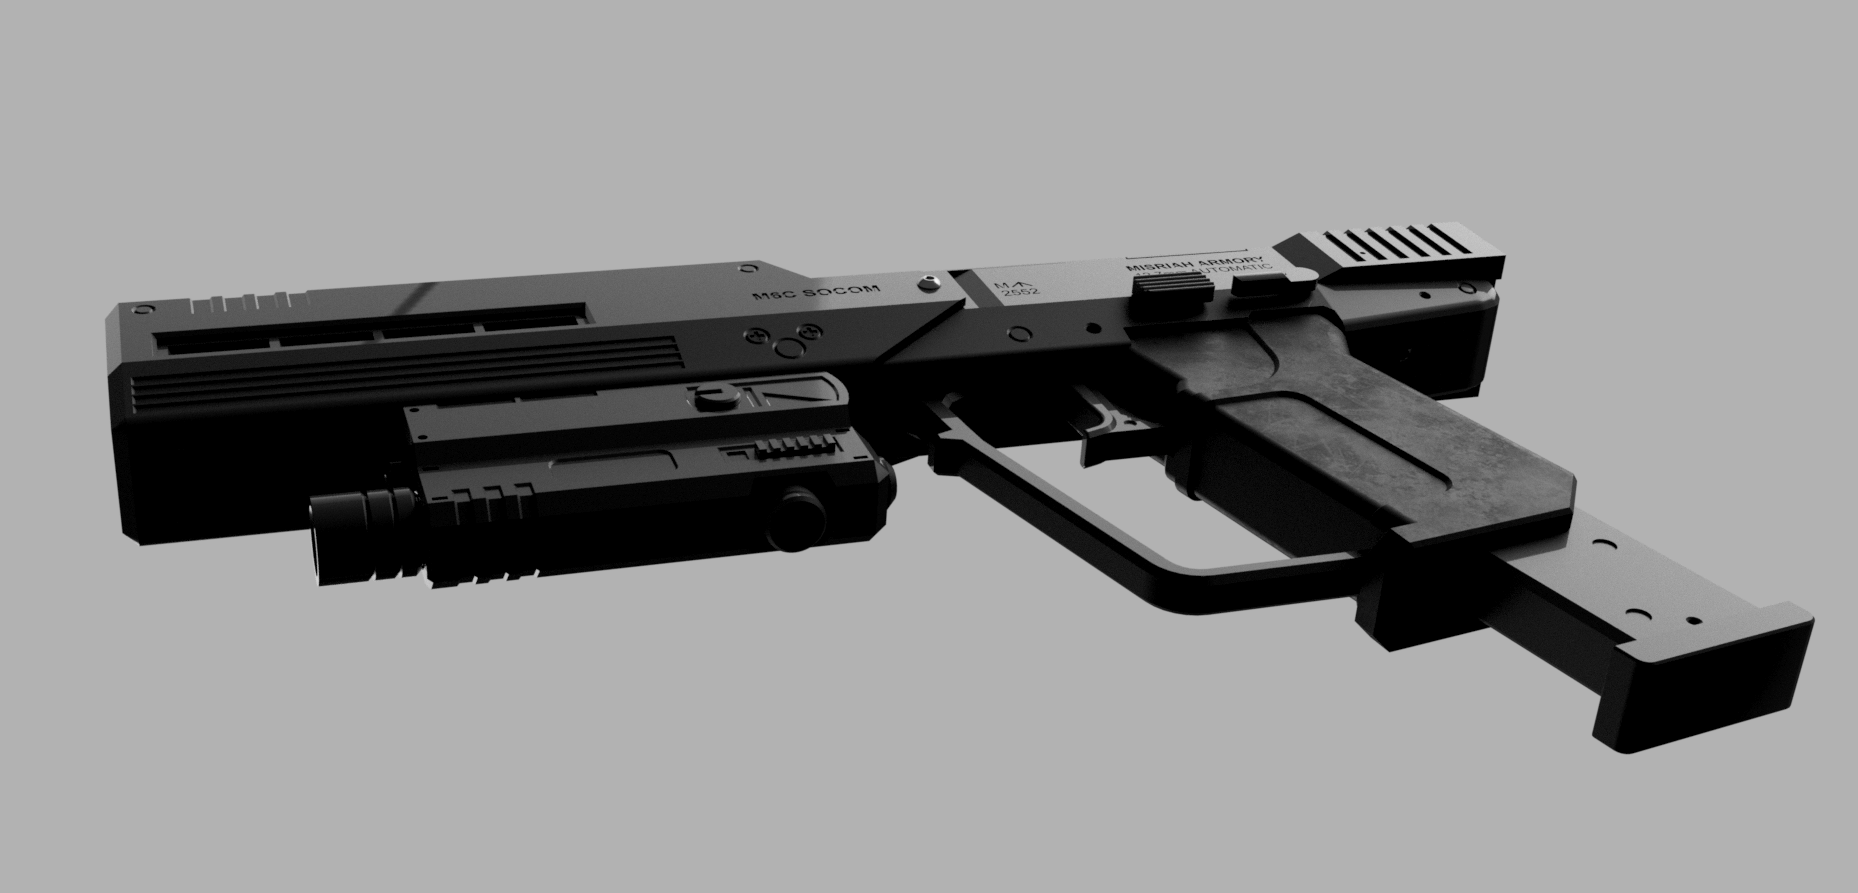
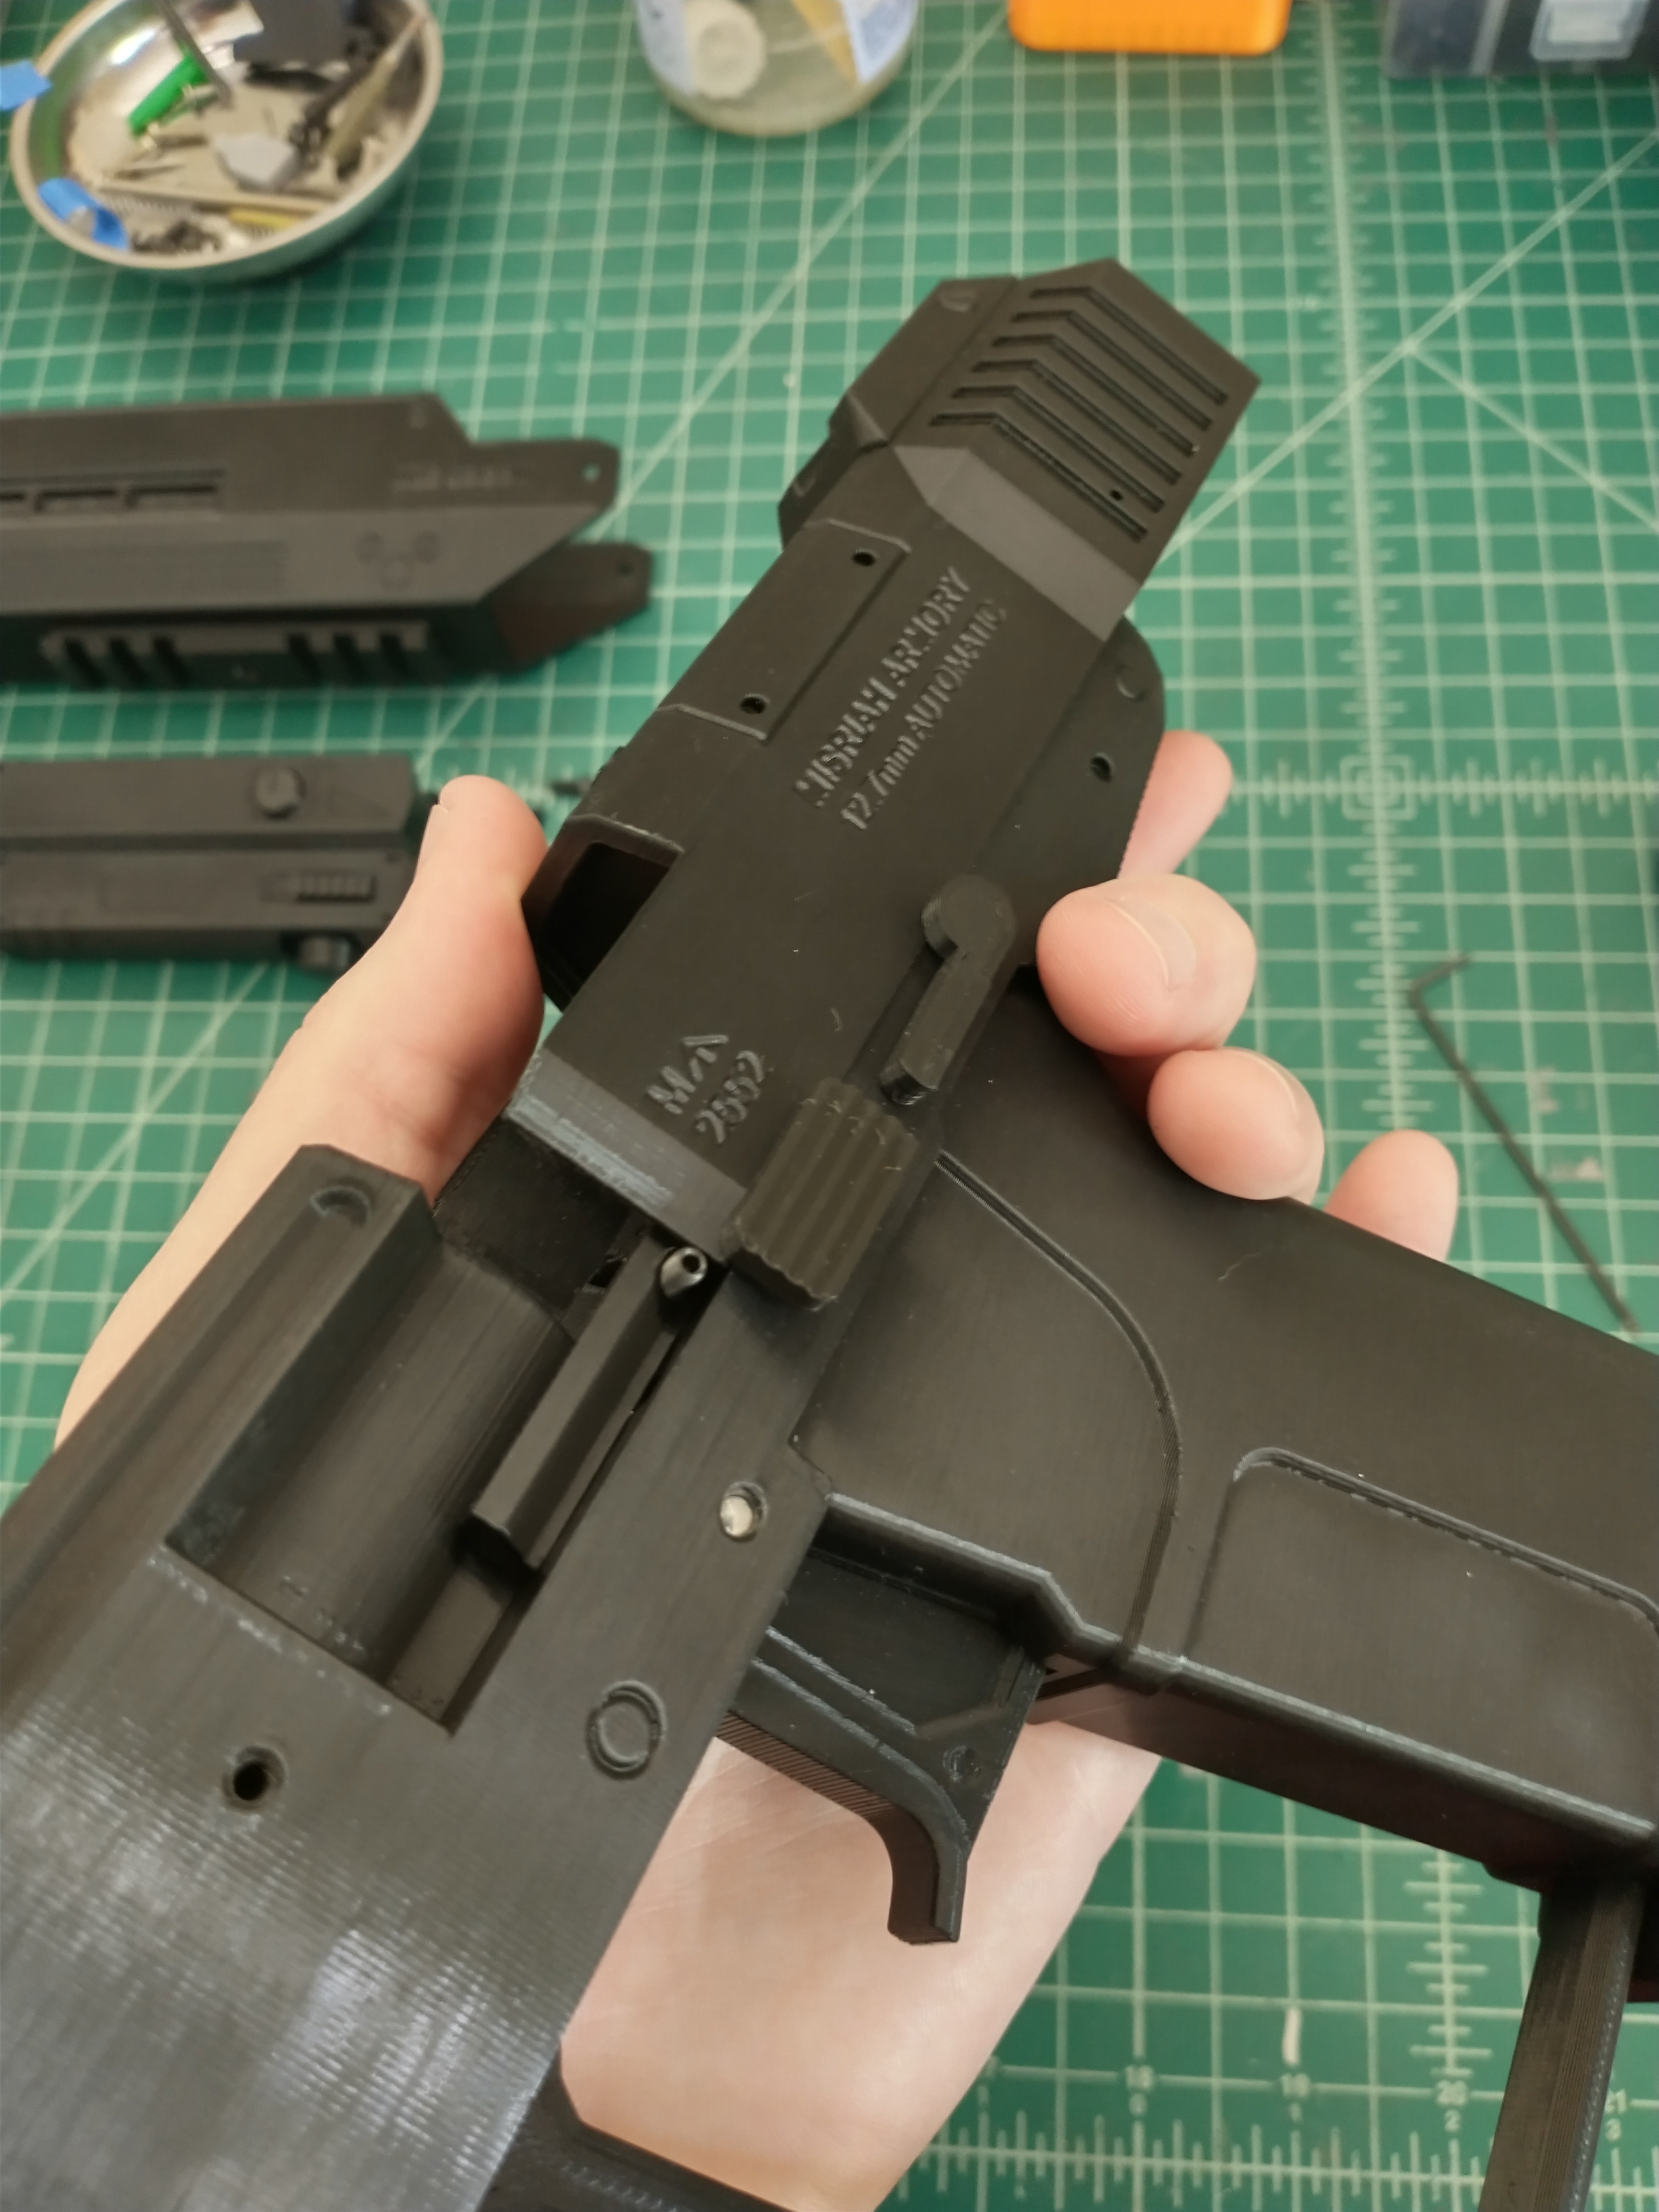
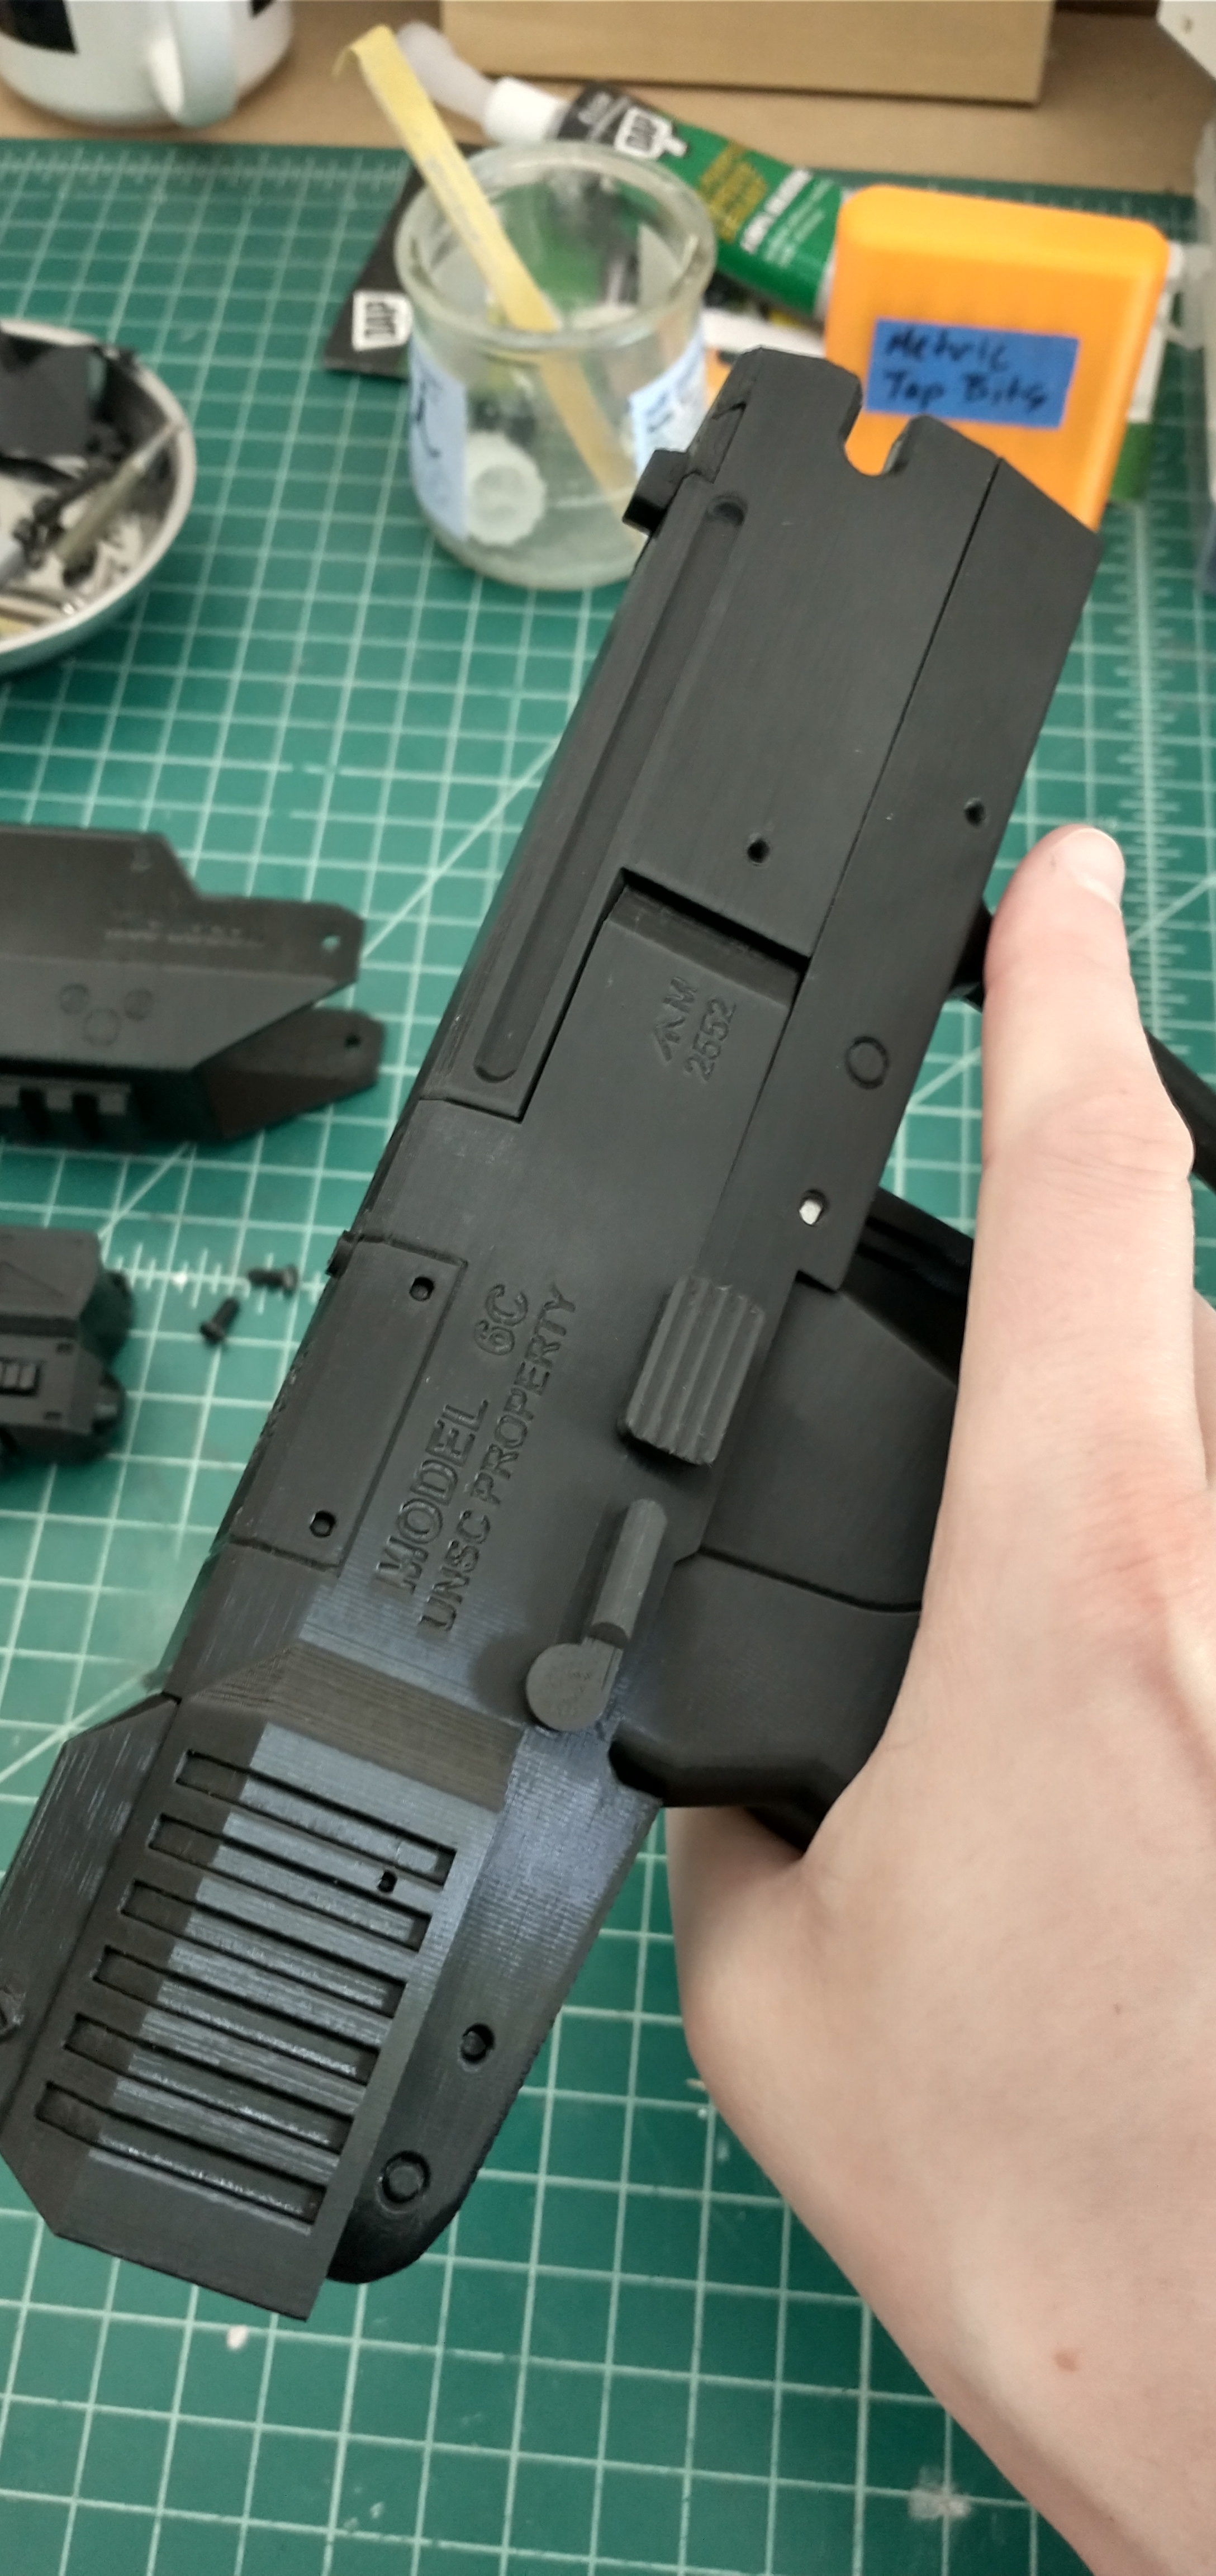
With my decision made on the ammunition, I decided to start working on the base M6C model pistol that the SOCOM is built on. Though…. it’s more like the M6G from Halo 3. The M6C/SOCOM in-game uses the same slide and base 3D model (for the most part) as the M6G pistol from Halo 3, not the M6C model in Halo 2. So, it ended up being more like an M6C/G variant. And, since it was built with the same M6G model from Halo 3, I figured it’d give me a base model to work with if I ever wanted to make a replica M6G from Halo 3.
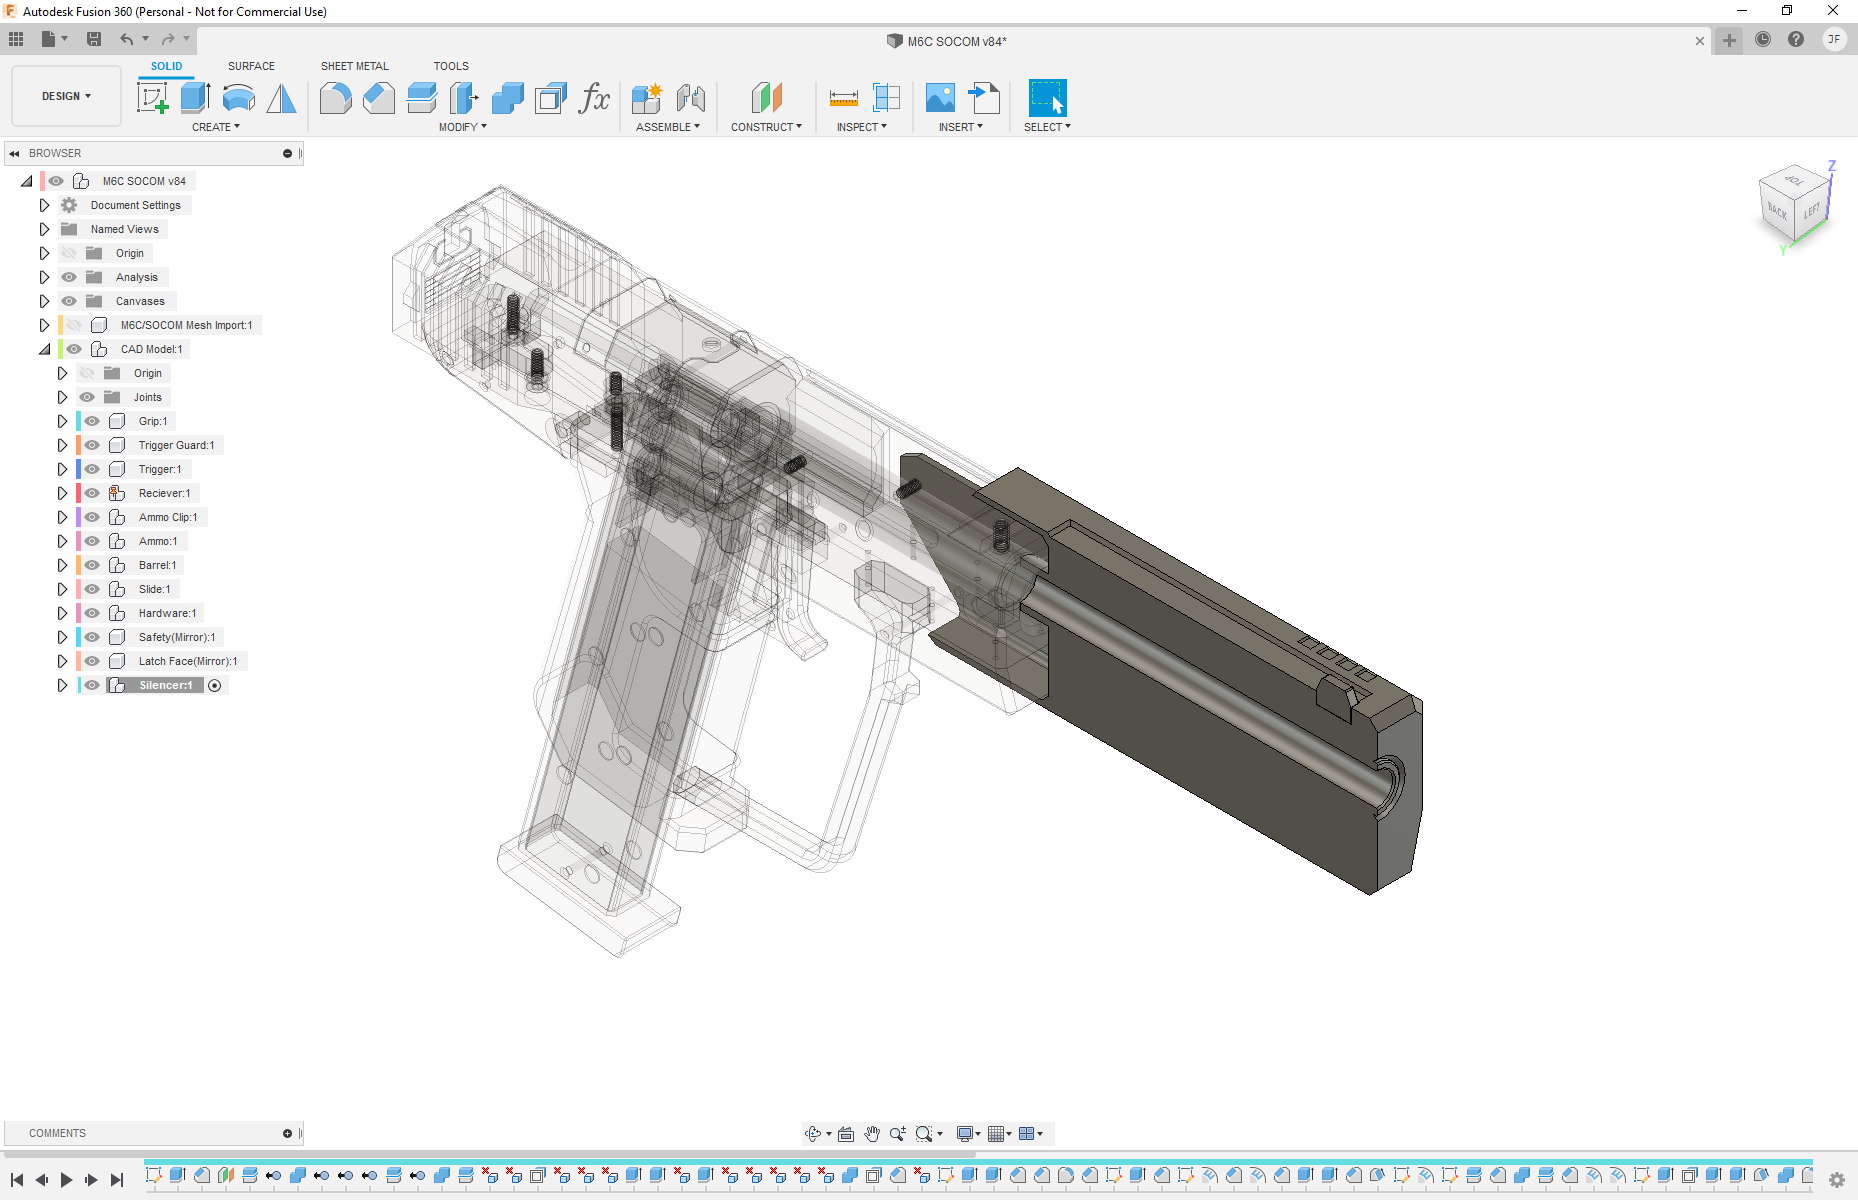
As with my other 3D modeling adventures, it took a bit of trial and error to get the model to look correct and piece together nicely. All the while I was thinking about how I would print each piece, what parts would need support, where I would have to cut it to make parts mate correctly and look nice without too much post processing, and where I was going to add hardware to screw everything together. A few of the features that I knew I wanted in the pistol, was a movable slide – bonus points if I was able to make it chamber a round correctly (spoilers, I was not able to figure that mechanism out, probably a good thing – don’t want to make too realistic of a replica), a removable mag with ammo, and a moving trigger. Additionally, I wanted to pack in as much detail as I could from the in-game texture. Which, surprisingly, I was able to get the text on the side of the pistol to turn out nicely.
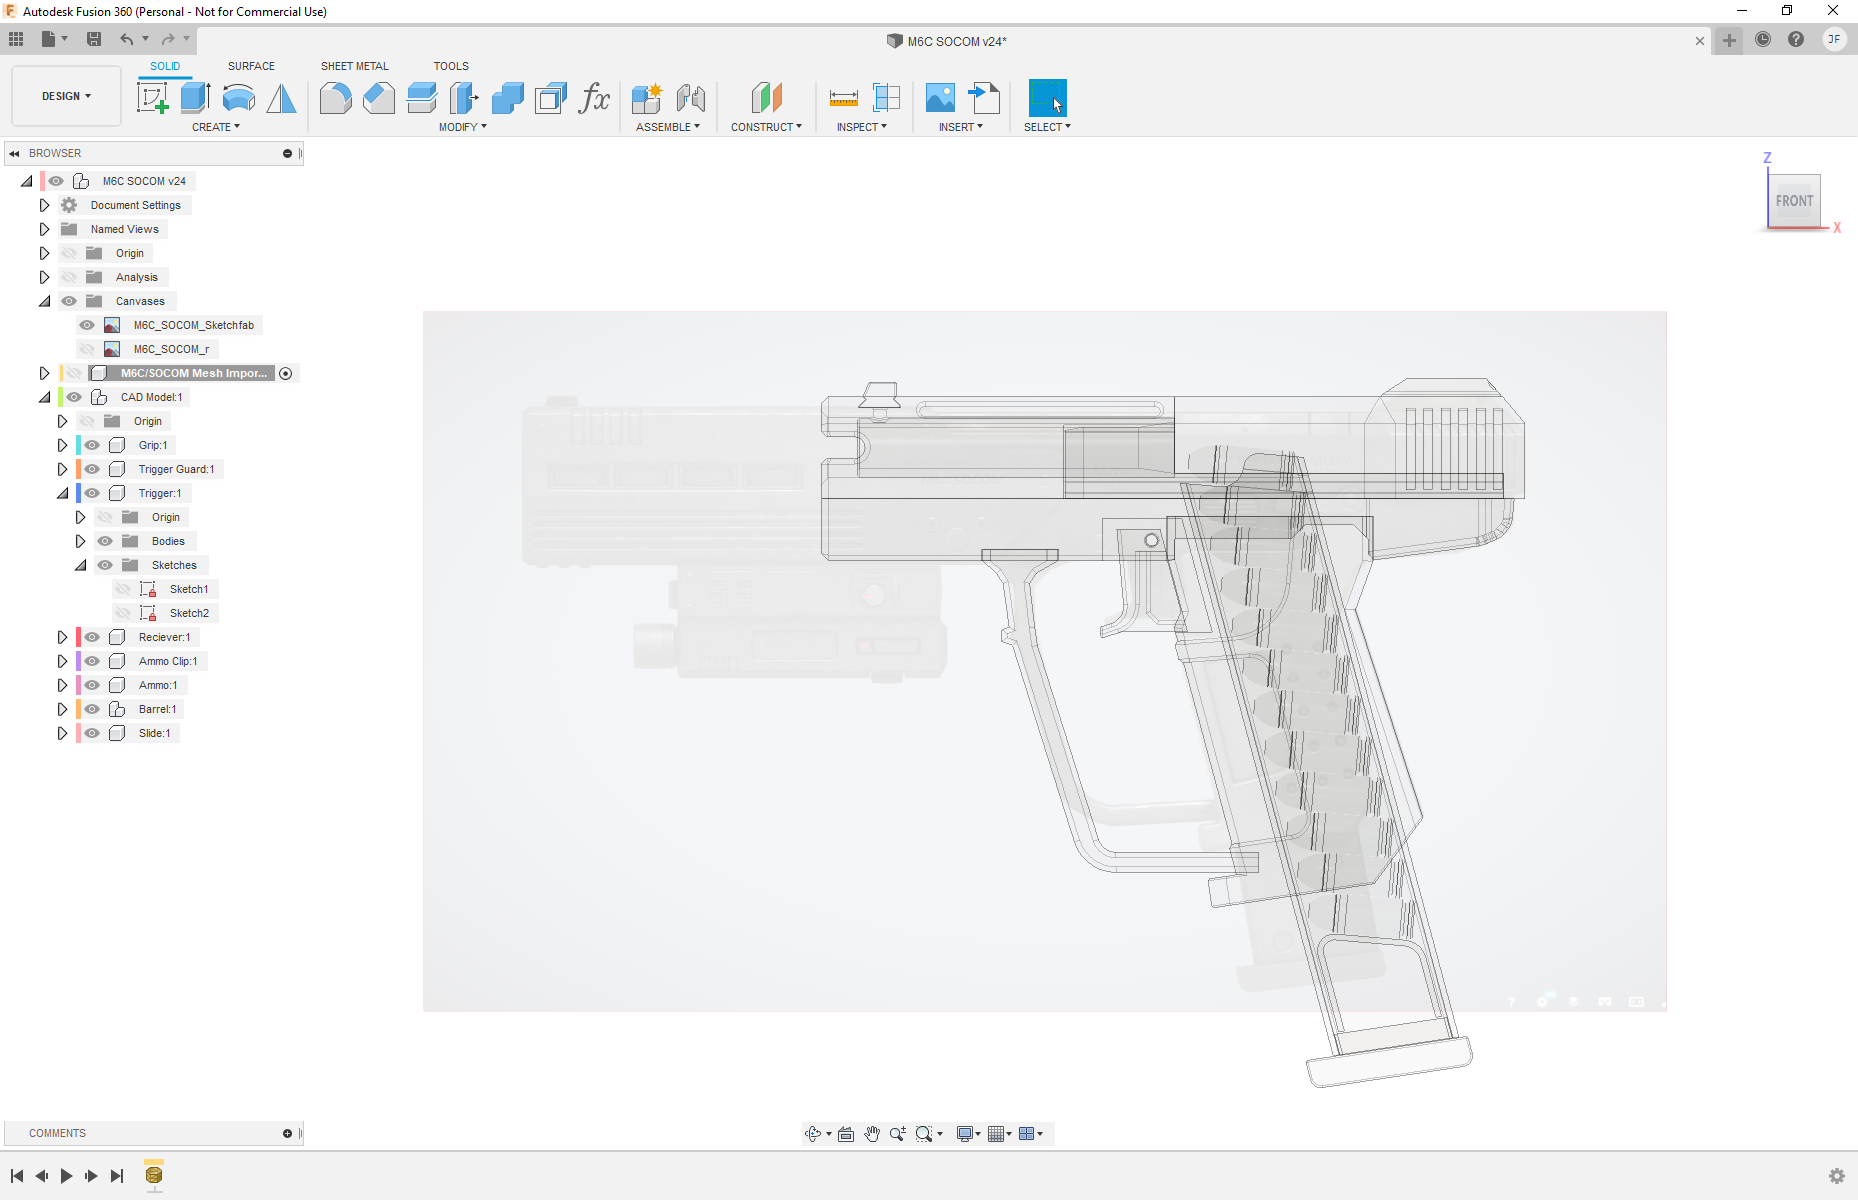

During the modeling process, I did a few test prints of the grip and receiver to make sure the scale was correct and that it would fit nicely in my hand. With the first few prints, I quickly found out my model was a bit too small. So I had to go back and change the model a couple times before I got it to a comfortable spot. What I should have done in the first place, and I’d forgotten that I’d had this image saved from a tip from Punished Props, was to import a picture of someone holding a replica pistol with a ruler in the photo. If I’d imported that, I’d have been able to scale the grip and trigger and the rest of the pistol fairly quickly and easily to that reference image. But unfortunately, I forgot all about that and went the trial and error route of printing a part and modifying the file several times before I got it to feel correct in my hand. Oh well, maybe next time.
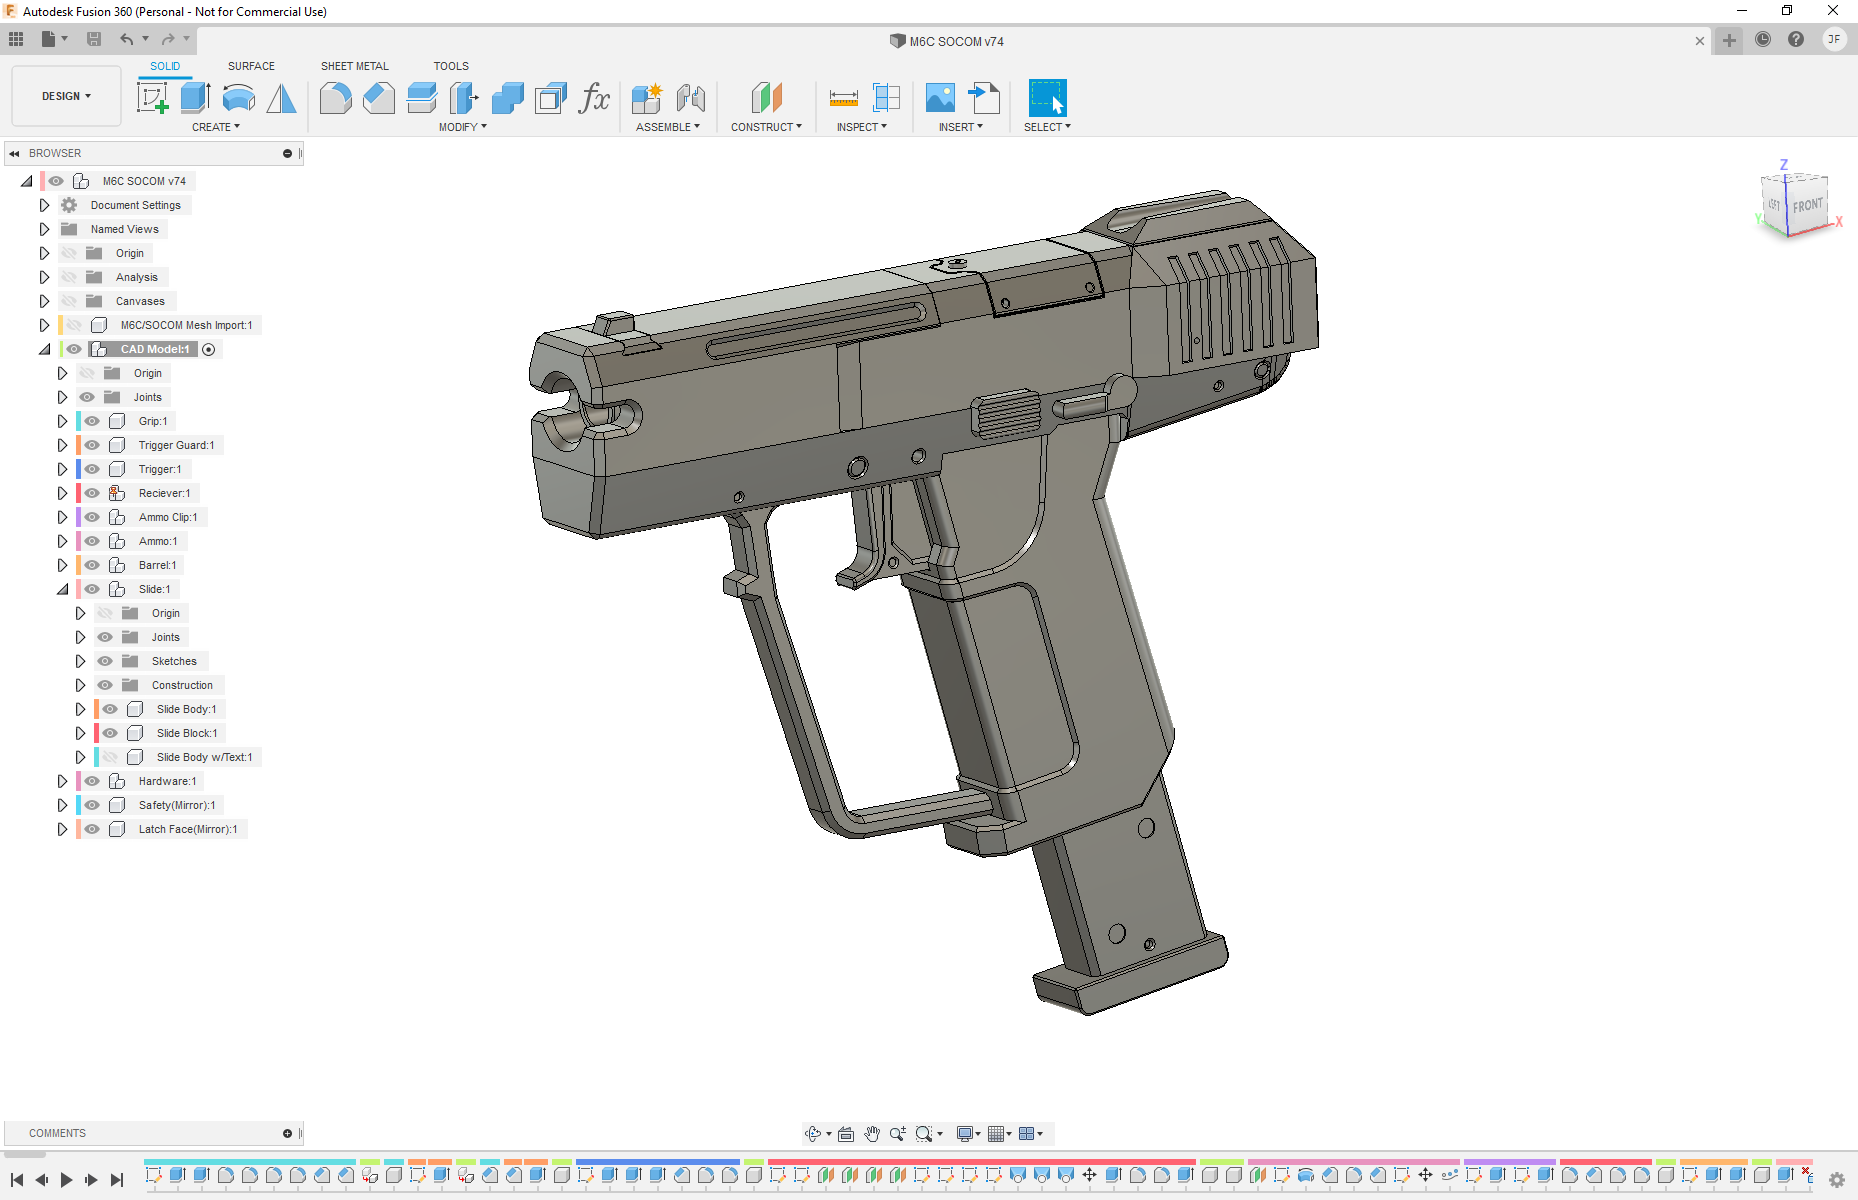
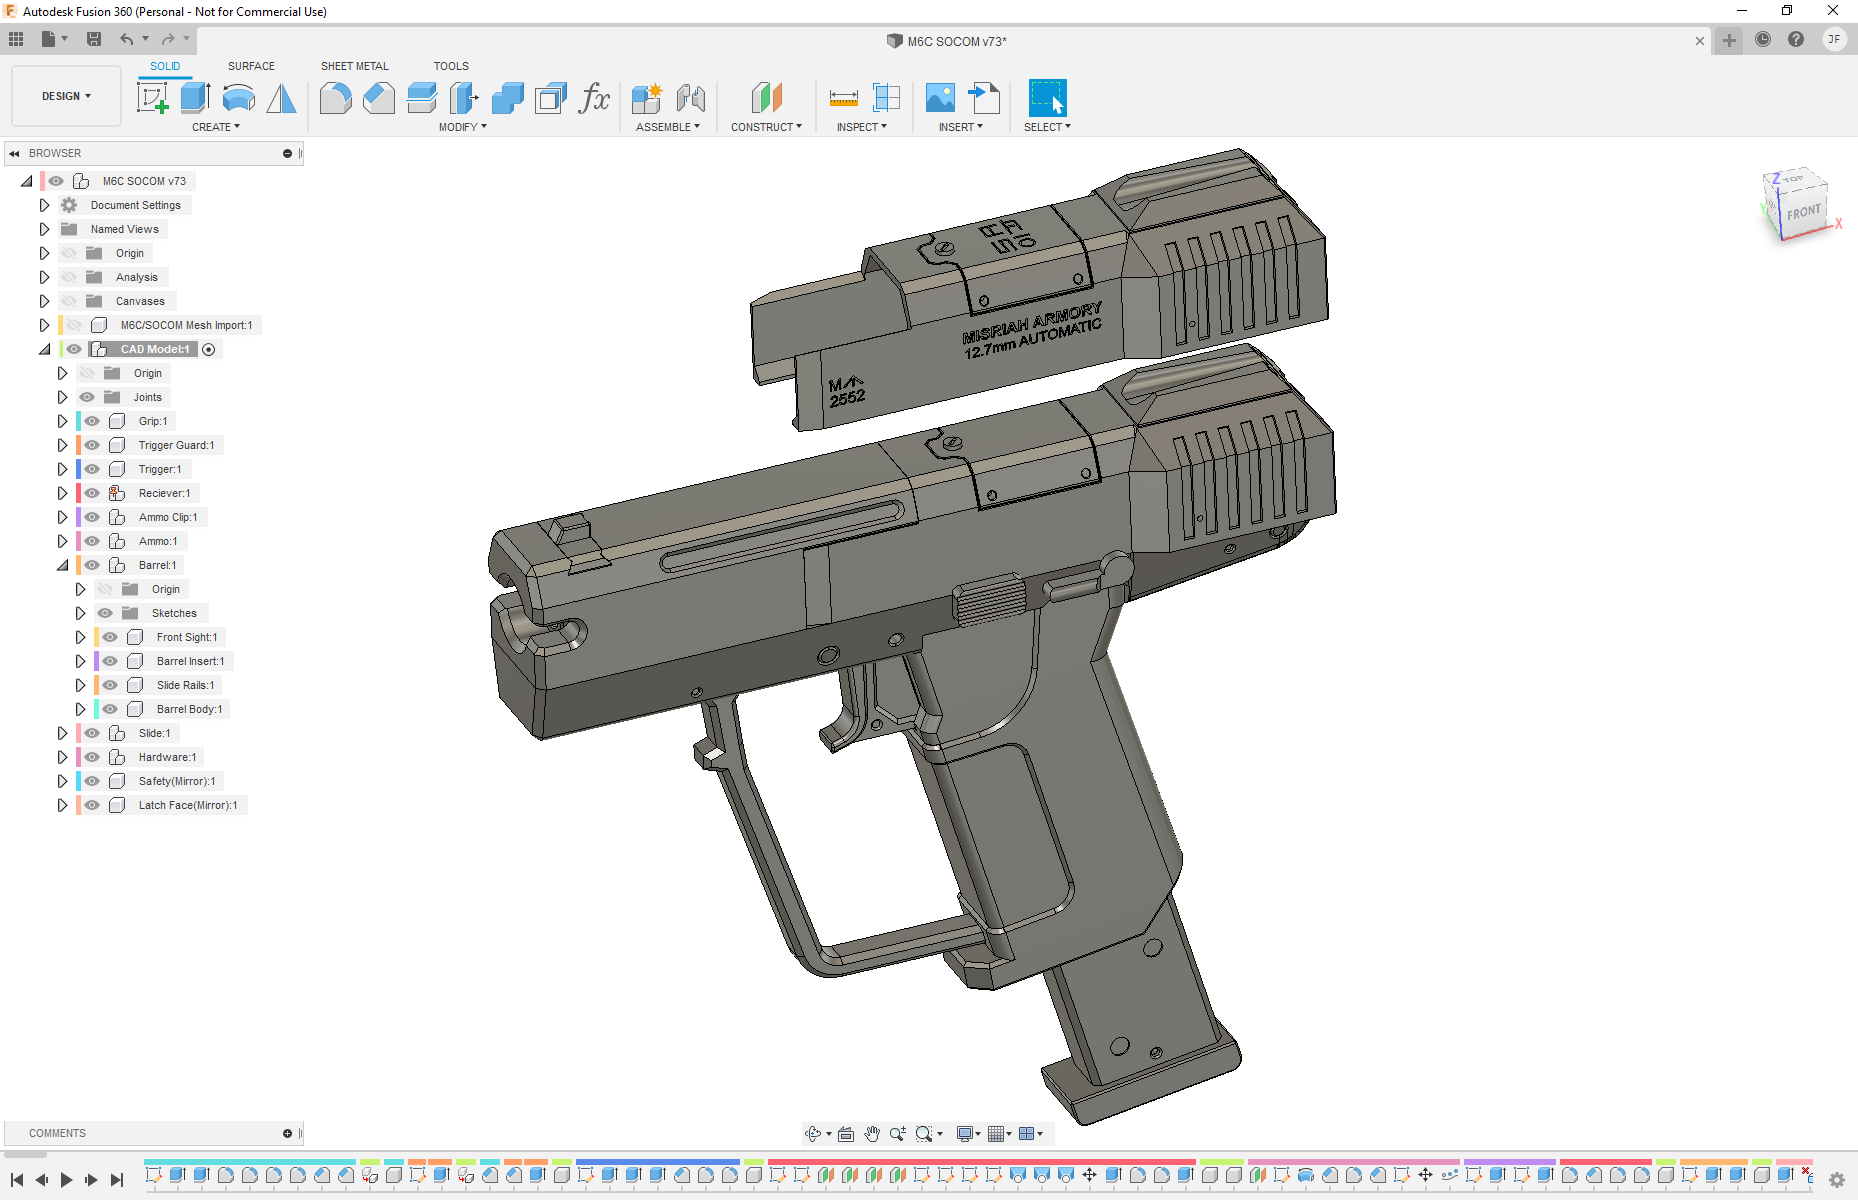
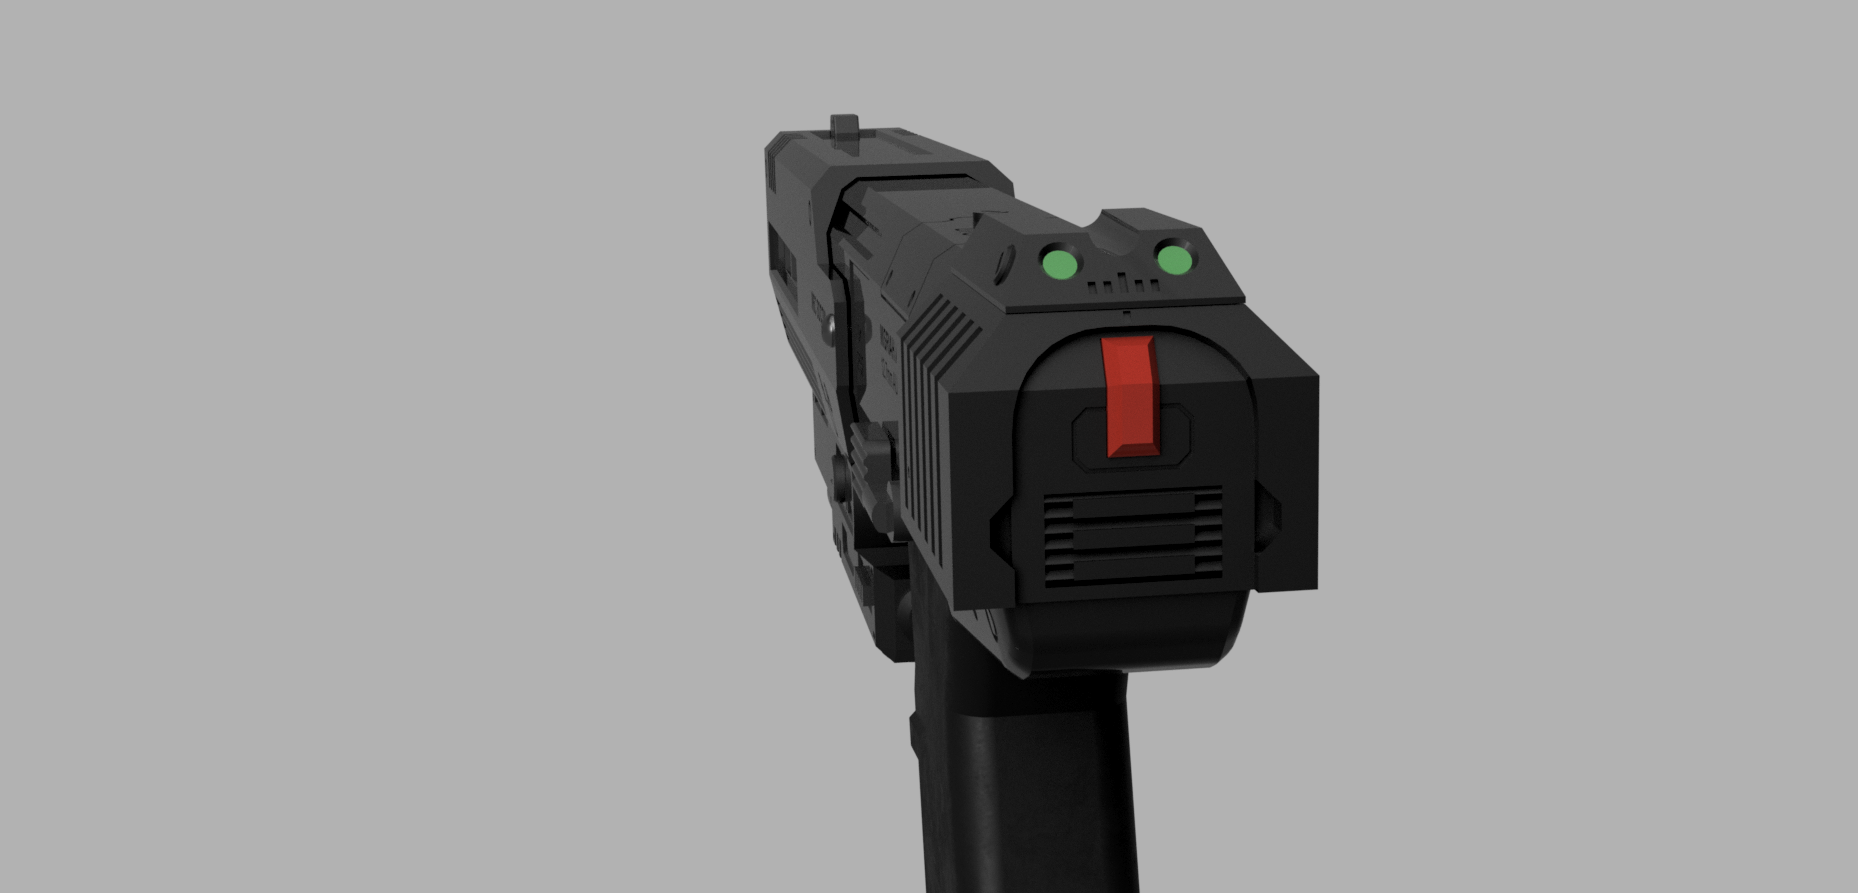
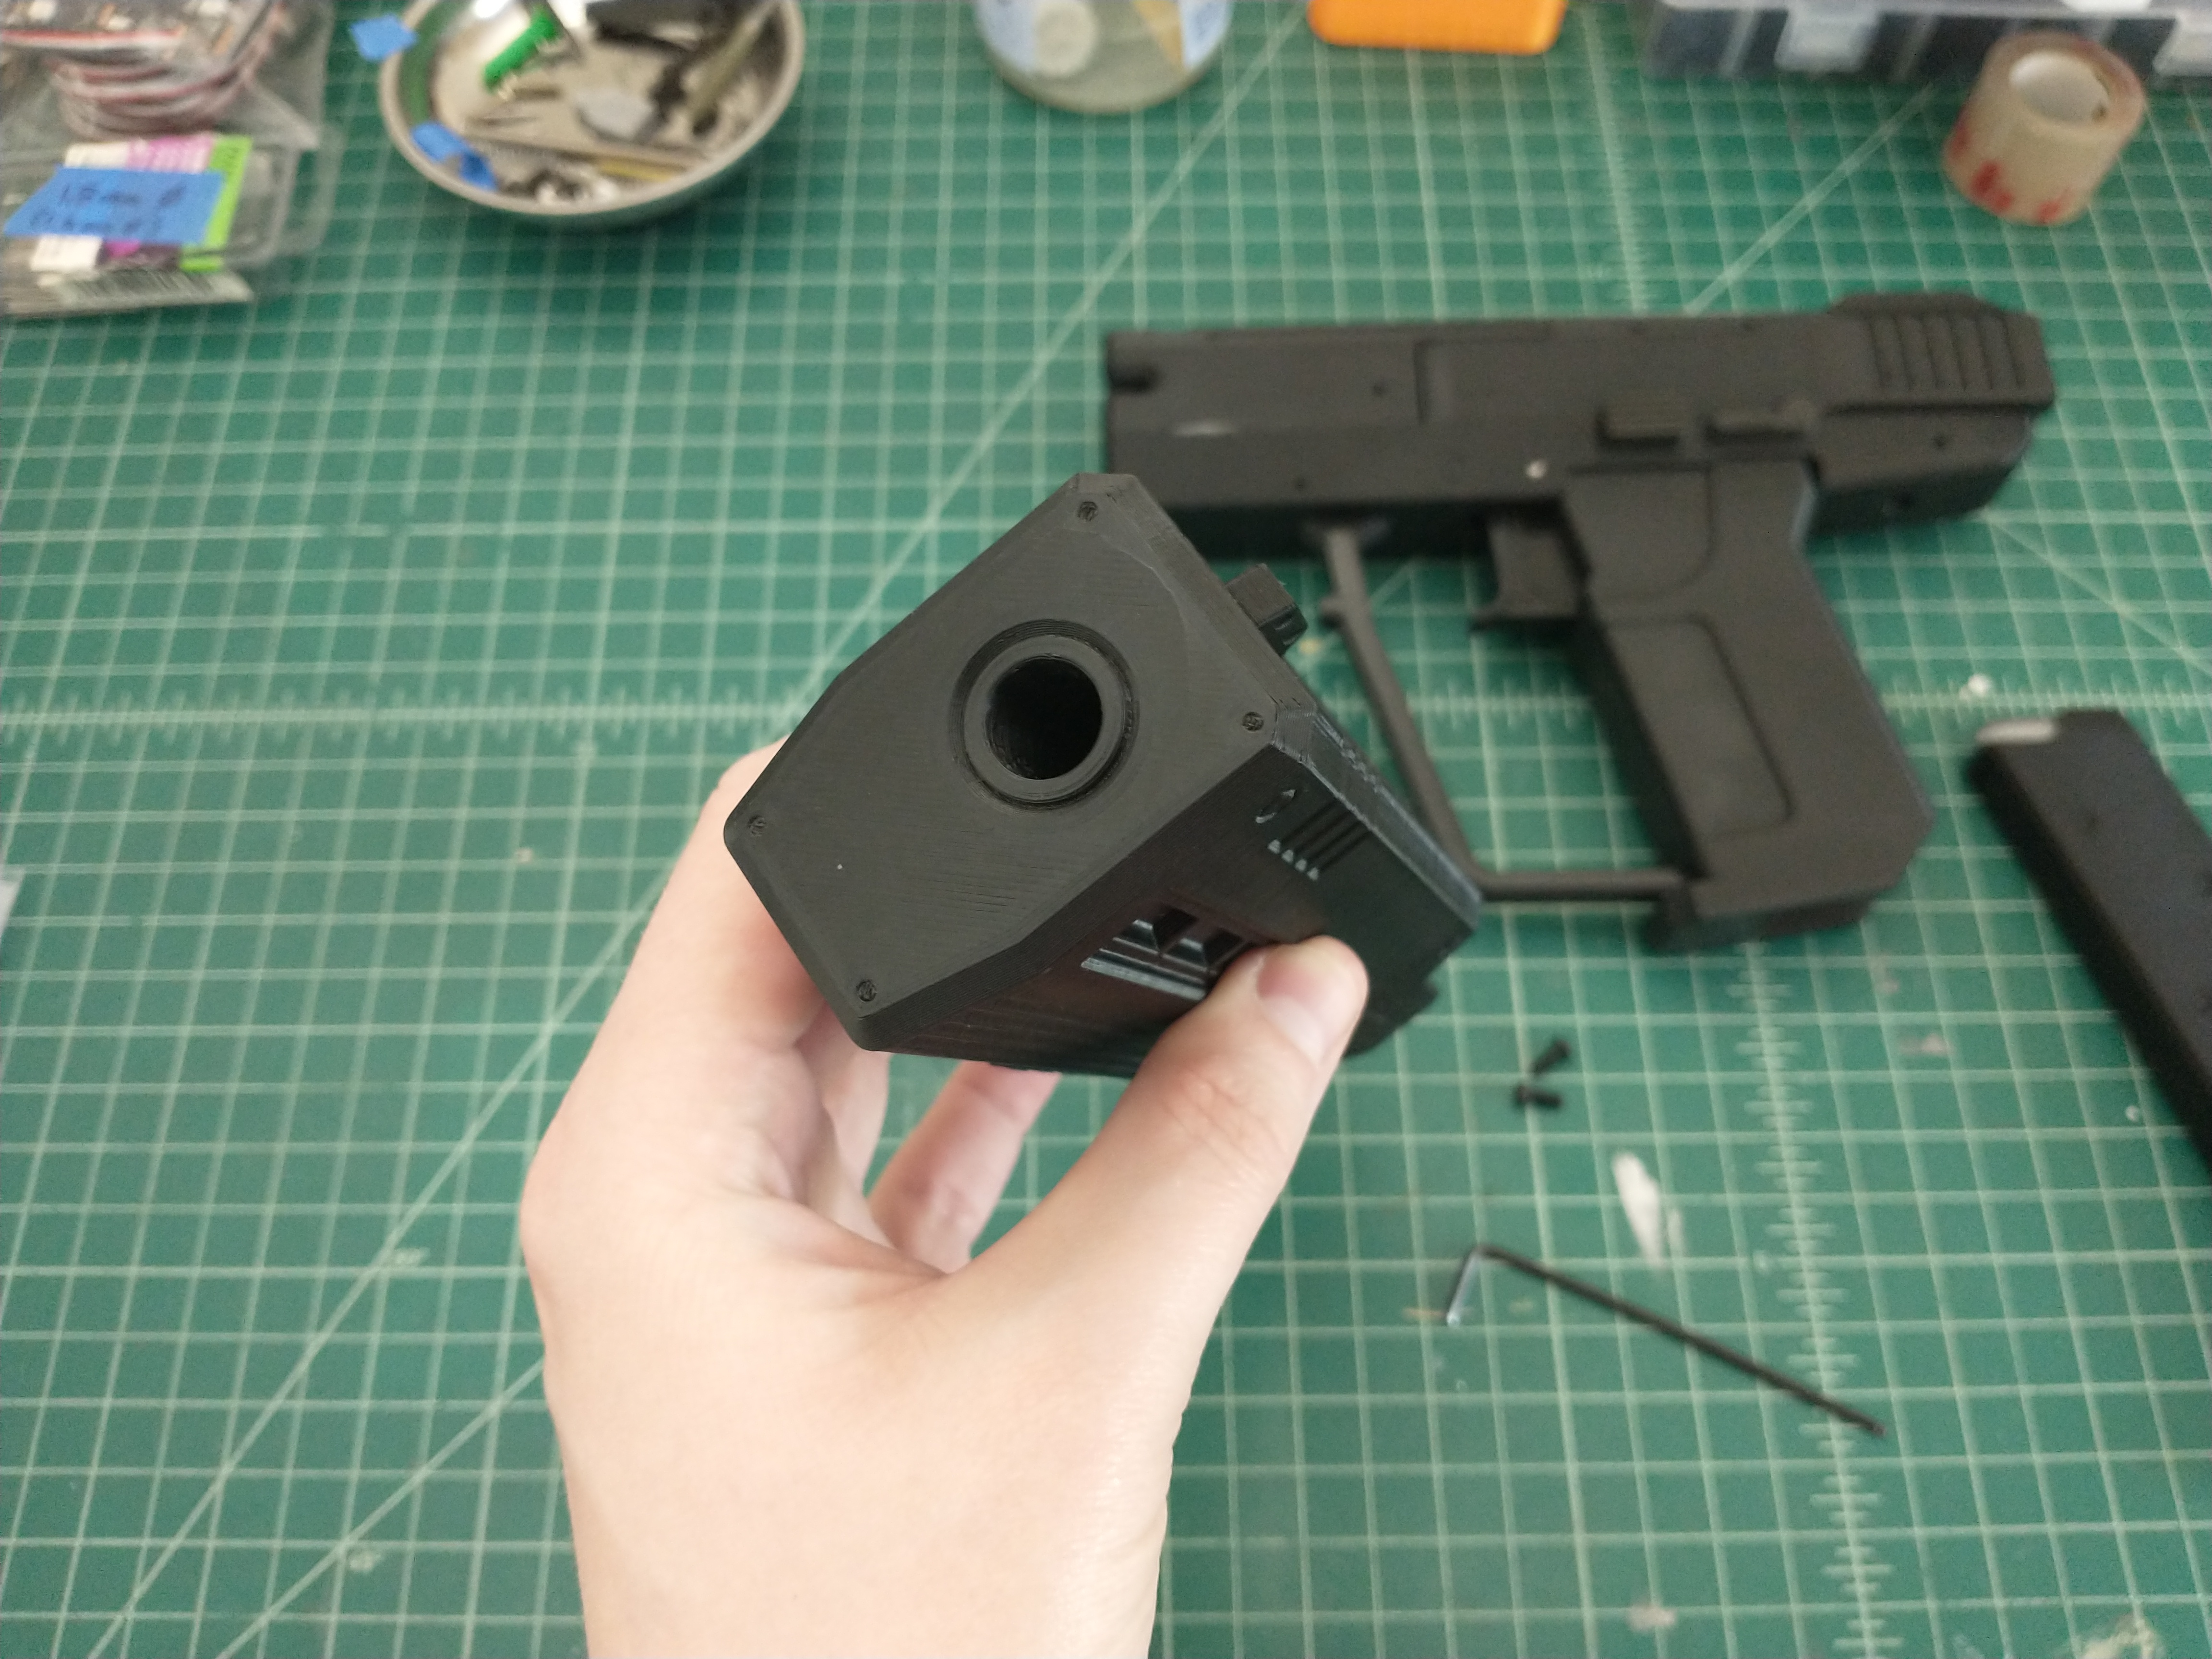
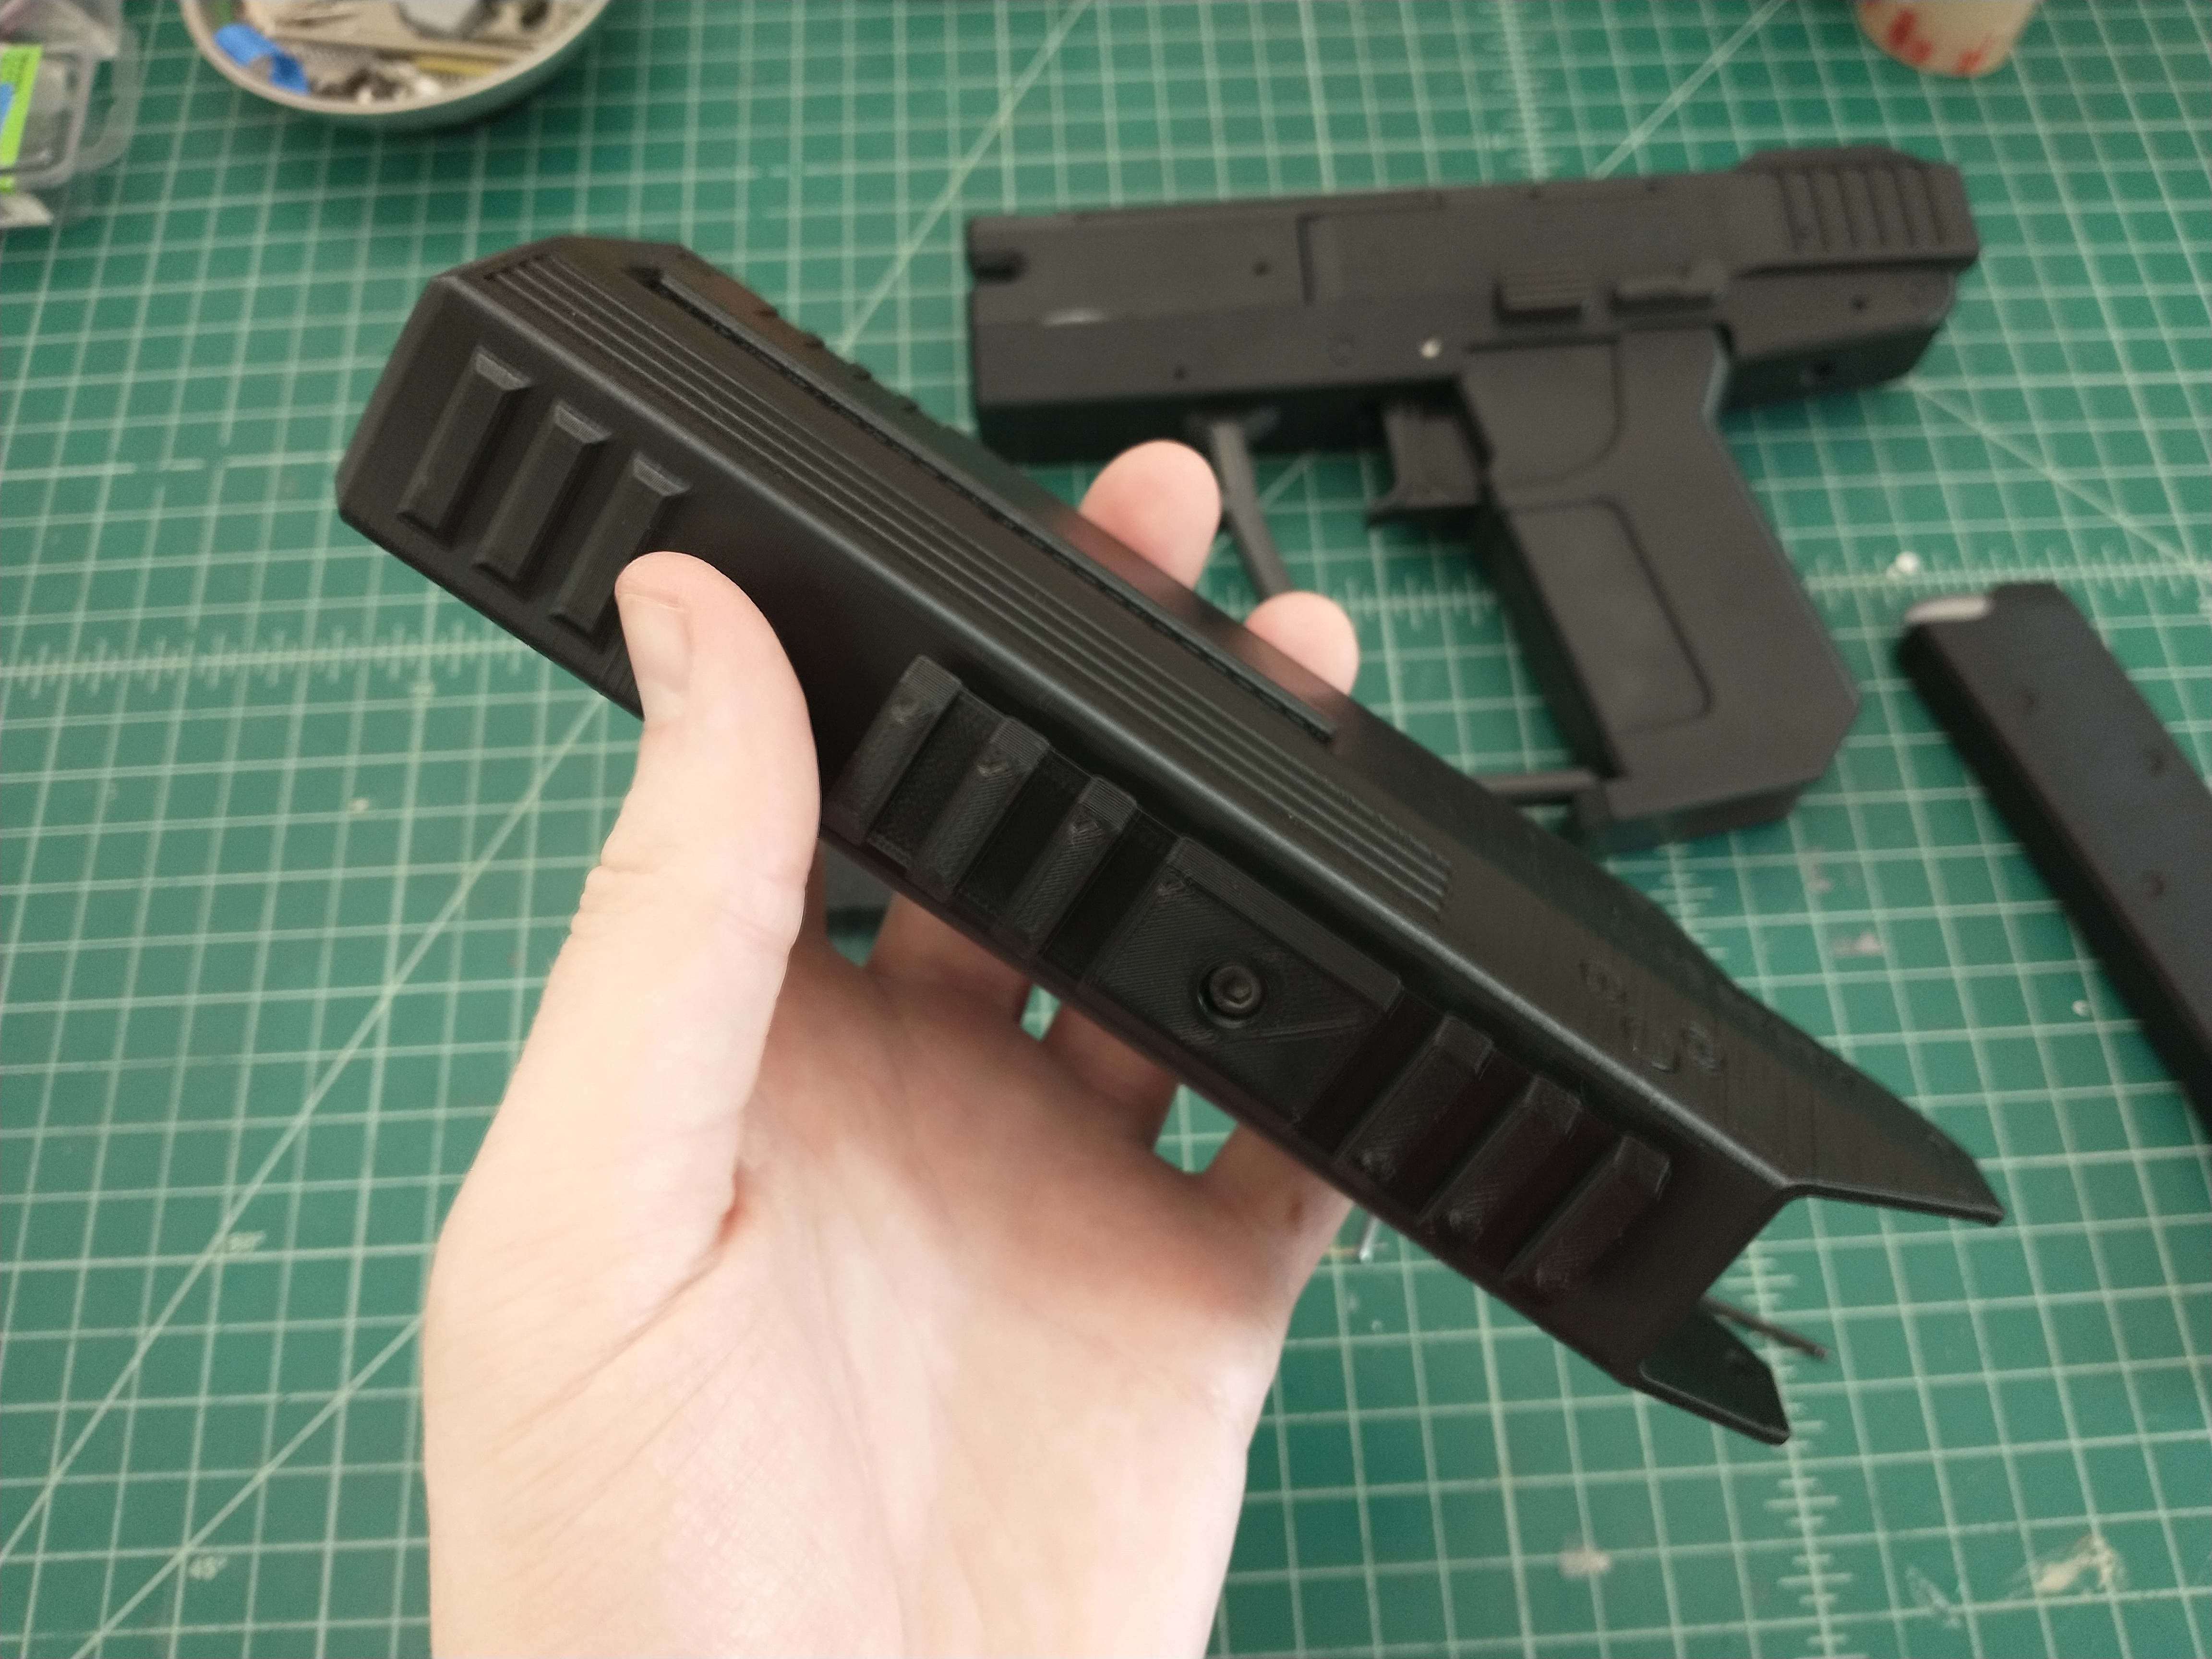
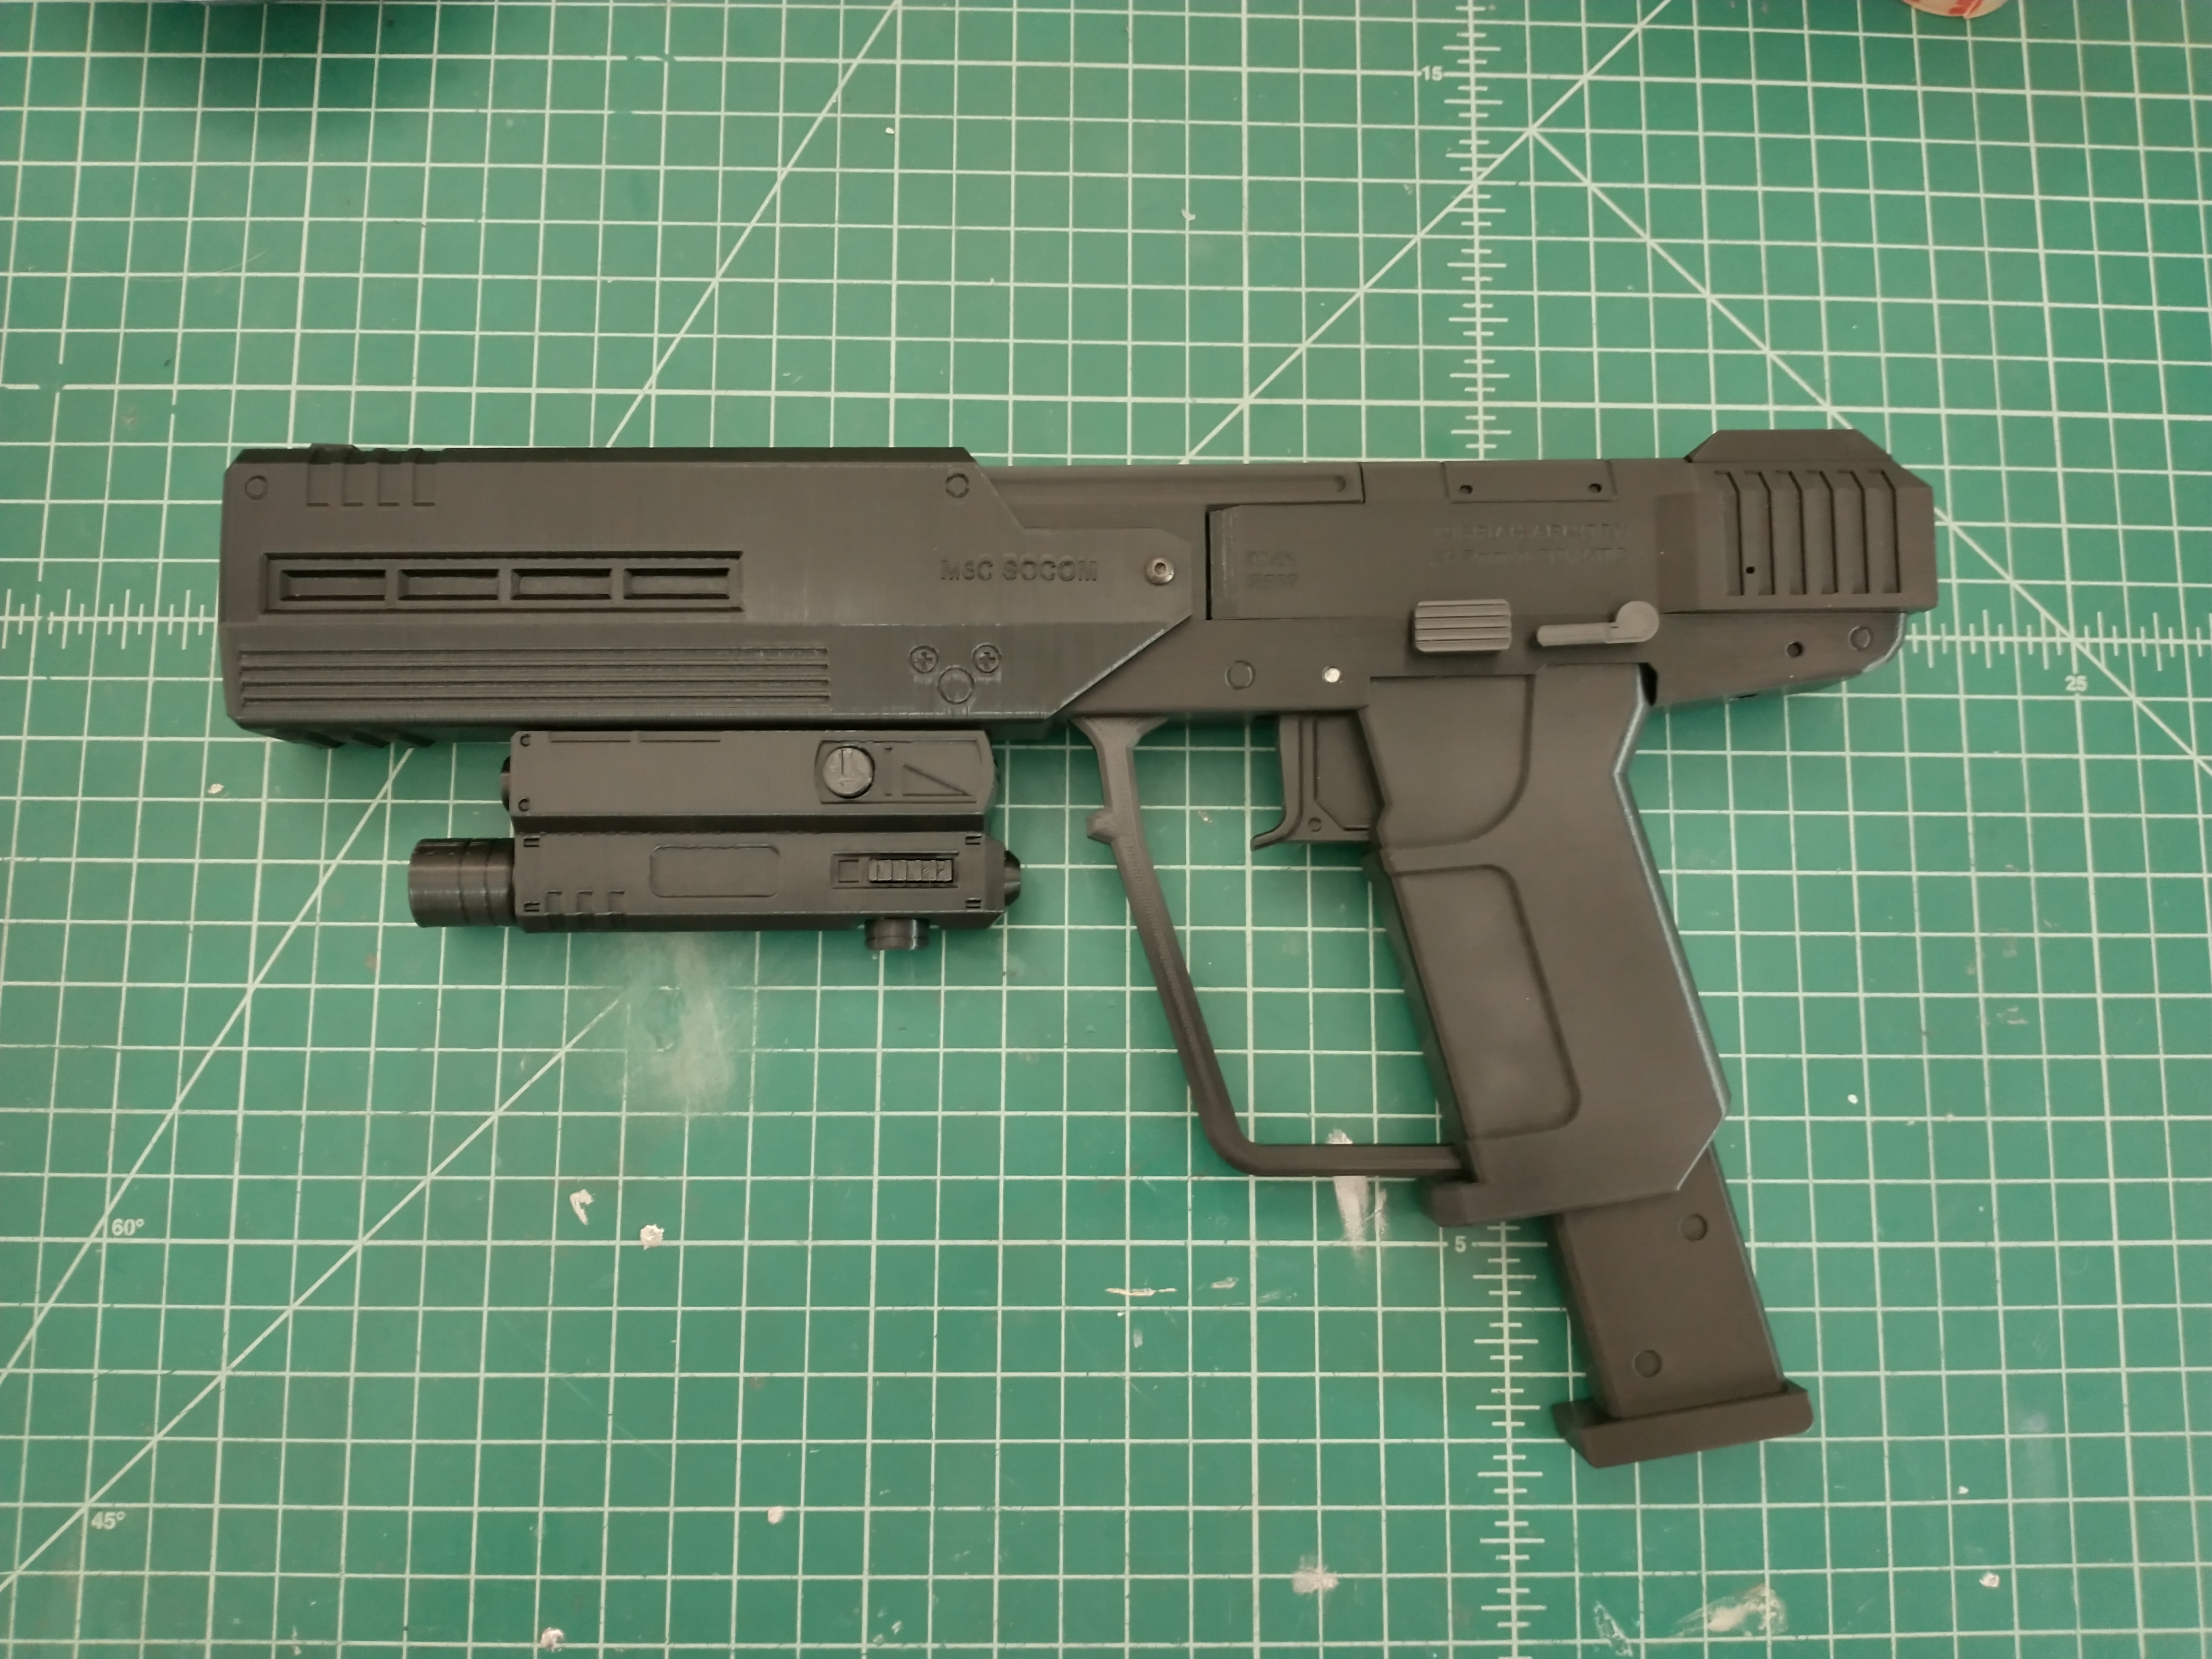
Anyway, with the base M6C variant pistol complete, I moved on to the silencer and flashlight that made the M6C/SOCOM so iconic in Halo 3: ODST. As there were no moving parts on the silencer, it was relatively quick to model and was the perfect size to print as a single piece, standing on end. I was quite happy to not have to split it up anywhere and introduce seam lines to the finished product. After that, I needed to work on the flashlight below it. Now, on the in-game model, the flashlight seemed to be a more-or-less integral part of the silencer. There didn’t seem to be an indication of how it was mounted or if there was even a way to take it off. For my purposes, to be able to print parts without support, I needed a way to separate the flashlight from the silencer. One of the nice things about having so many references from so many other people who had made replicas, is that there were plenty of ideas for me to glean inspiration from of how to accomplish this. The most popular method seemed to be mounting it to a picatinny rail on the bottom of the silencer. It was a perfect way to mount it that made sense for the flashlight as an attachment. That said, the in-game model did not have a picatinny rail (at least one that showed on the model). So, I decided to model the rail short enough that the flashlight body would completely surround it, and hide the rail – perfect! Just what I needed, and I would be able to print the picatinny rail as a separate piece and the join seam to the silencer would be hidden, everything would be jointed mechanically, and I could take everything apart later.
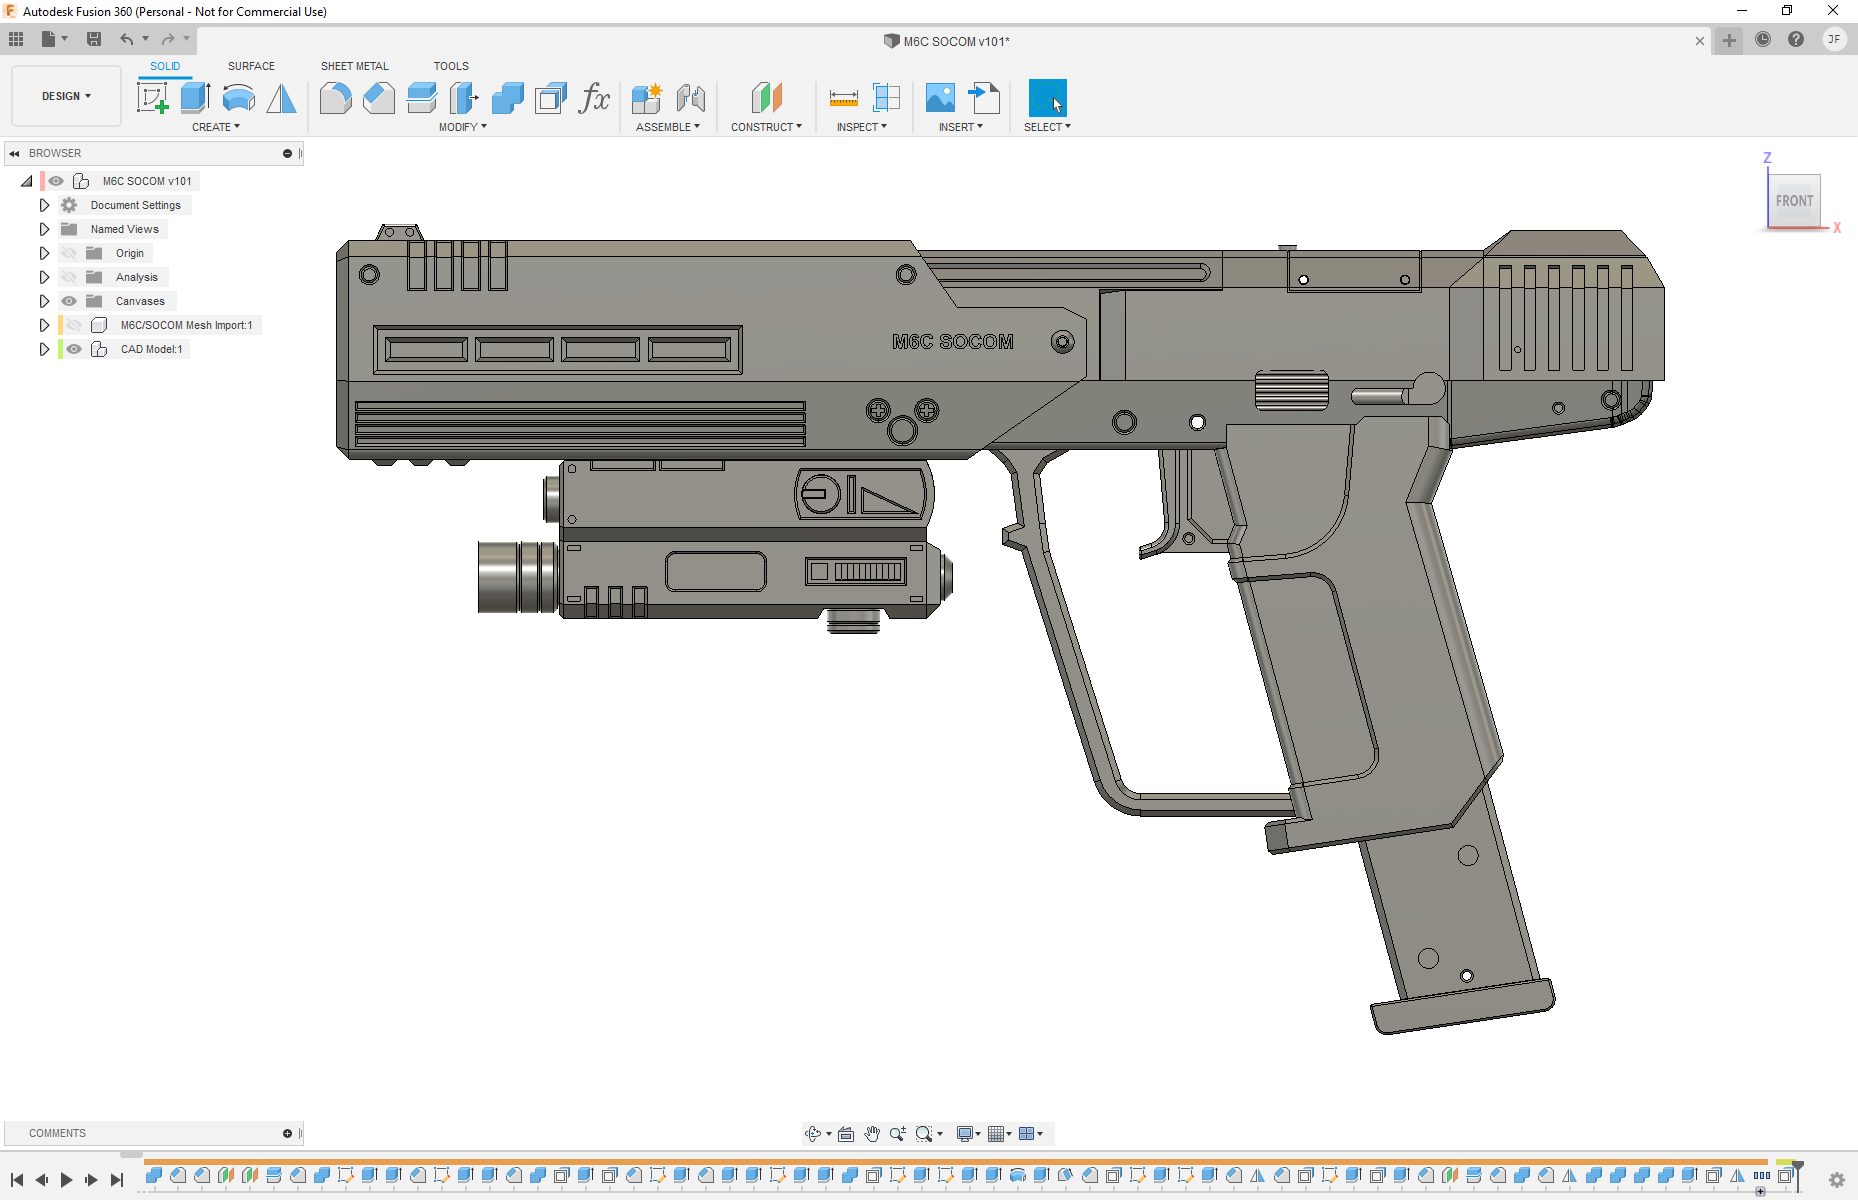
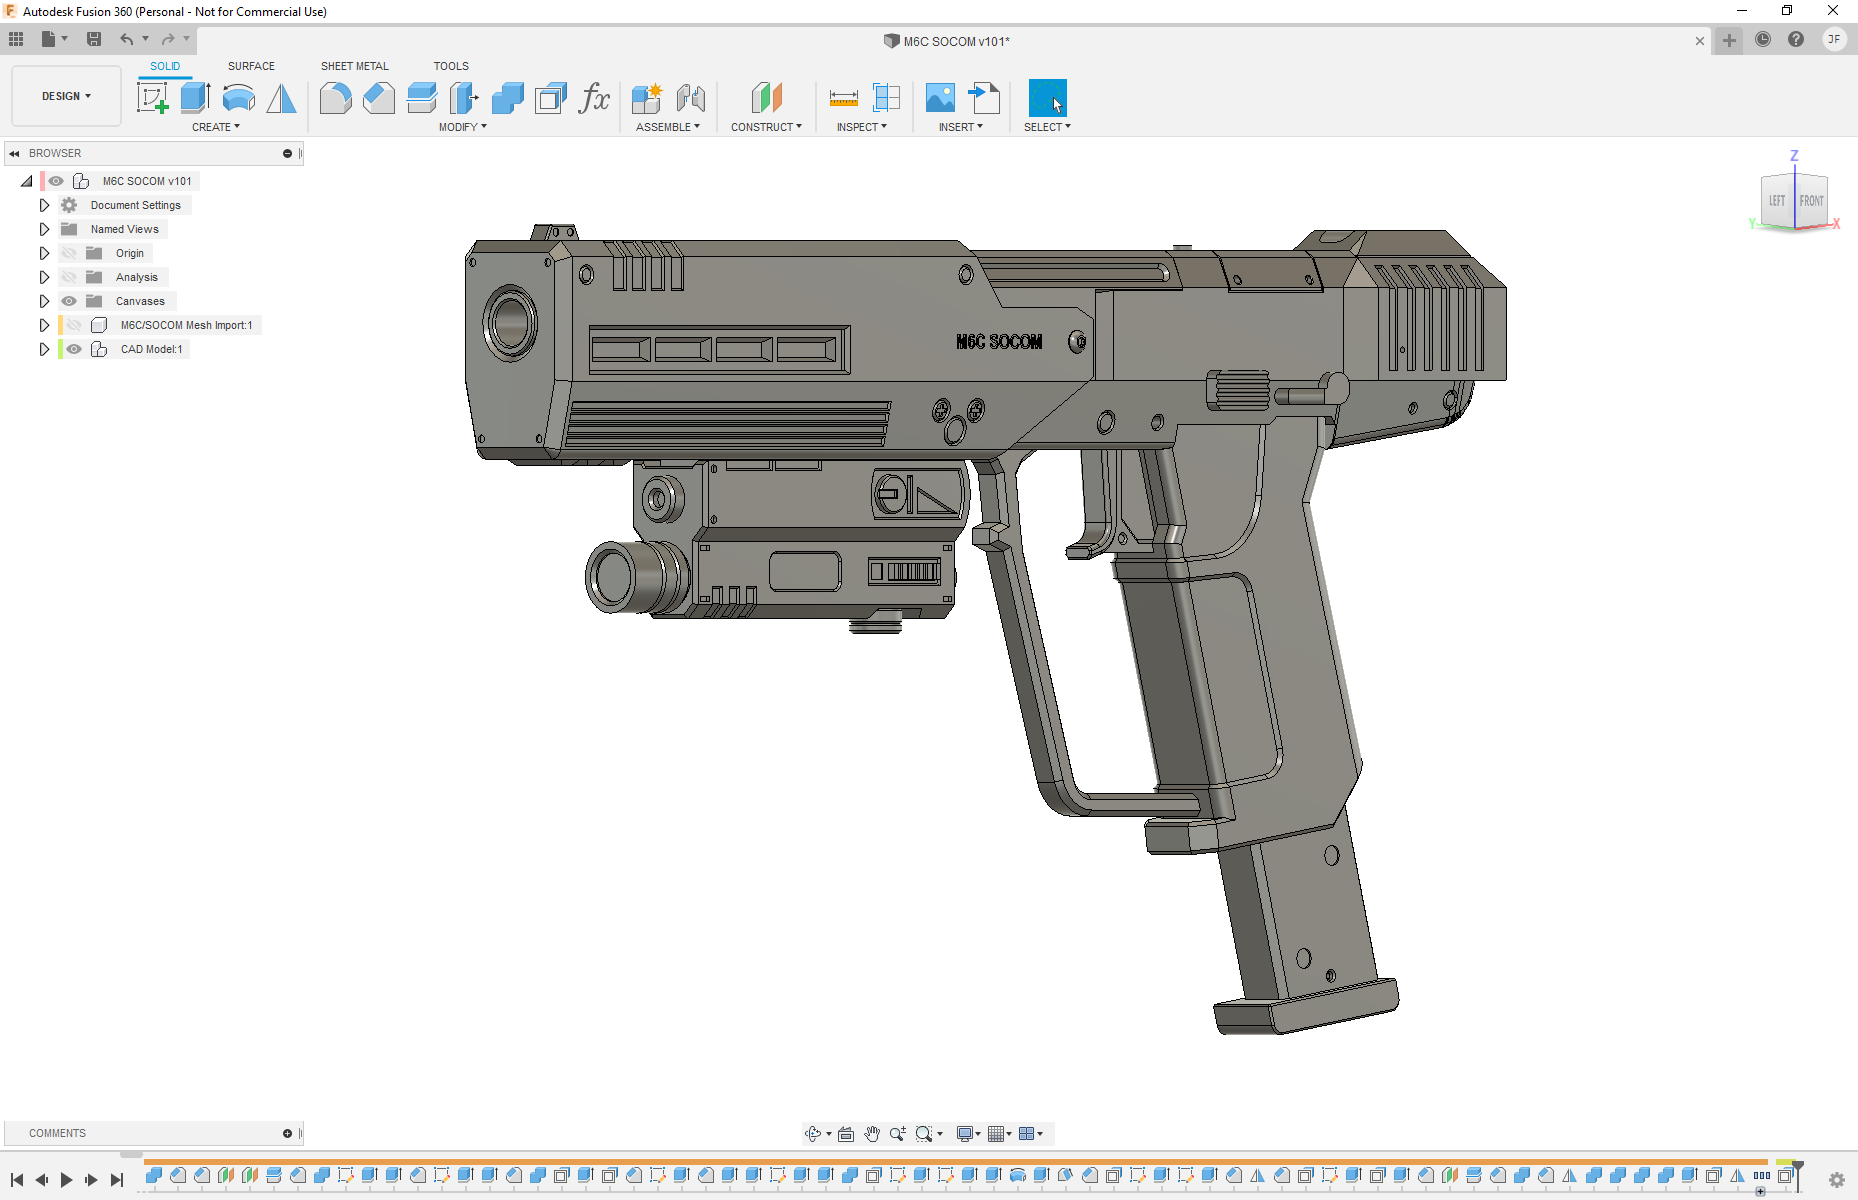
All that said, I felt it was time to add a bit more novelty to the model. For one of the replicas of the SOCOM, that I’d been using as reference, it’s maker had embedded a small flashlight in the model to actually make the flashlight functional. I decided I wanted to do the same, and picked up some similar, small flashlights to take dimensions off of and use myself. I’m a little sad that I didn’t also attempt to add in a laser pointer as well, as another maker had done with their replica, but I wasn’t really sure how I was going to make it work out properly. That was okay though, I was happy enough with just the flashlight being functional.
With the model finally finished and to a point where I was happy with it – it was time to print all the parts out and assemble it. As with any 3D print, this was the part that always seemed to take the most time. While it was printing, I was still feeling creative and wanted to play around with the render function in Fusion 360. Working with what colors and materials there were in Fusion’s palette, I mocked up the model as best I could and gave it a render at several camera angles. I like to think it came out pretty well.


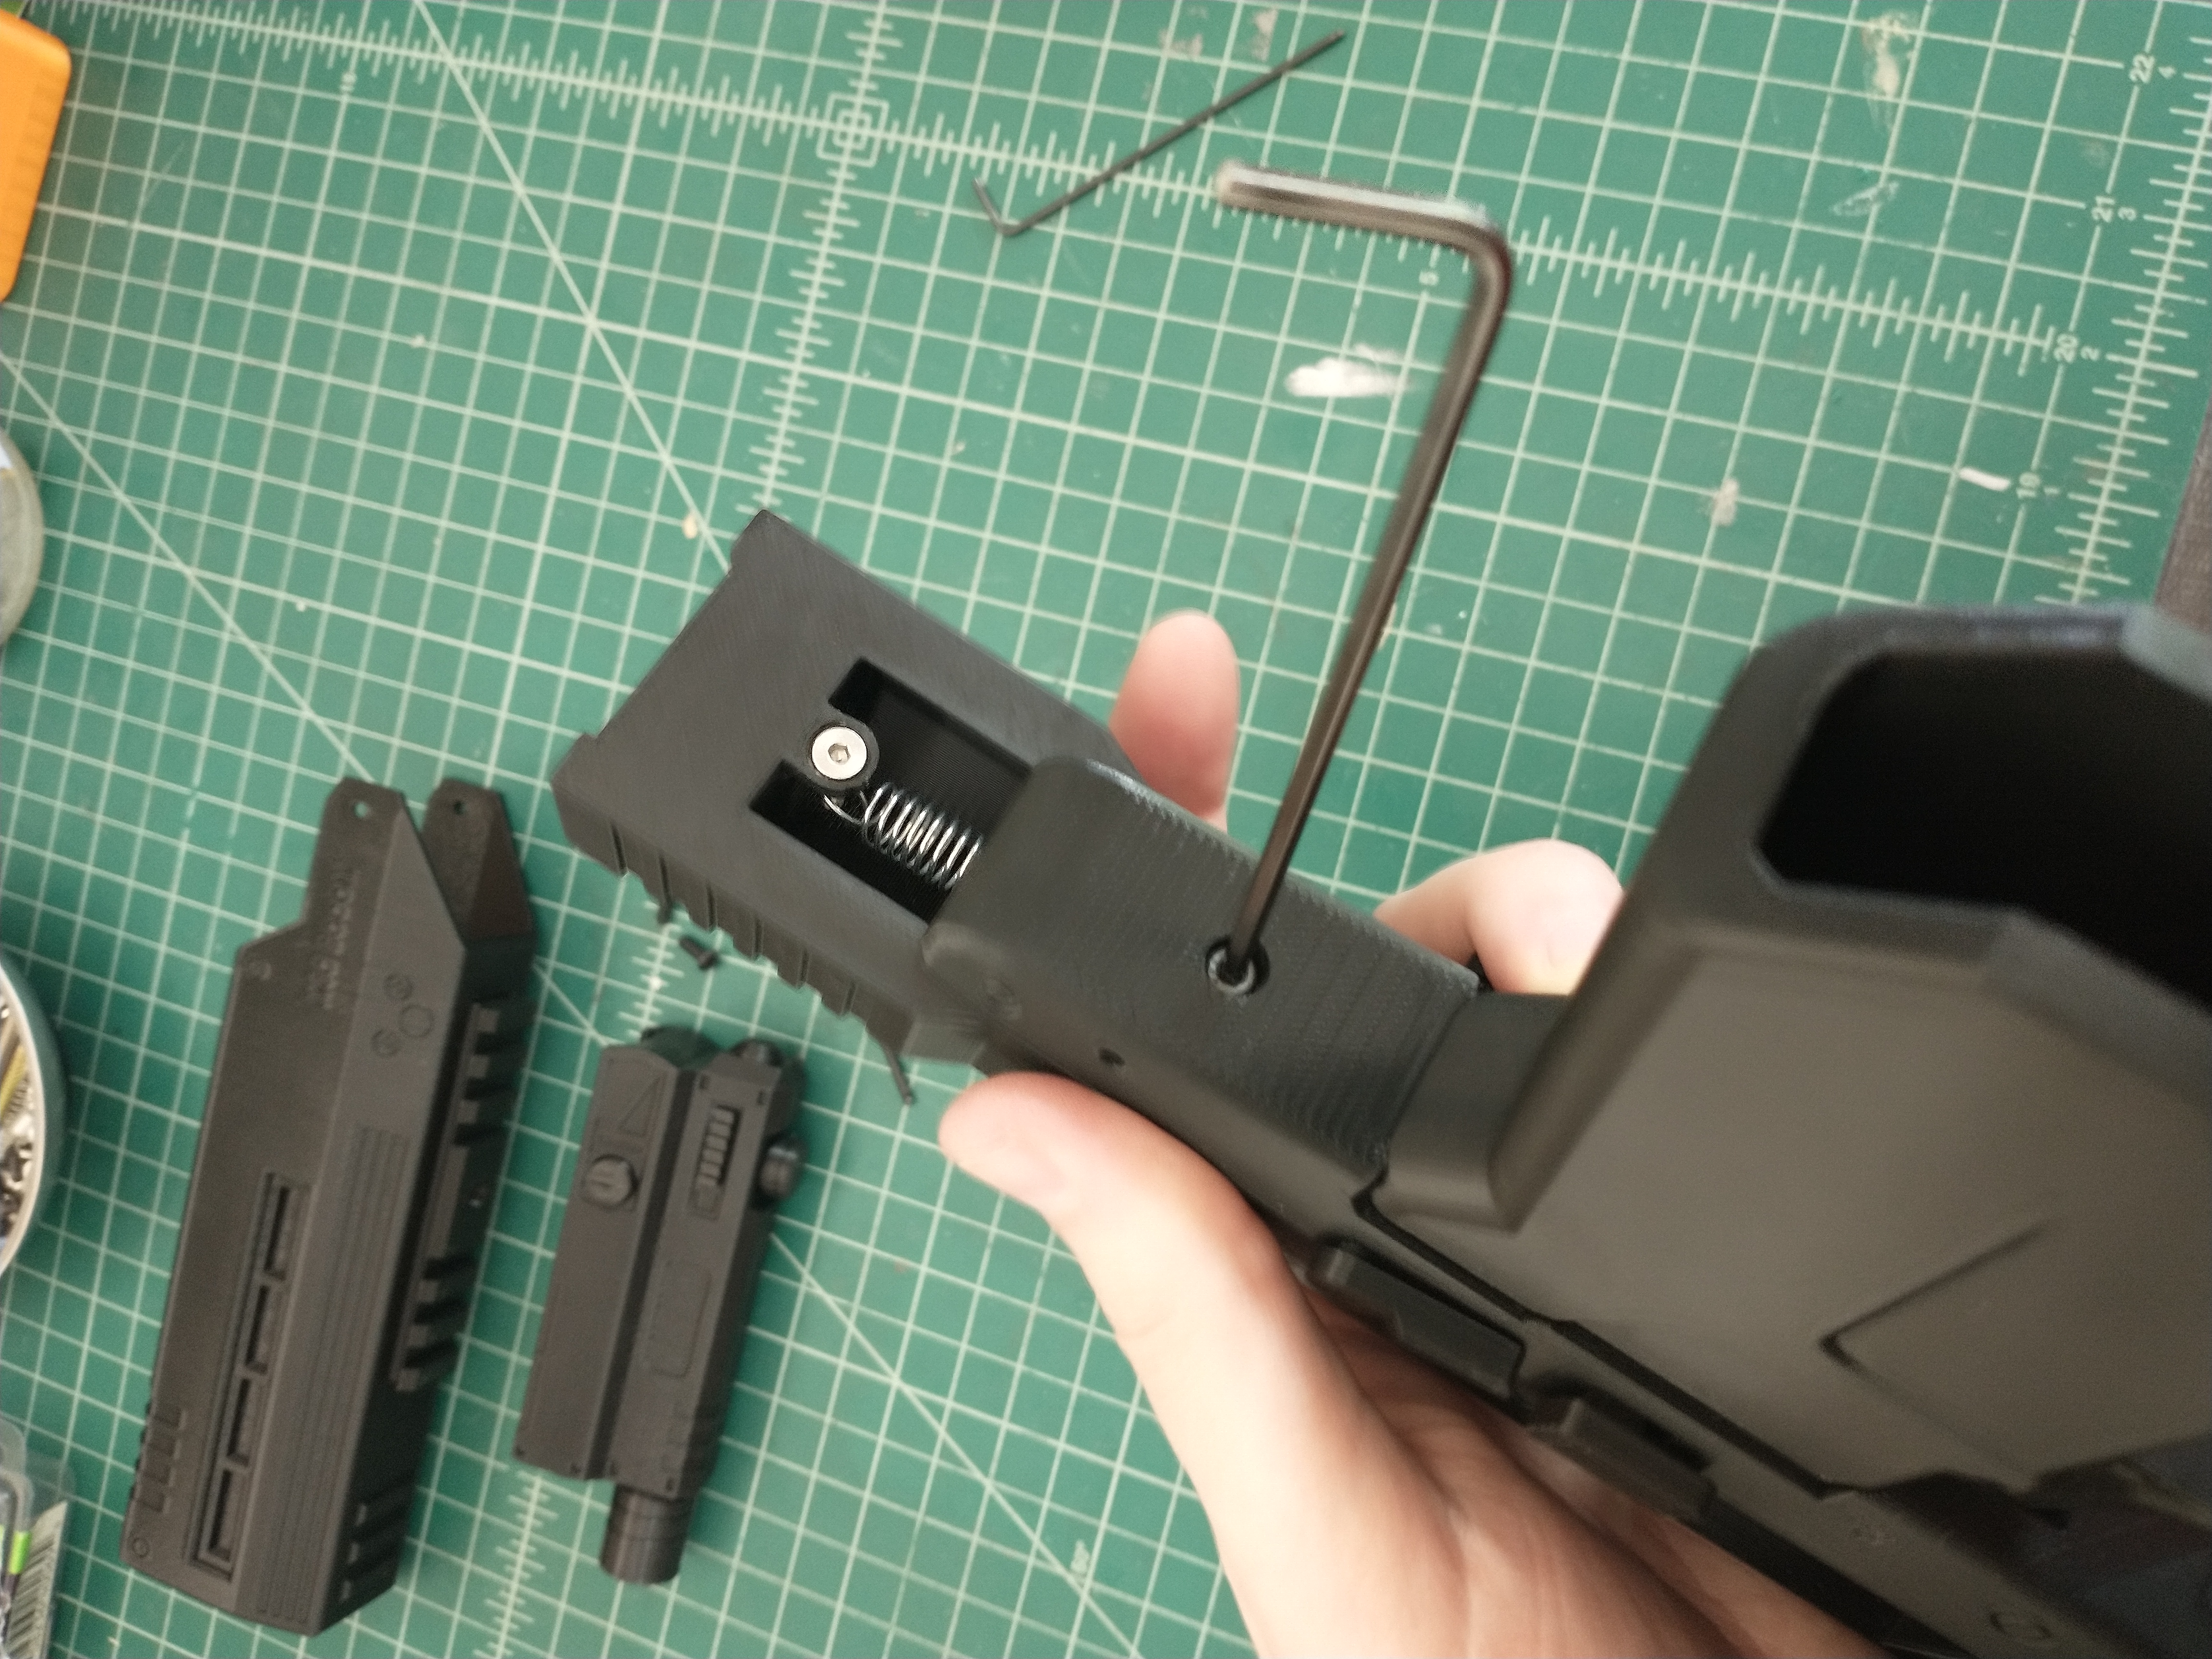
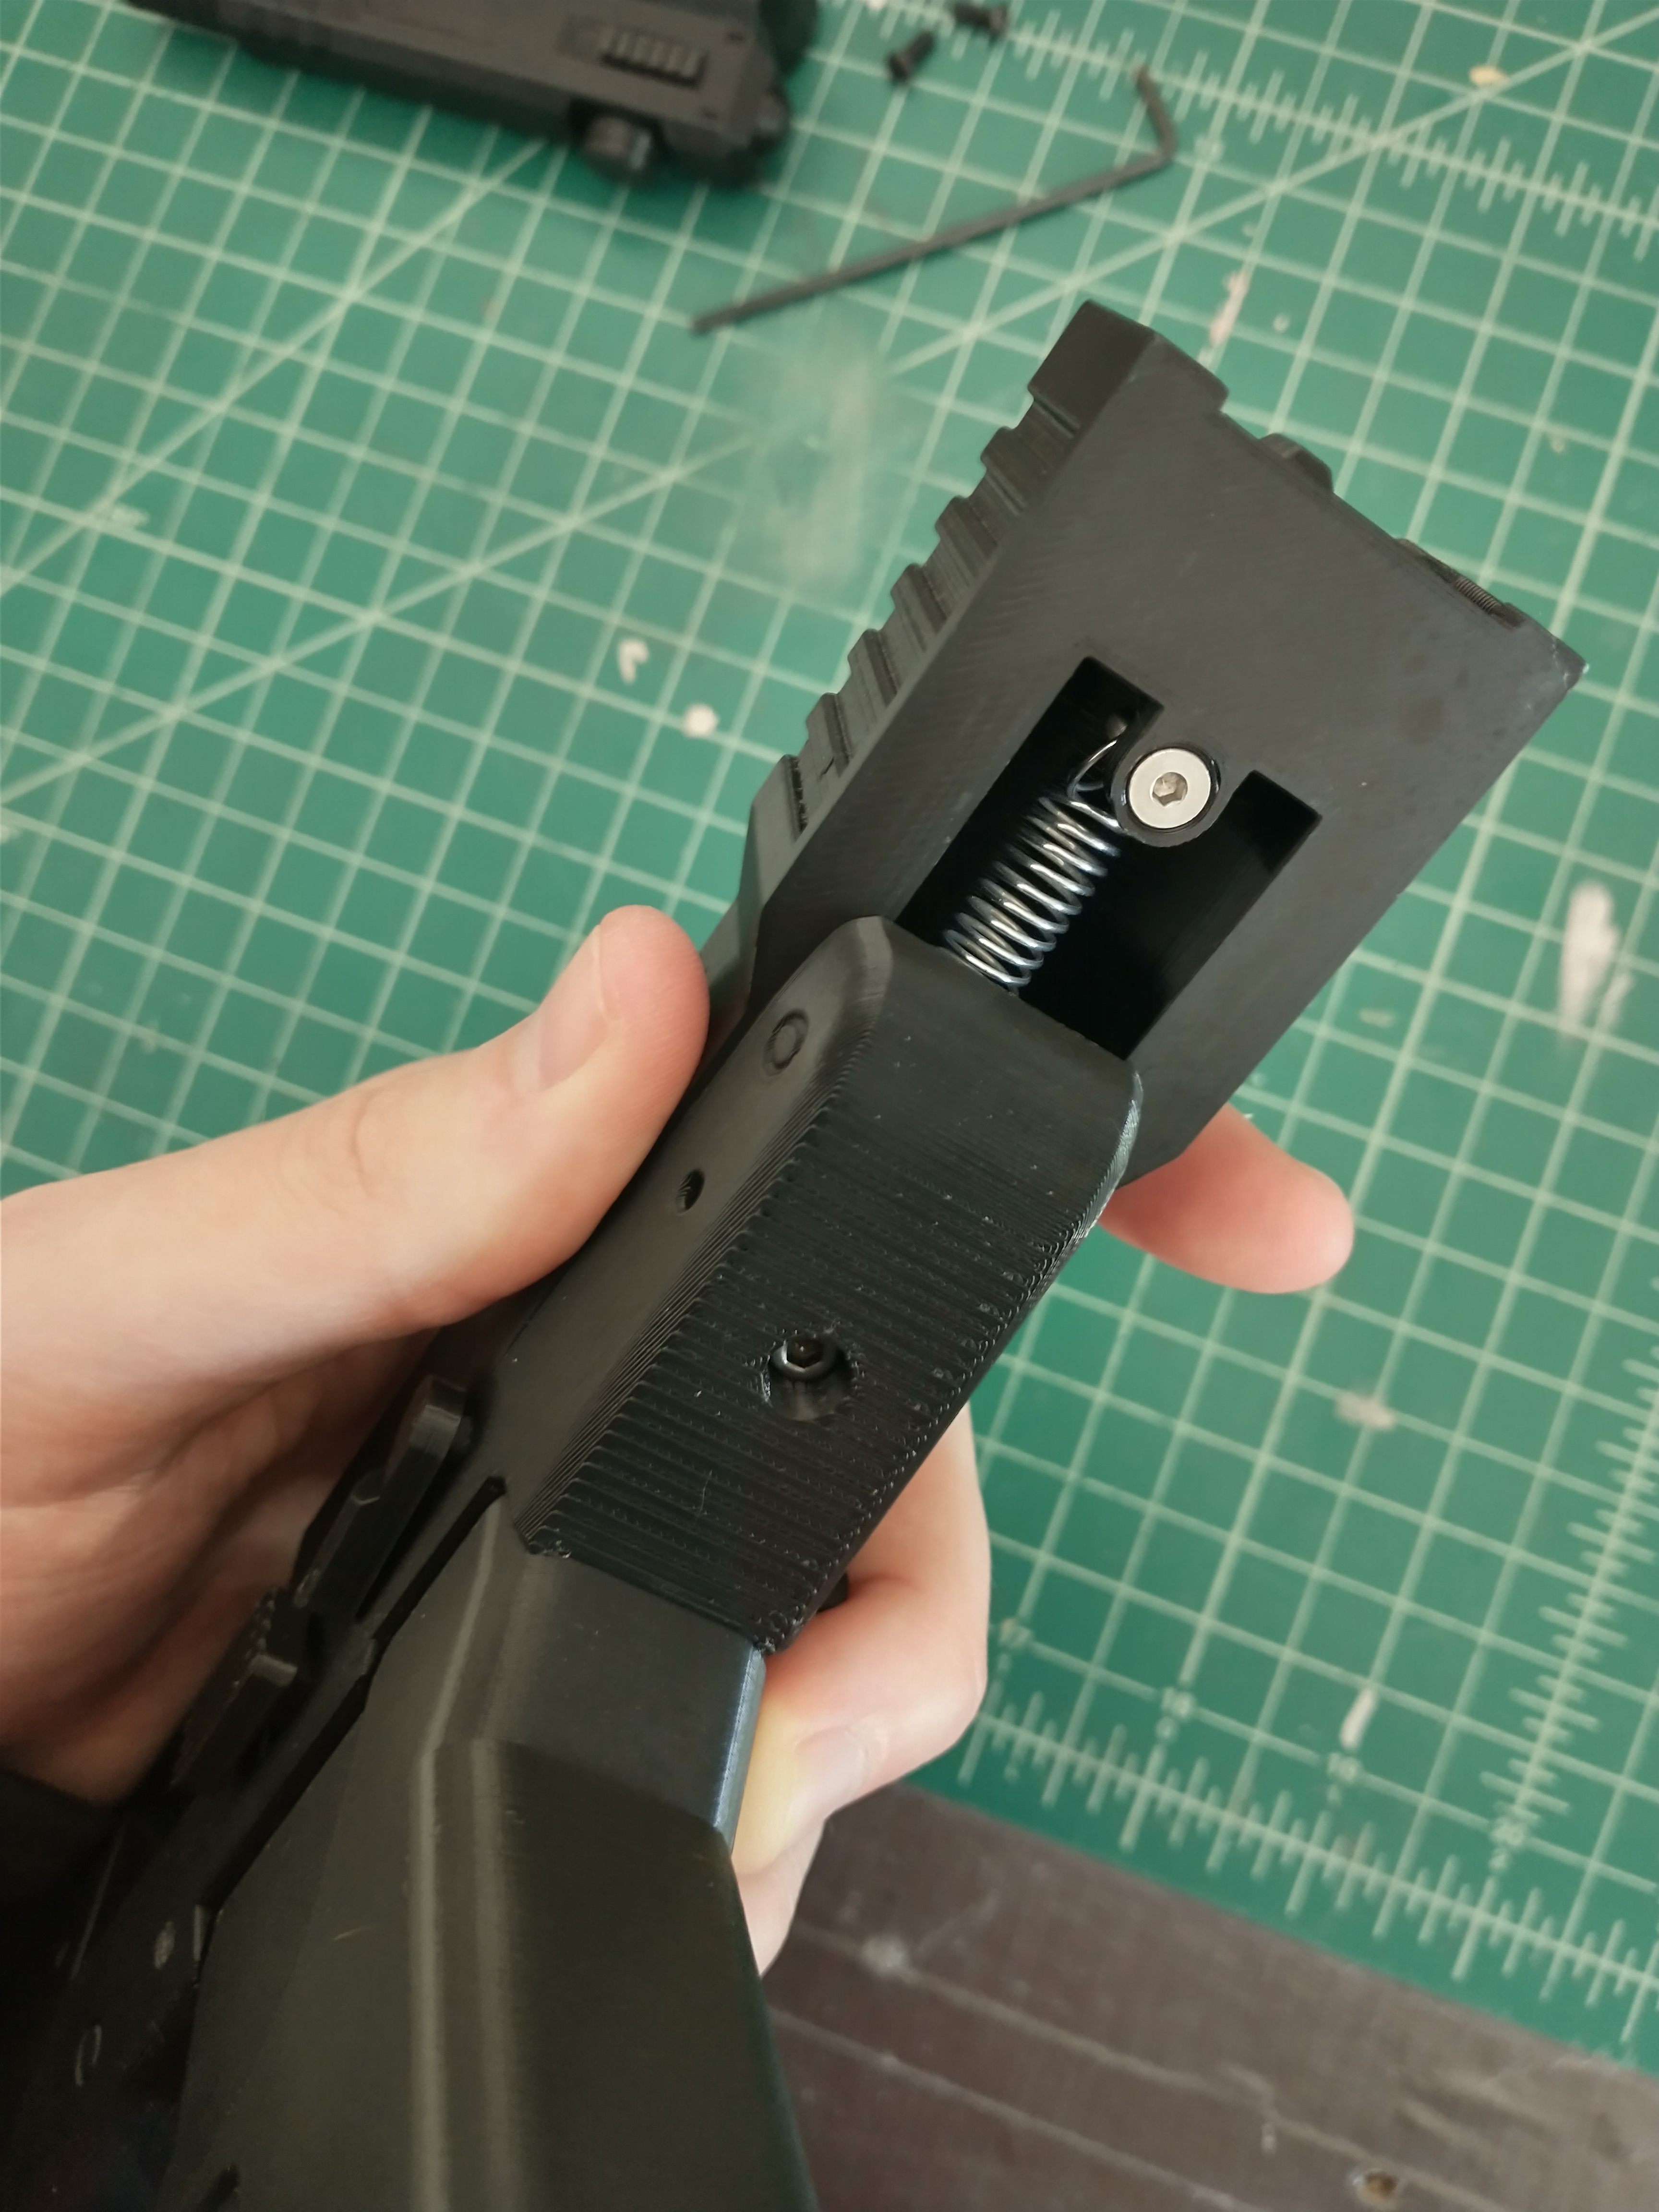
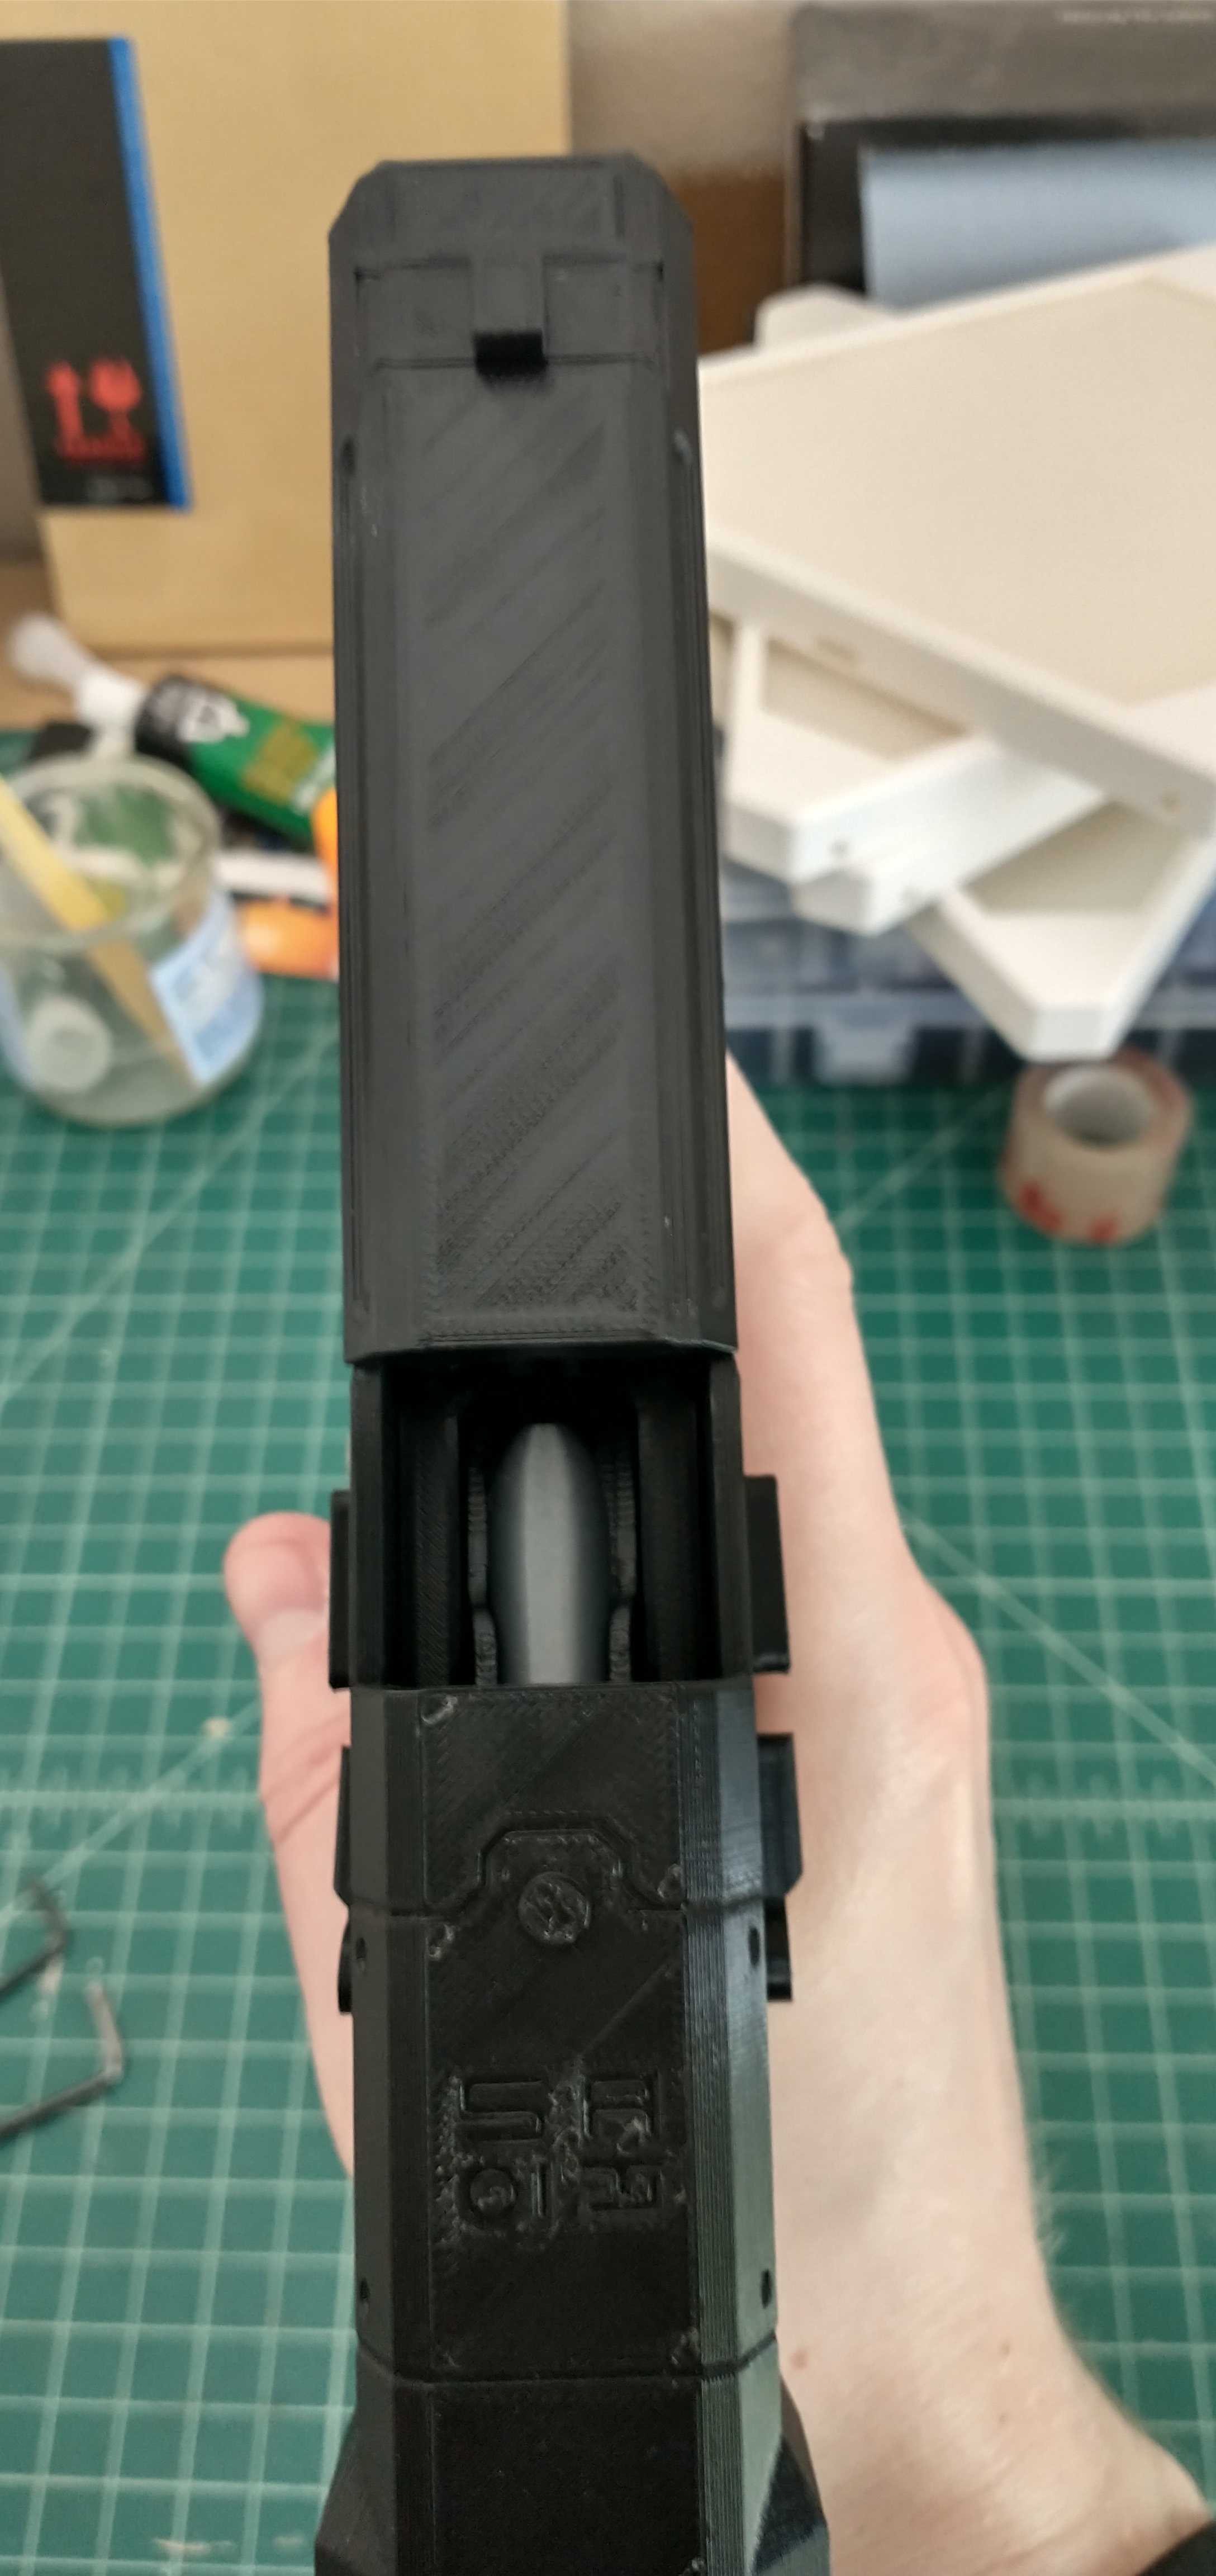
Once the parts had finished printing, it was time to assemble what I had and make sure it all fit correctly and worked the way I expected. And, so far so good. Everything lined up and went together fairly easily. The most challenging part of the assembly to deal with was the spring for the slide. I’d toyed around with using a compression spring in a similar manner to one replica I’d found online. But, I just couldn’t get the design right, and without ordering custom springs I wouldn’t get the travel distanced I wanted out of the slide. So, I’d settled for using a tension spring instead. With how I’d designed the body and slide, there was really no good way to access the inside to install the spring with the slide on. But I couldn’t take the slide off, cause I needed it to be mounted on the body of the pistol to attach the two together via the spring. In one of my test 3D prints of the model, I’d tried installing one side of the spring on the body and reaching trough the bottom of the slide to pull the spring back and slip it over the pin on the slide, but that seemed to just end in failure no matter how hard I tried.
After scratching my head over several ideas, I ended with using a detachable rail for the slide to ride along. This allowed me to remove both the slide and rail with the spring attached. And when assembling the pistol, I was able to move the slide back while holding the rail in place and screw it to the body. It was an awkward operation to install the spring, slide, and rail, but it was the best I’d been able to come up with and worked all right for the most part.
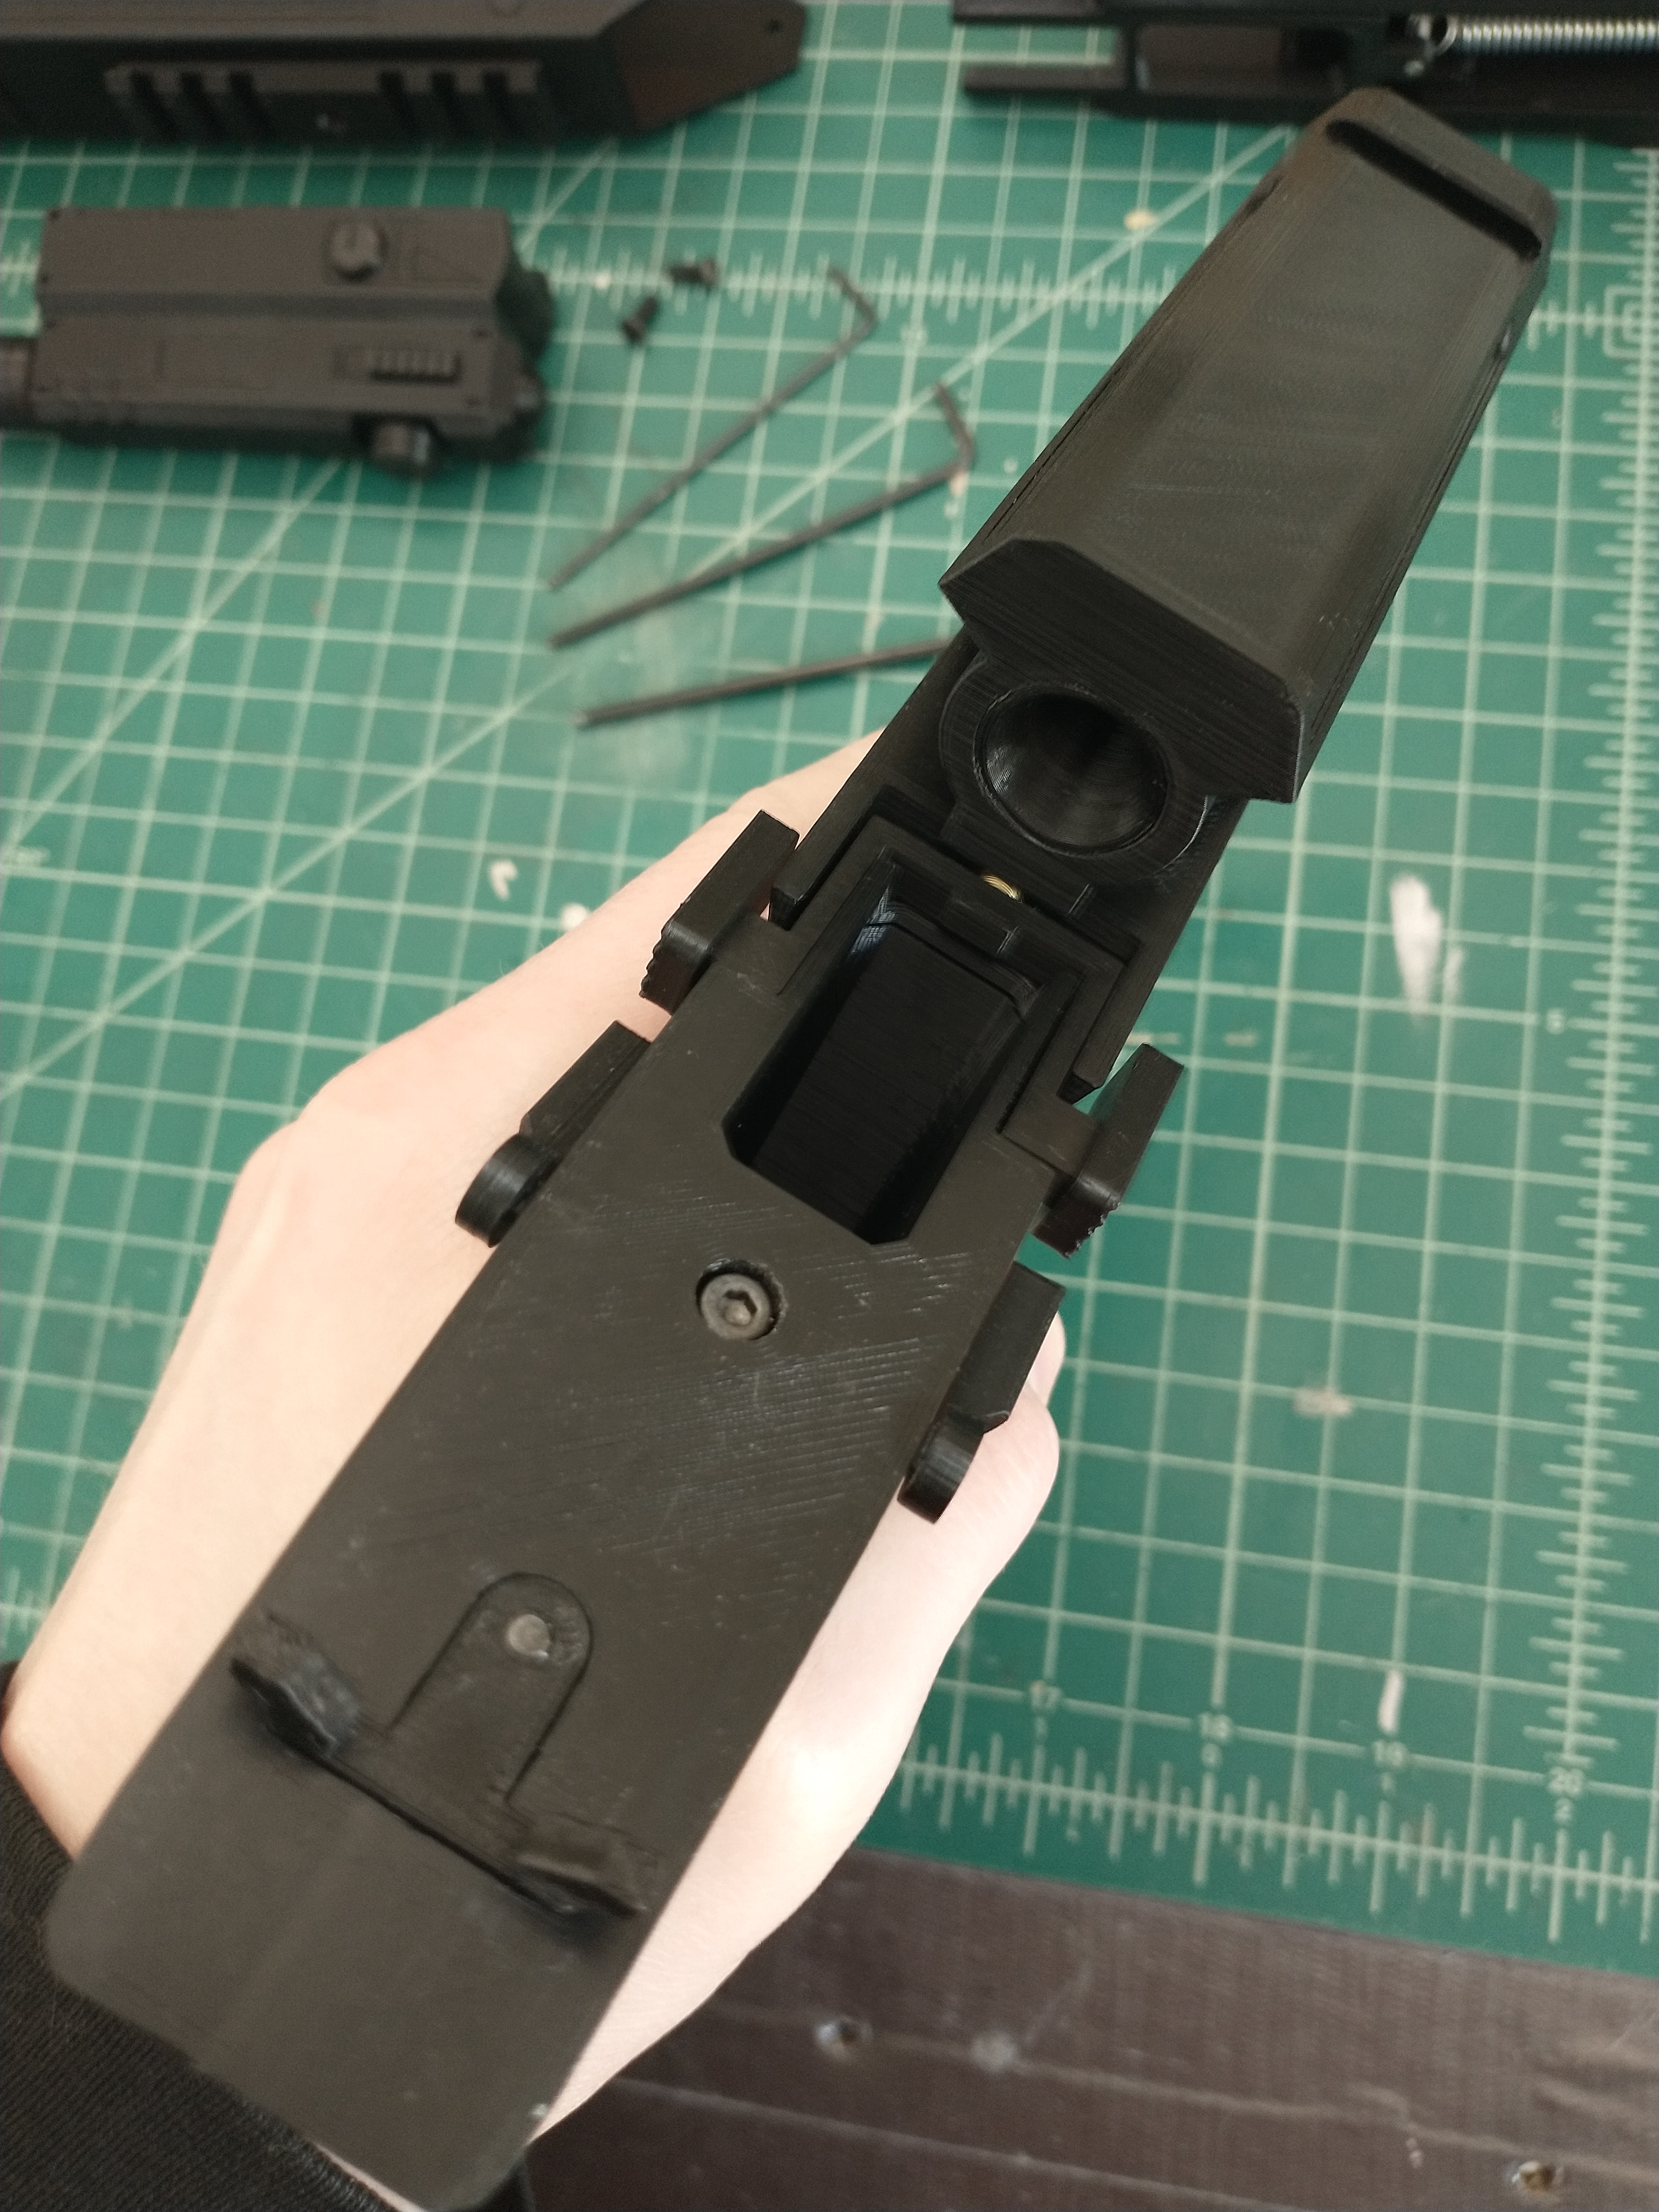


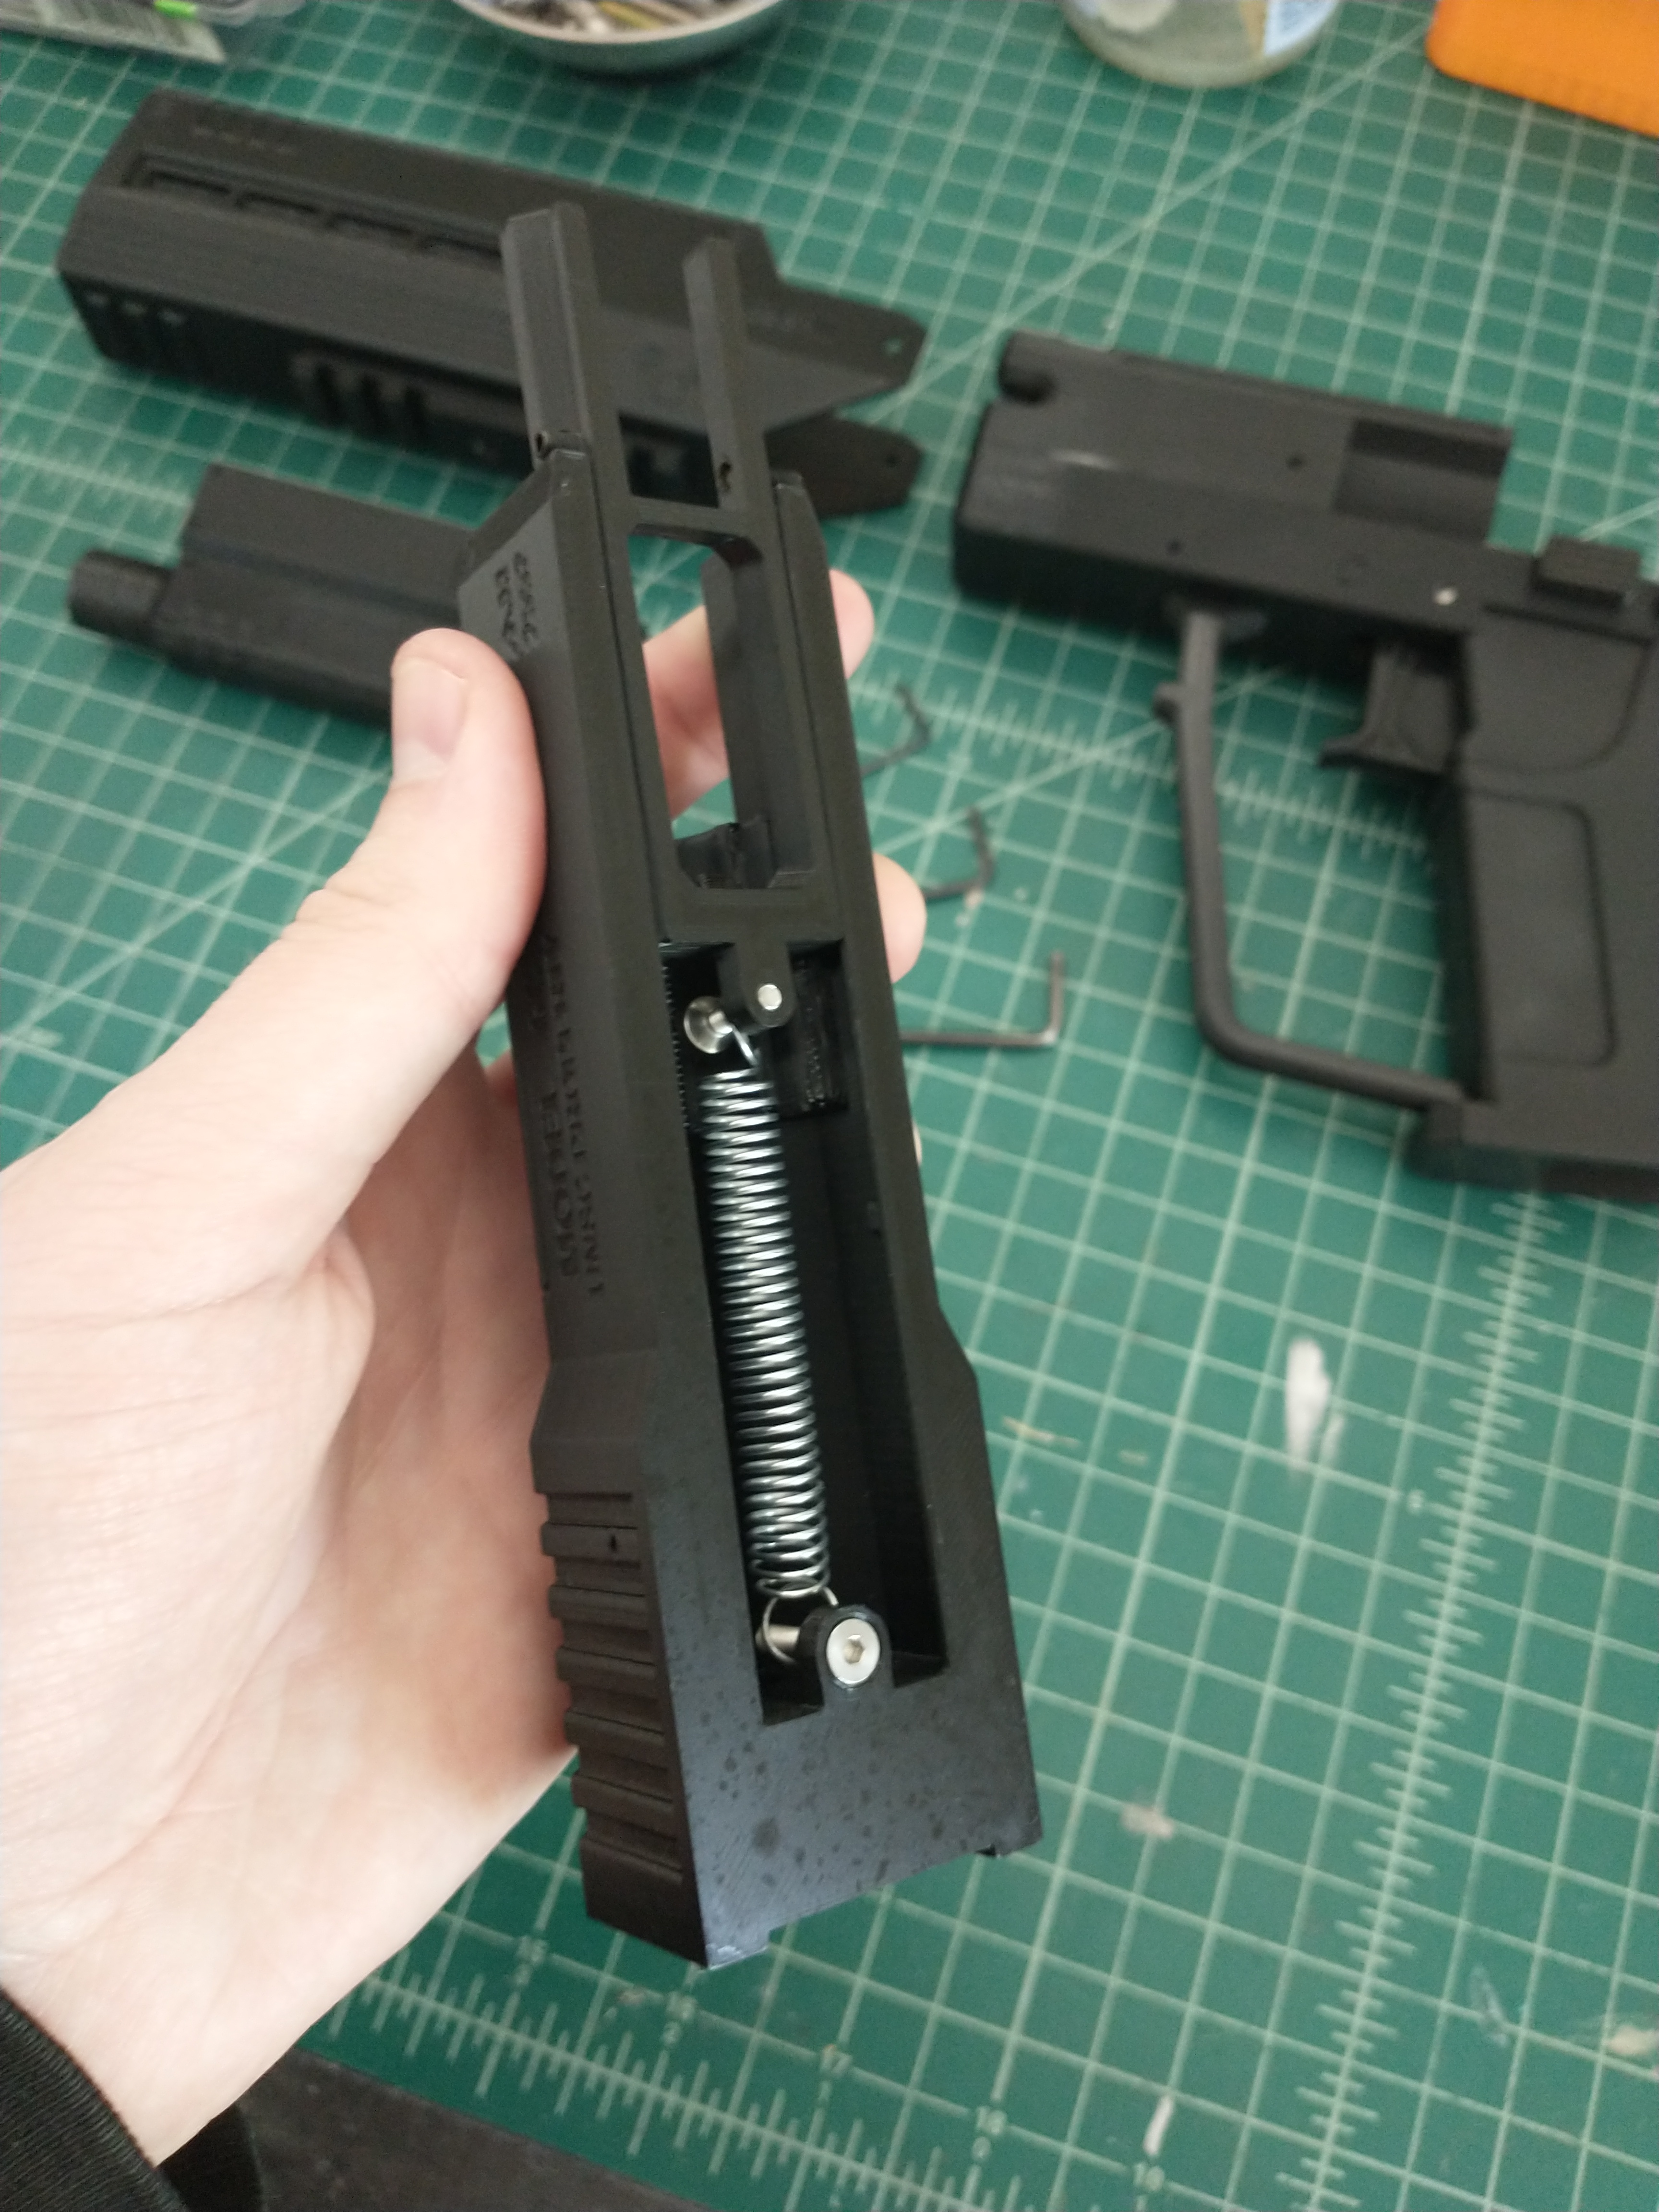
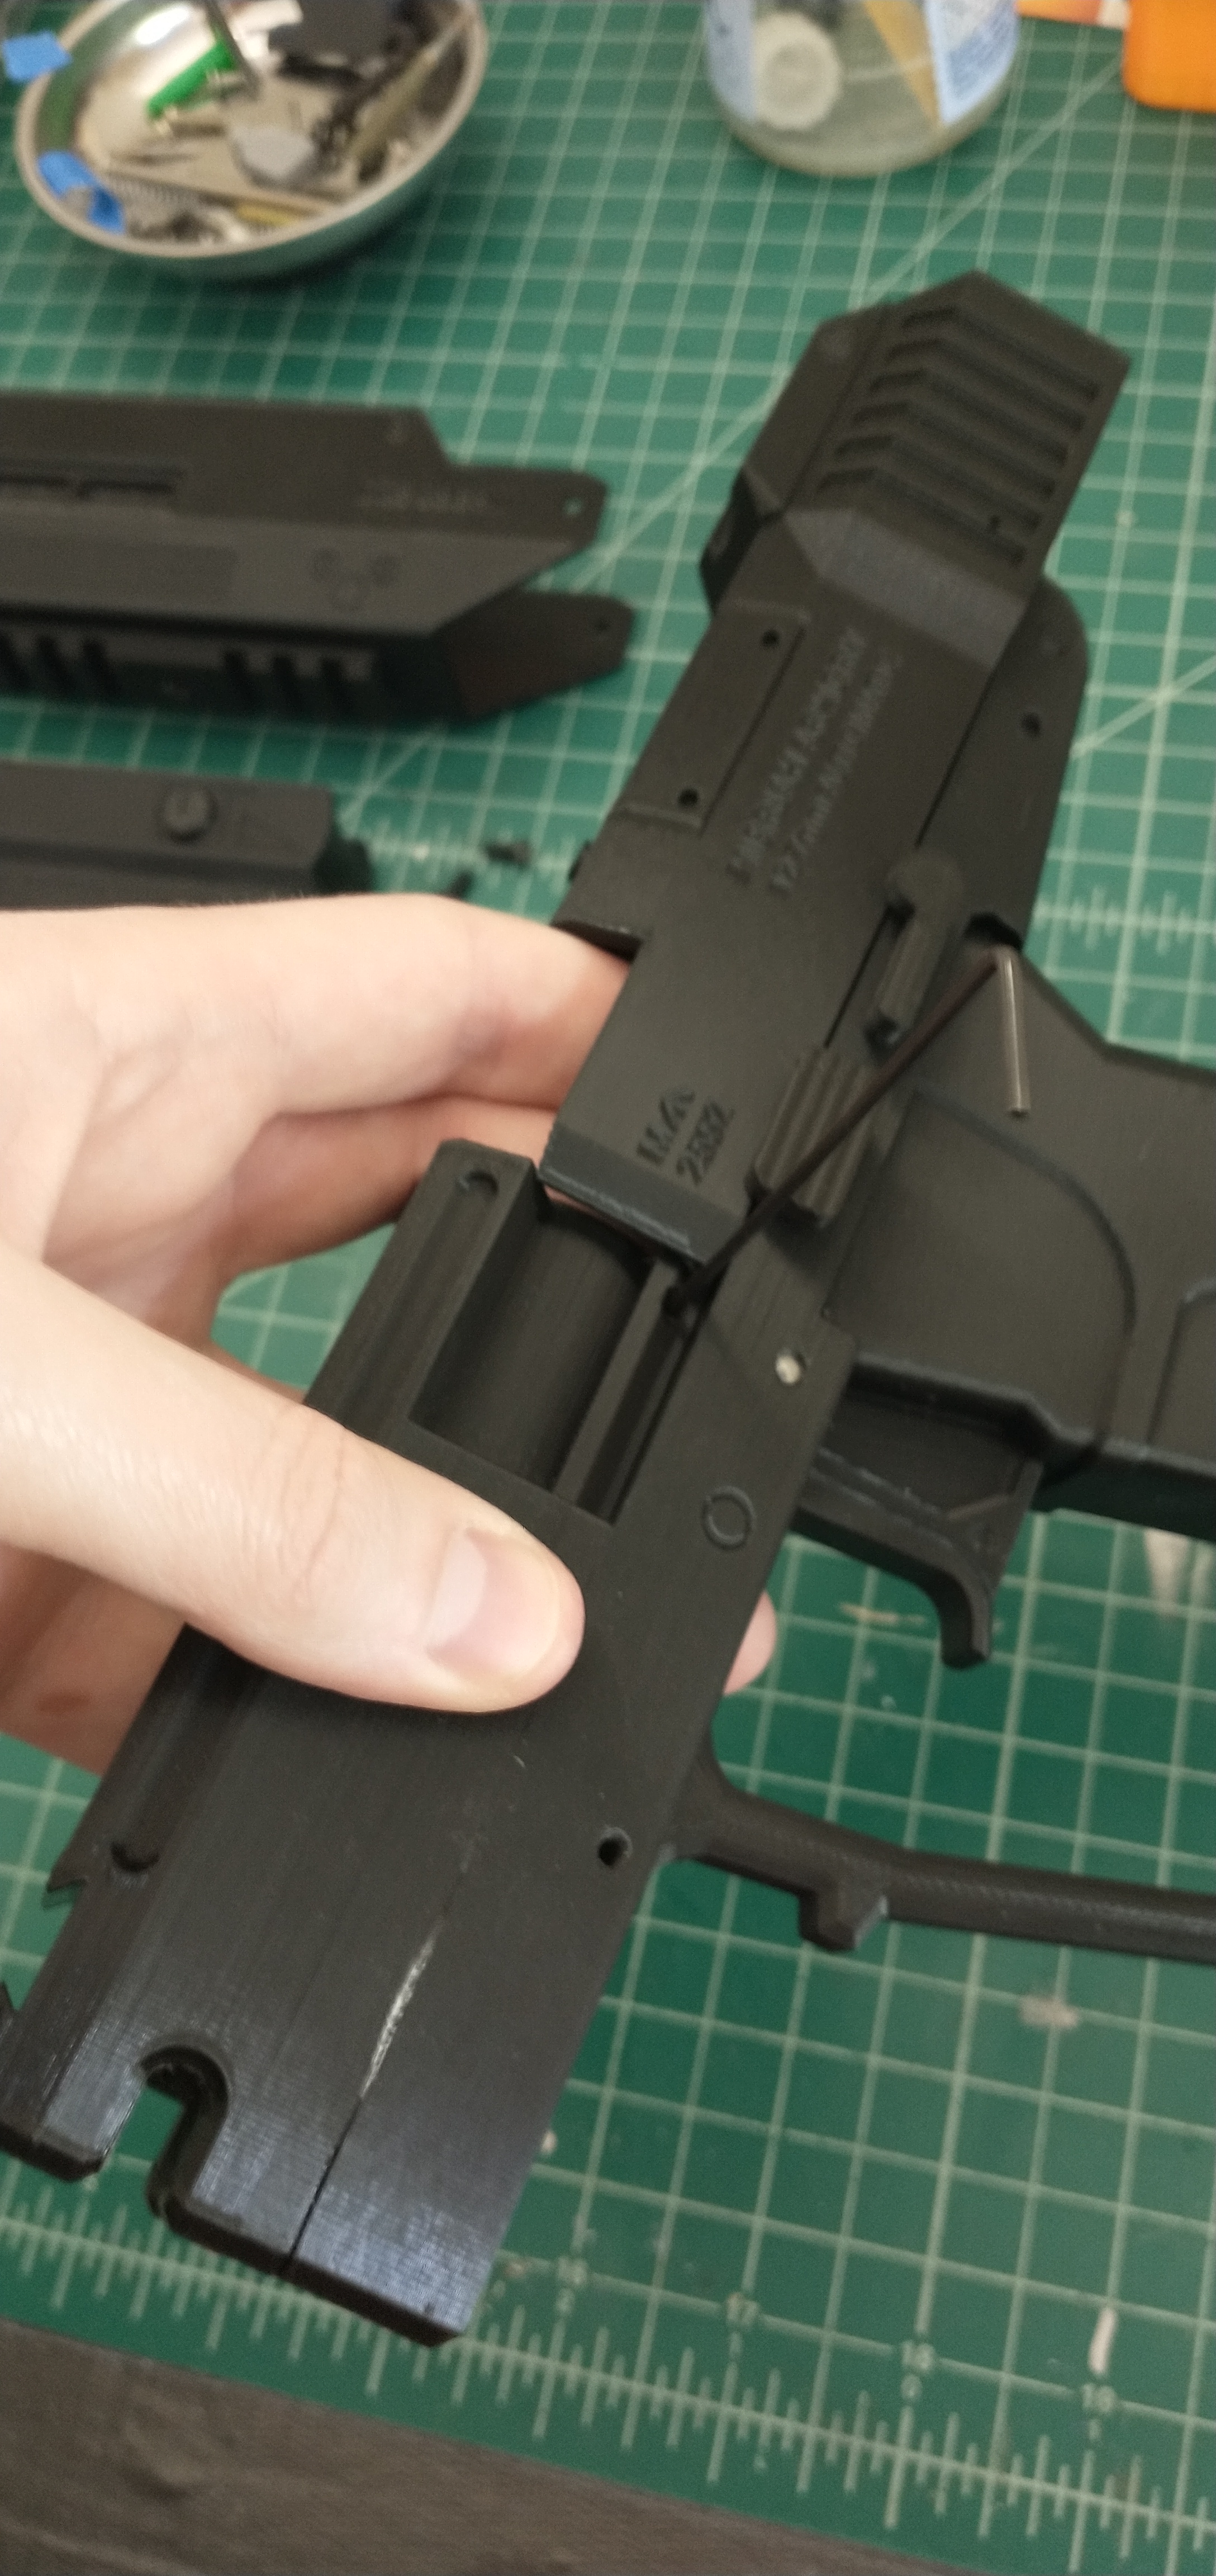
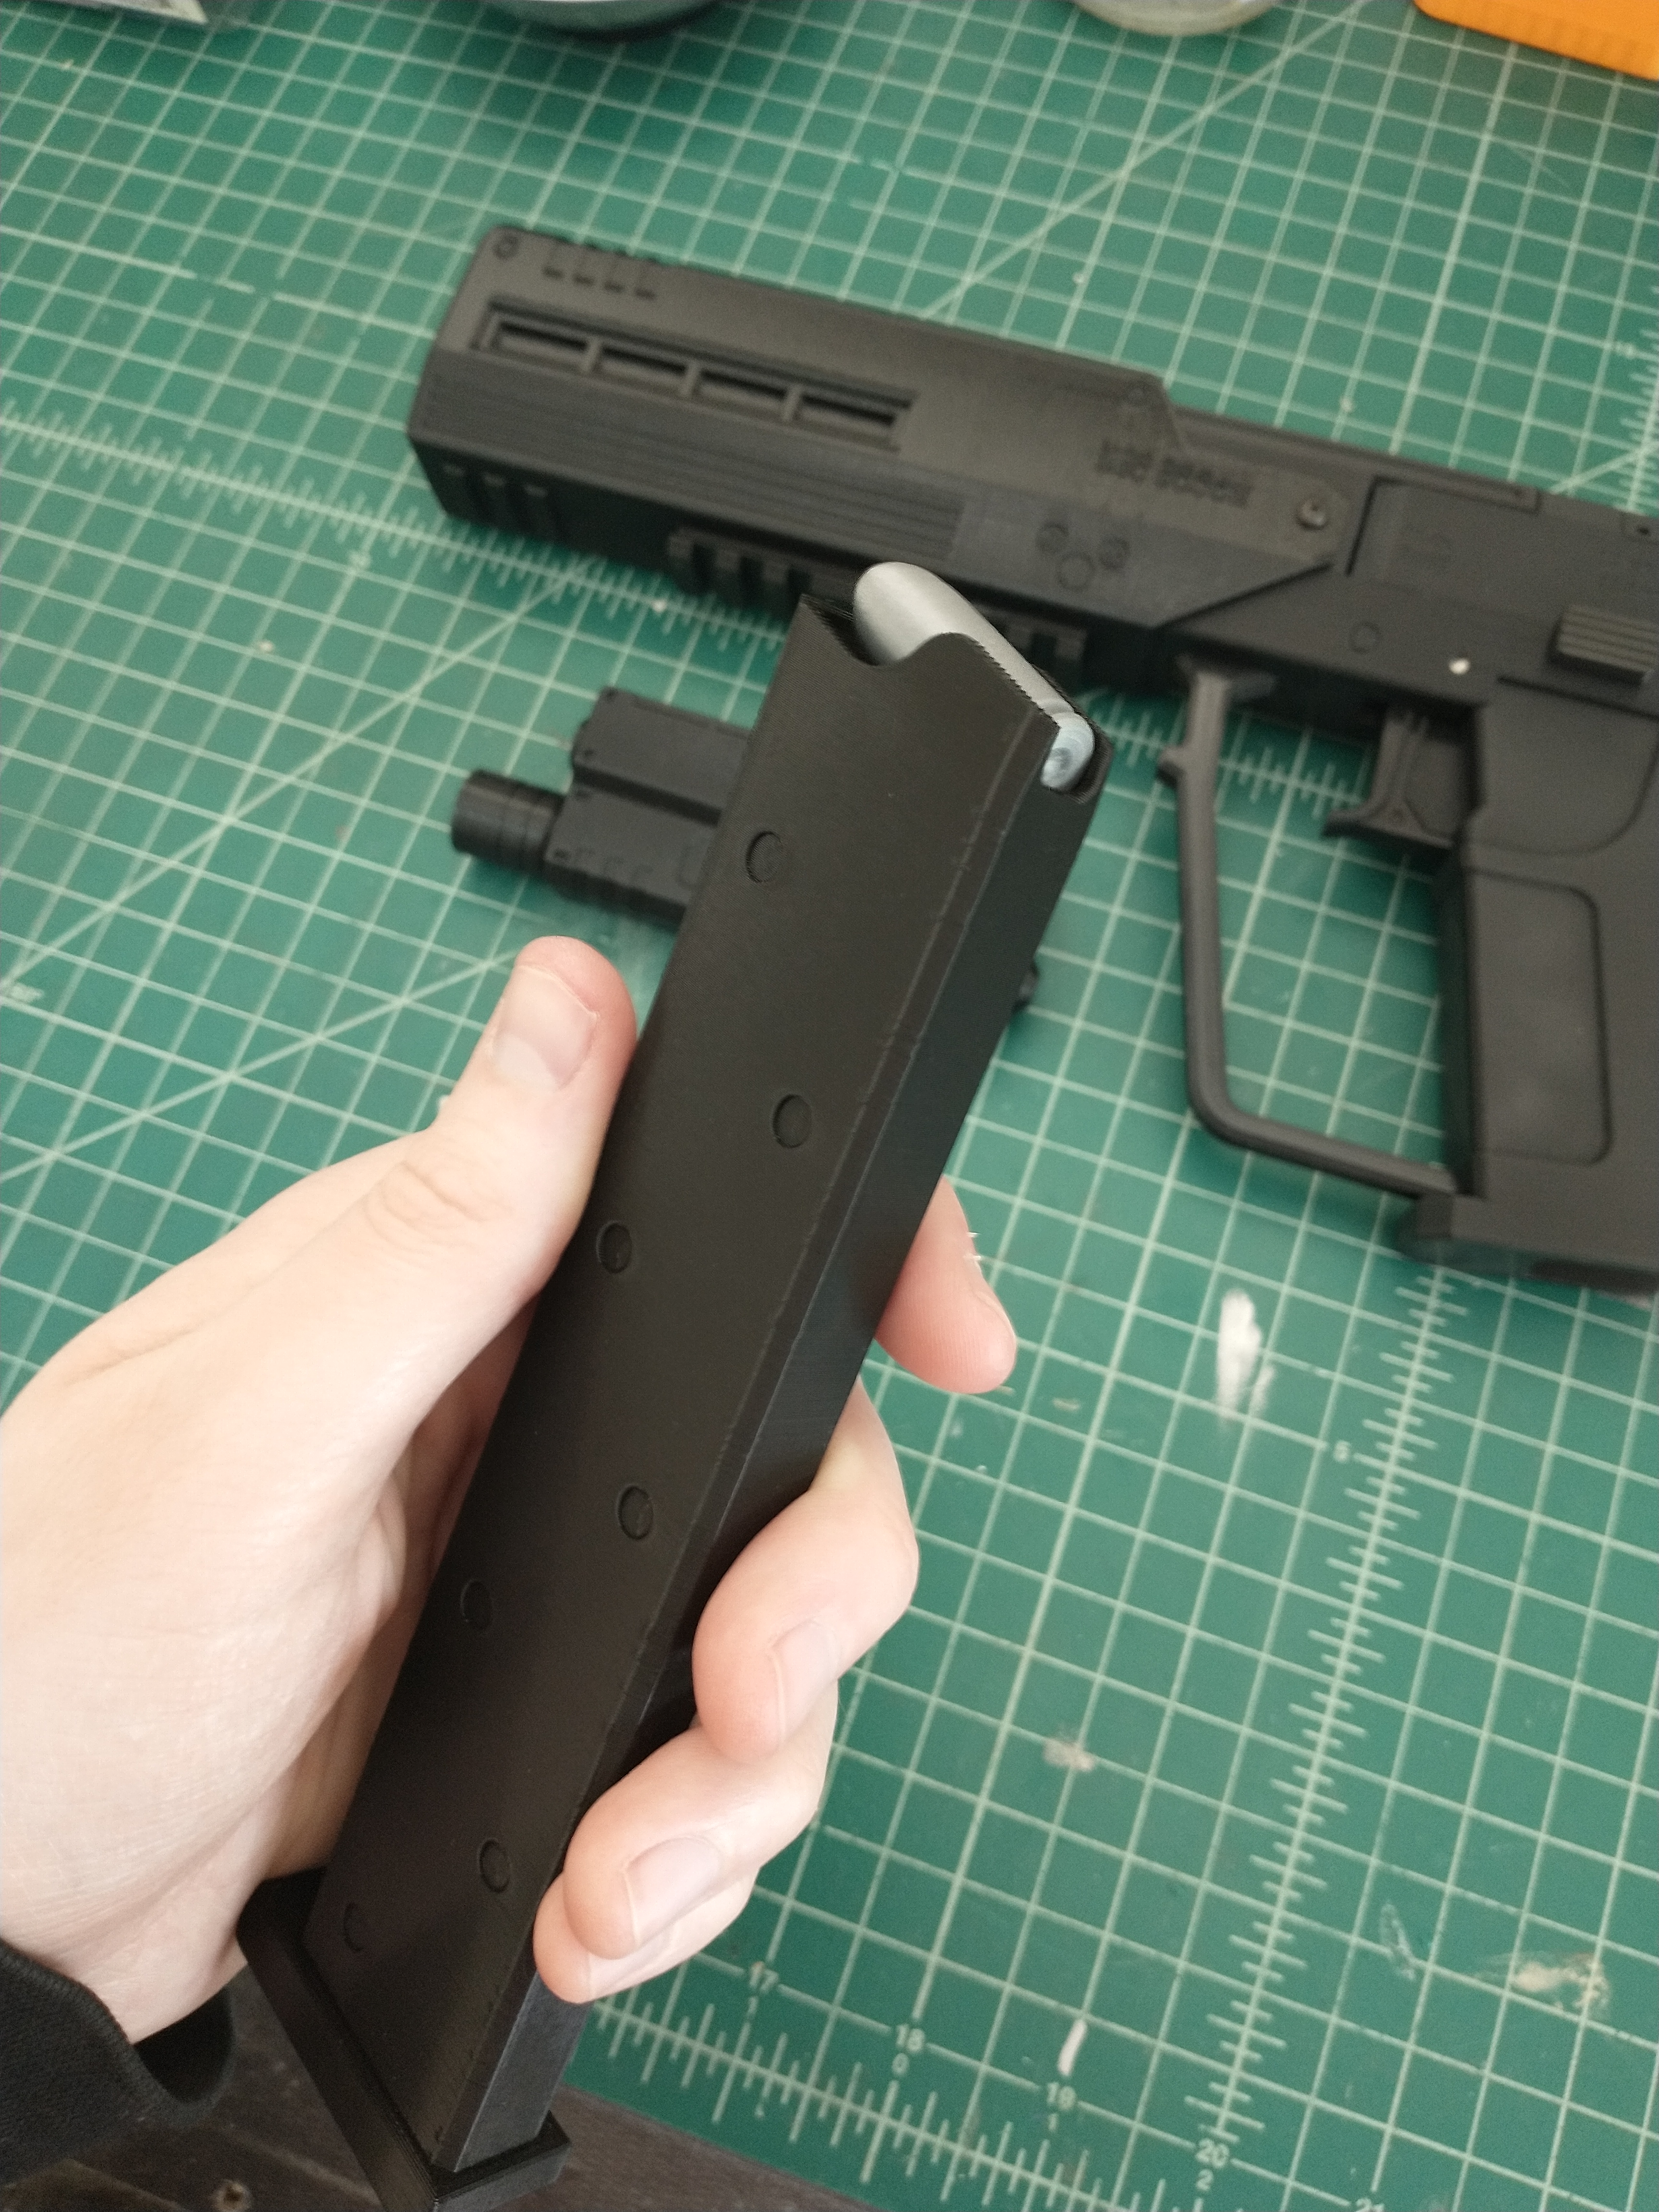
The additional challenge I’d had in the designing of this replica, was the ammo clip. I was thrilled that I’d figured out how to make a functional (albeit simple) release for the clip so that it was removable. The challenge though lay in it holding the ammo. I’d originally thought it would be a novel idea for it to hold the same amount of bullets as in the game, and there was plenty of space to do that in the model. However, I’d again need a custom spring similar to a real ammo clip to make it work, and there was no way I was going to go the distance to get a custom spring like that. In the end, I settled for just a simple clip design with a single bullet showing at the top. It still gave the replica the cool functionality of being able to pull the slide back and see the bullet ready to be chambered.
Last thing to do was to design a mount for it to hang on my wall. As it was, the raw 3D print looked pretty great without any finishing, and I wasn’t feeling in any rush to dive into the long and arduous task of sanding and painting it. No, I figured I’d save that for another day. There were other projects I wanted to get on to at the moment. Something to do for the future.
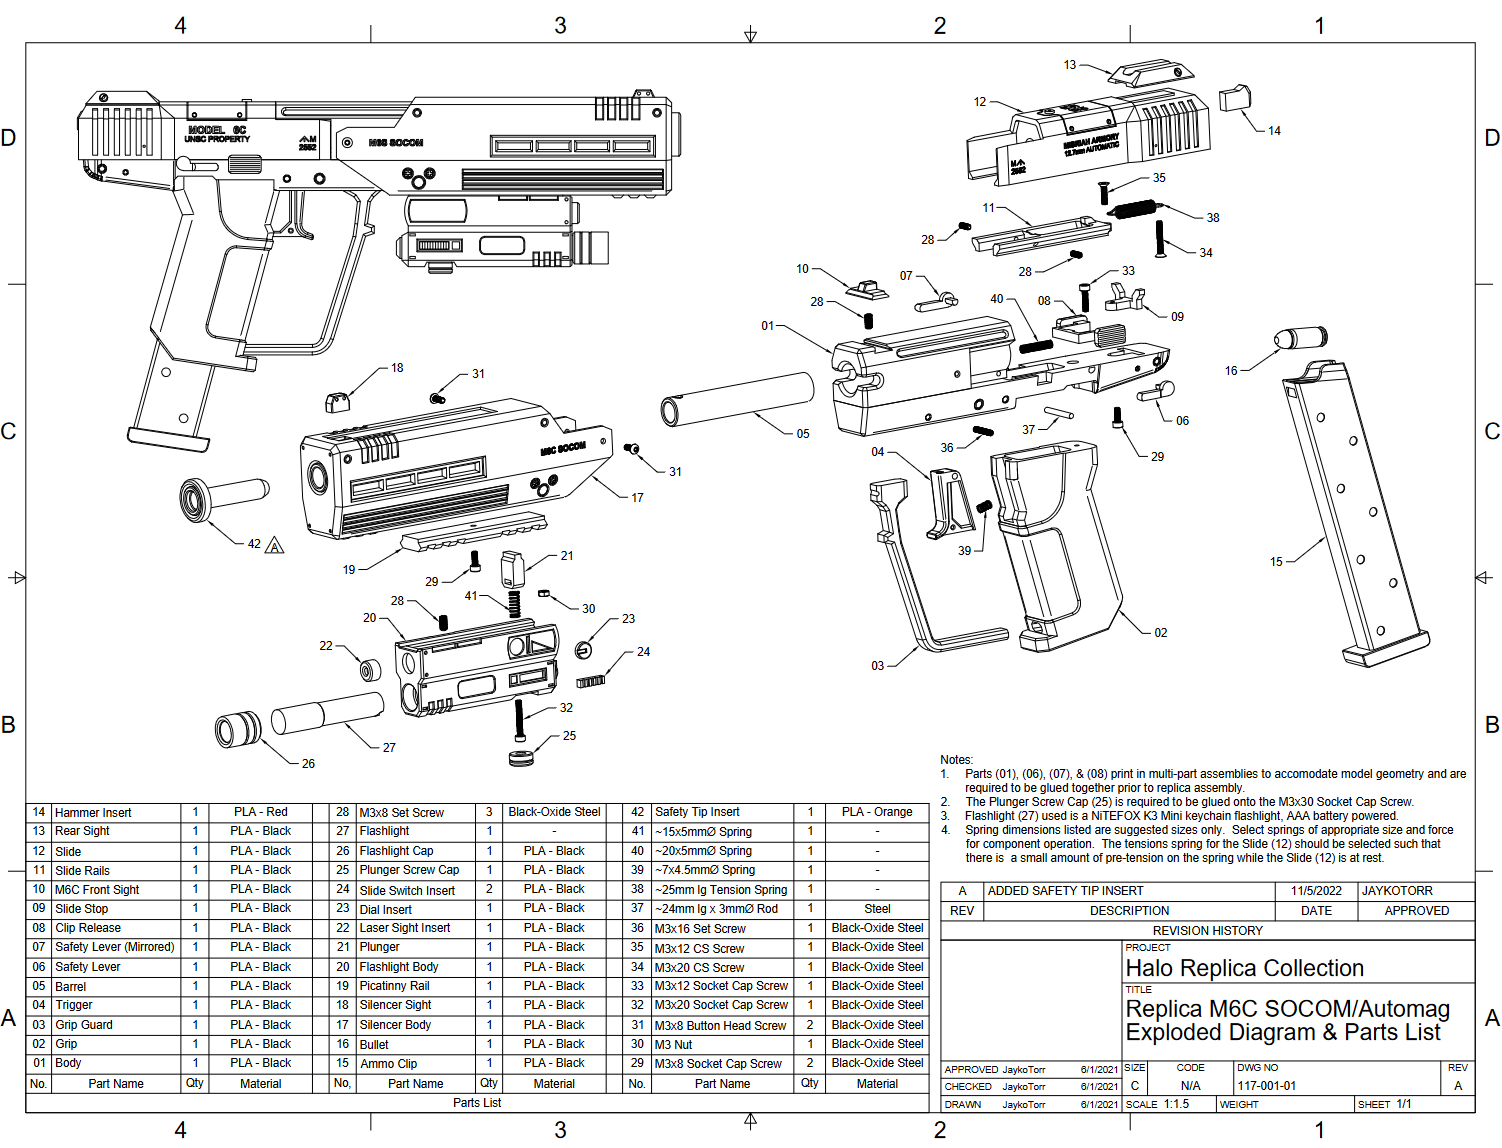
Instead, I decided to put my energy toward something else I’d wanted to try with the CAD model I’d created for this project. I’ve always found blue-prints and assembly drawings of complex items fascinating (makes sense considering my engineering background). With that in mind, I wanted to attempt at least a projected view of the model I’d worked to create. I also wanted to attempt a set of assembly drawings, showing how to put the replica together, with a bill of materials and all, but Fusion 360’s drawing interface really left a lot to be desired in that department. For now, a projected view drawing would suffice. Finally got around to making the assembly drawing with the bill of materials. The projected view was neat, but this is much nicer, and better shows off the complexity of the replica.
And with that, I’d completed my first Halo replica, the M6C/SOCOM Automag from Halo 3: ODST.
