Sometime after I’d finished my last ‘large’ project, the Laser Rifle replica, I decided I wanted to take on another ‘large’ project. In my early days of owning a 3D printer and attempting to print “All the things!”, I’d attempted to print and assemble a helmet. That attempt, and I call it an attempt for this reason, didn’t go so well, and I consider it a bit of a failed project, maybe a story for another time. But, I wanted to try again, and having some experience under my belt and some ideas from watching Punished Props on YouTube, I felt more confident in my abilities.
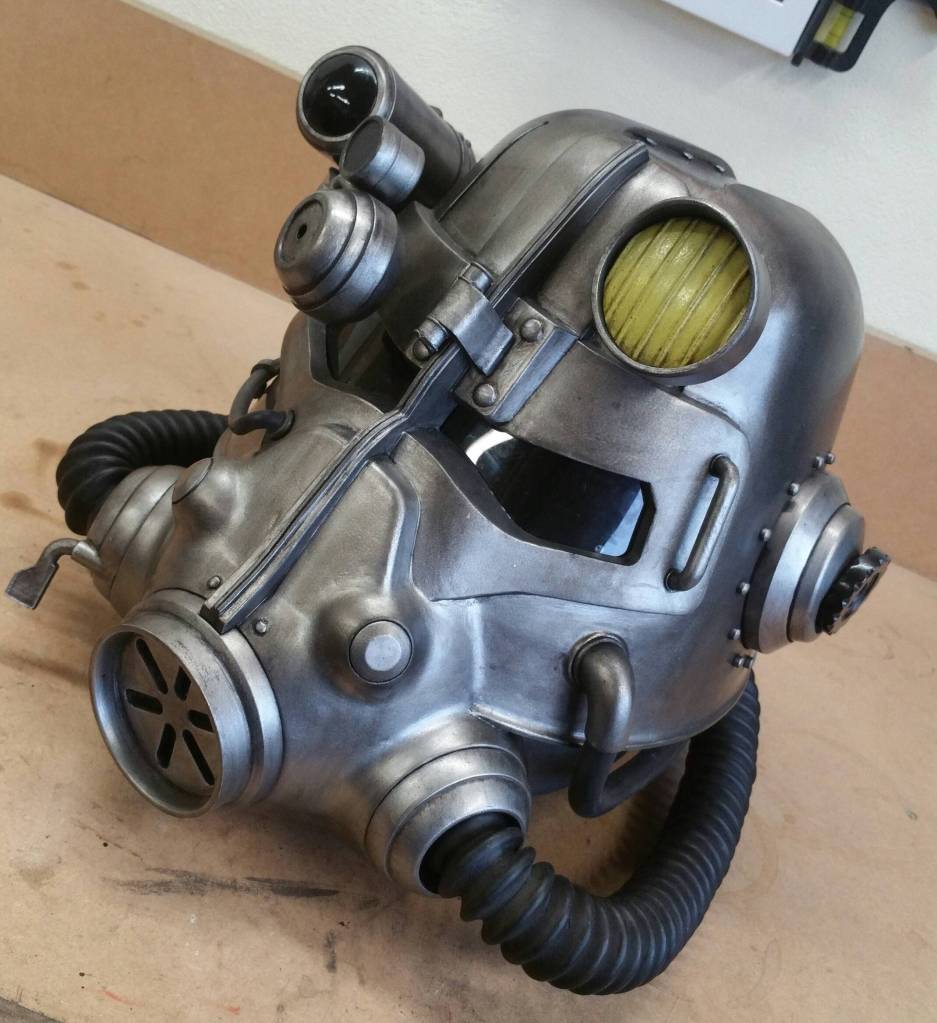
This is where Daniel Lilygreen‘s amazing Fallout inspired T-45b Power Armor Helmet comes into the picture. This was a helmet that I absolutely wanted to try and make. I think I’d spotted it on MyMiniFactory back when he’d had it first posted there. I forget if I downloaded the STL files at that point in time, or later on before he’d removed it. He had removed it to post it on his Patreon and on Etsy, which for the amount of work he put into this 3D model, is absolutely fair, as it is well worth the price. And when I found out he’d posted the STEP file to his Patreon for a bit more of a contribution, I went all in so I could get my hands on it, as I had a few tweaks I wanted to make to the model, and that’s easier to do with a STEP file than an STL file.
I can’t thank him enough for posting not only a very well designed and put together model, but for providing all the files as well for his Patreons. He’d split the model in a number of appropriately sized parts to fit on most desktop 3D printers and had added registration pins to help align the pieces to together for gluing. Along with the detailed parts list and assembly drawings, it makes for a really great build.
For my build of this replica though, I wanted to take splitting the model for printing a few steps further, so I could better mange some of the detail pieces and hopefully make it even easier to print some of the parts. I also wanted to add more registration pints (or rather holes for registration pints) in the form of small brad nails to get the alignment of pieces as close as I could (one of my failures on my last helmet project). Additionally, I wasn’t satisfied with just having a ‘fake’ helmet lamp, I wanted to see if I could add an actual light to the lamp, and make it light up. So, into Fusion 360 I went and started organizing all the components into manageable groups and editing the parts a little at a time.
Once I was satisfied with my tweaks to the model, it was time to start the long process of printing it out. And what better place to start than with the front face plates of the helmet that required the most support material to print nicely.
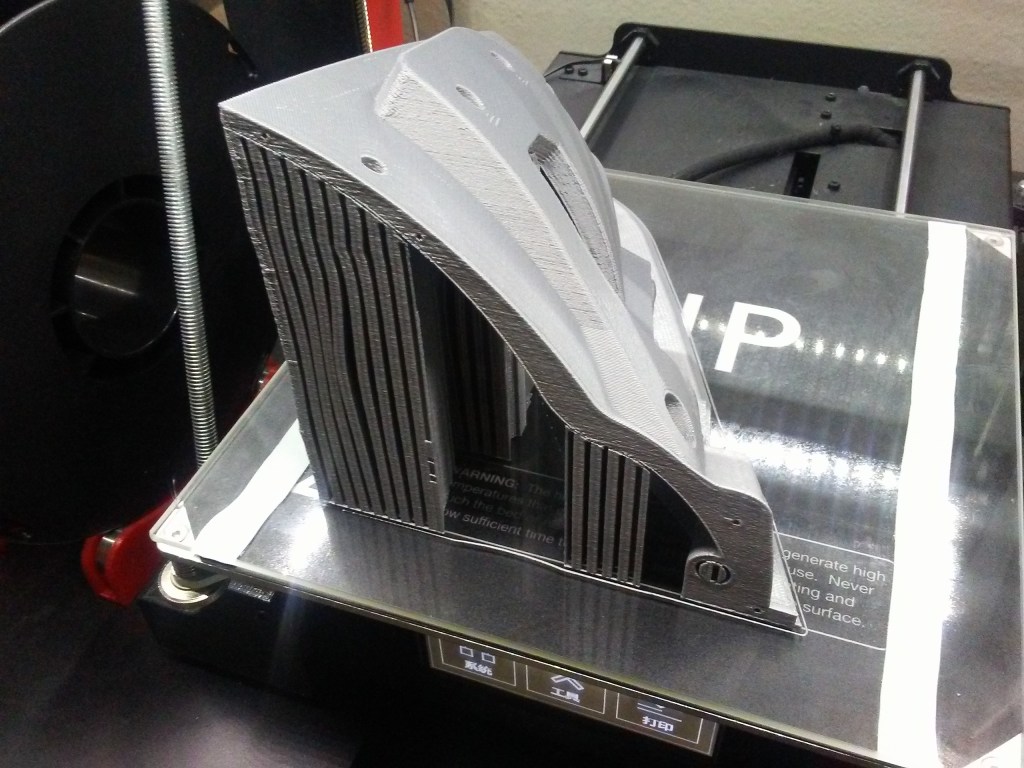
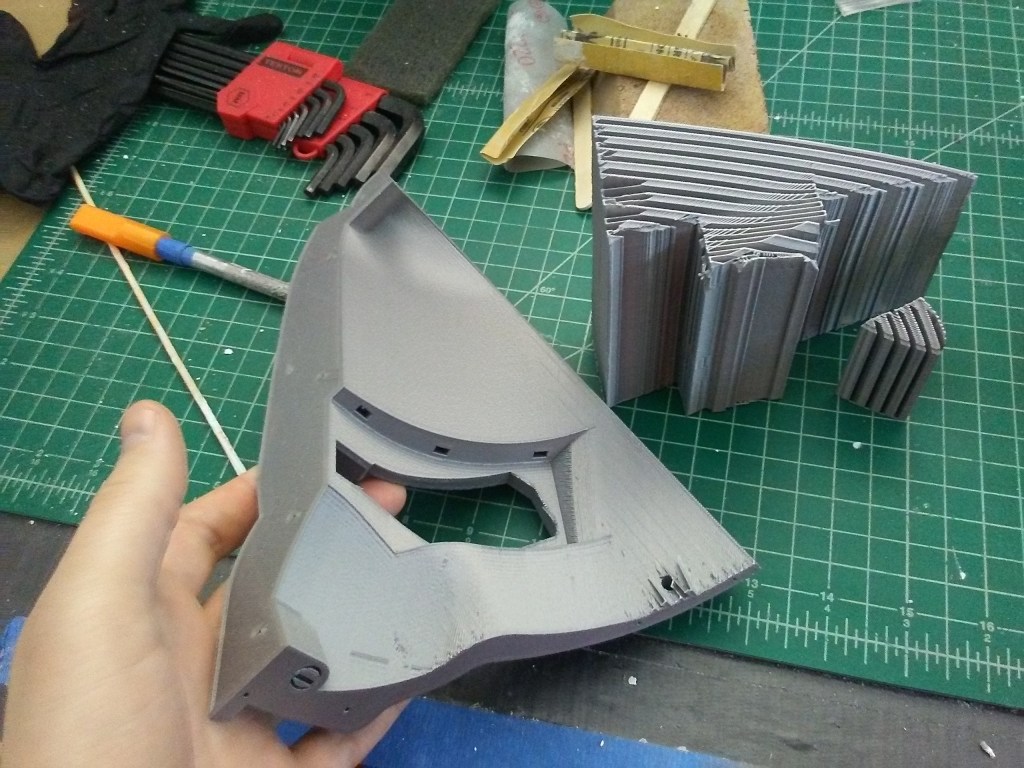

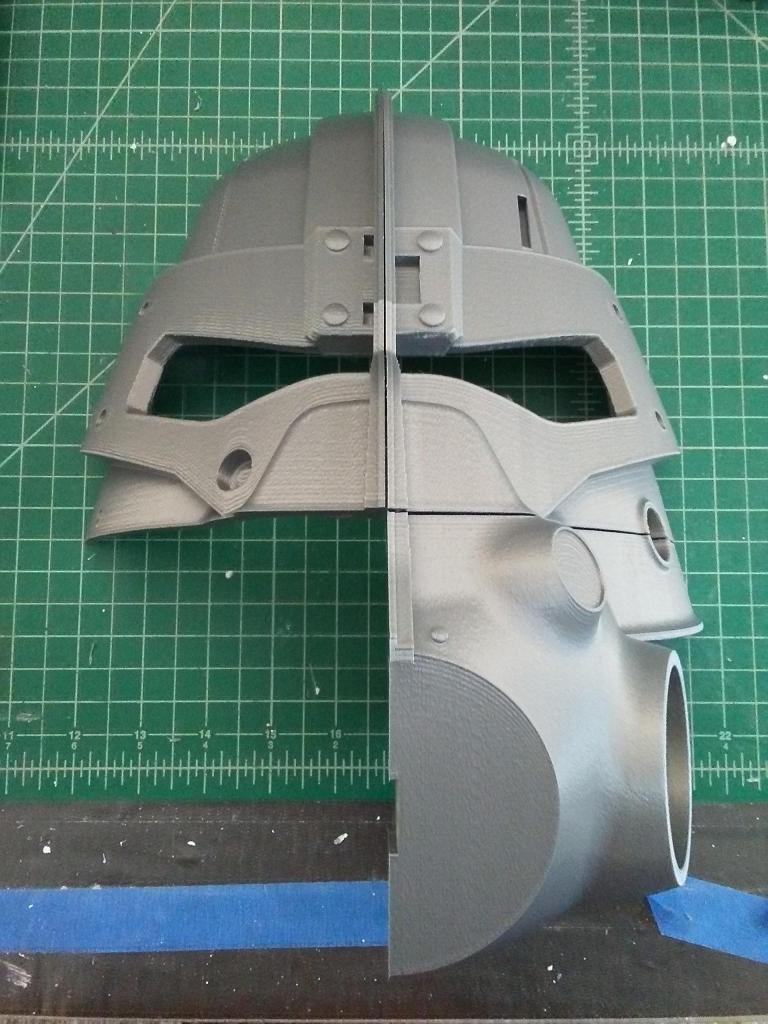
I figured these parts would be the most challenging due to the steep overhangs requiring a decent amount of support material to help the print succeed. On some of my past 3D prints, in my playing around with support material, I’d ended up with it fused to the print, and I didn’t want that to happen with this one, but at the same time, I didn’t want to have so little support material that it couldn’t print the overhangs properly and the printed model fail on me during post processing later. Thankfully the support material for these came off nicely and though the underside of the some of the overhangs were a little on the rough side, the print was pretty sturdy.
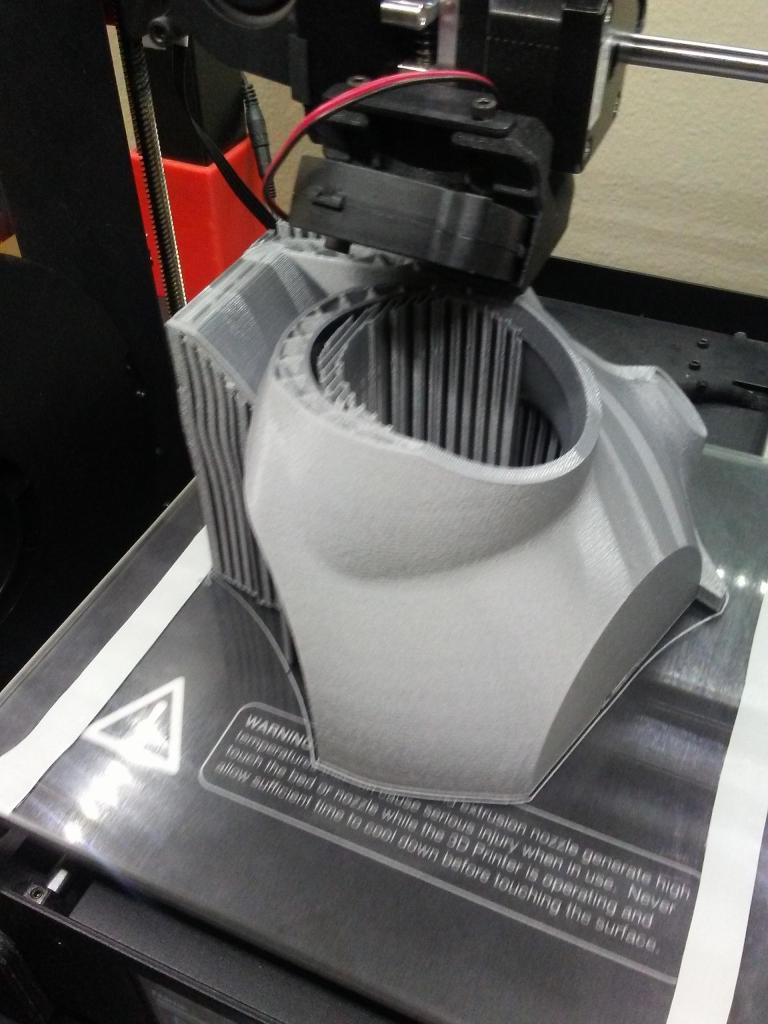
Next it was on to printing the back plates. And before I knew it, I had a full helmet that I could wear on my head.
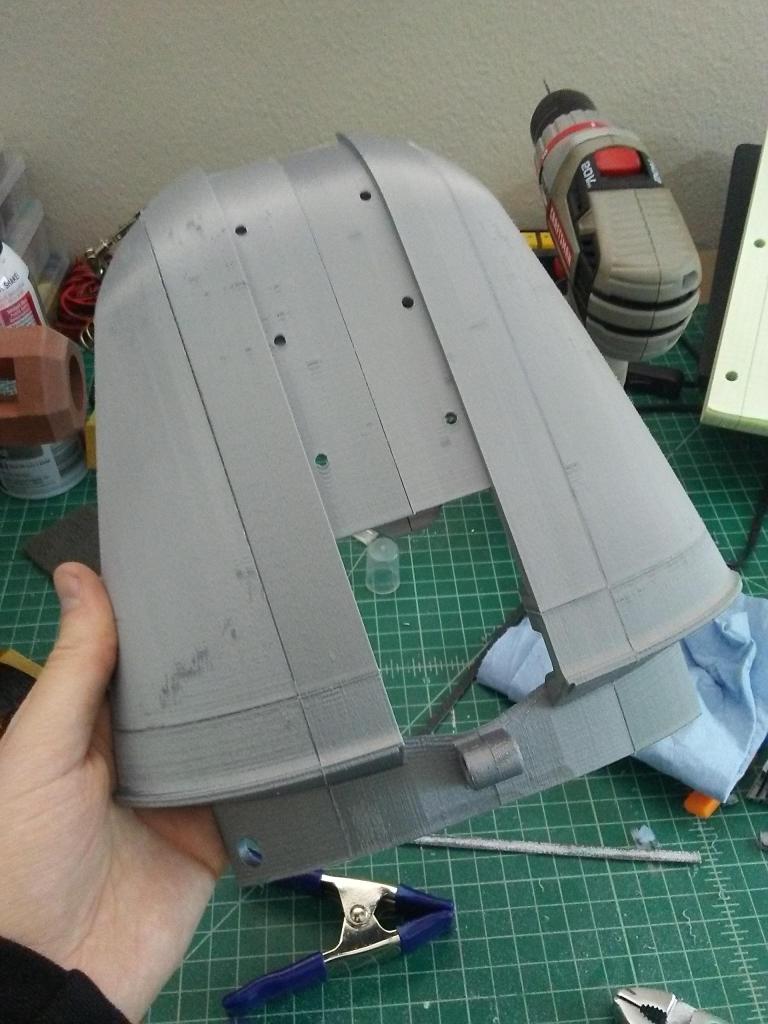

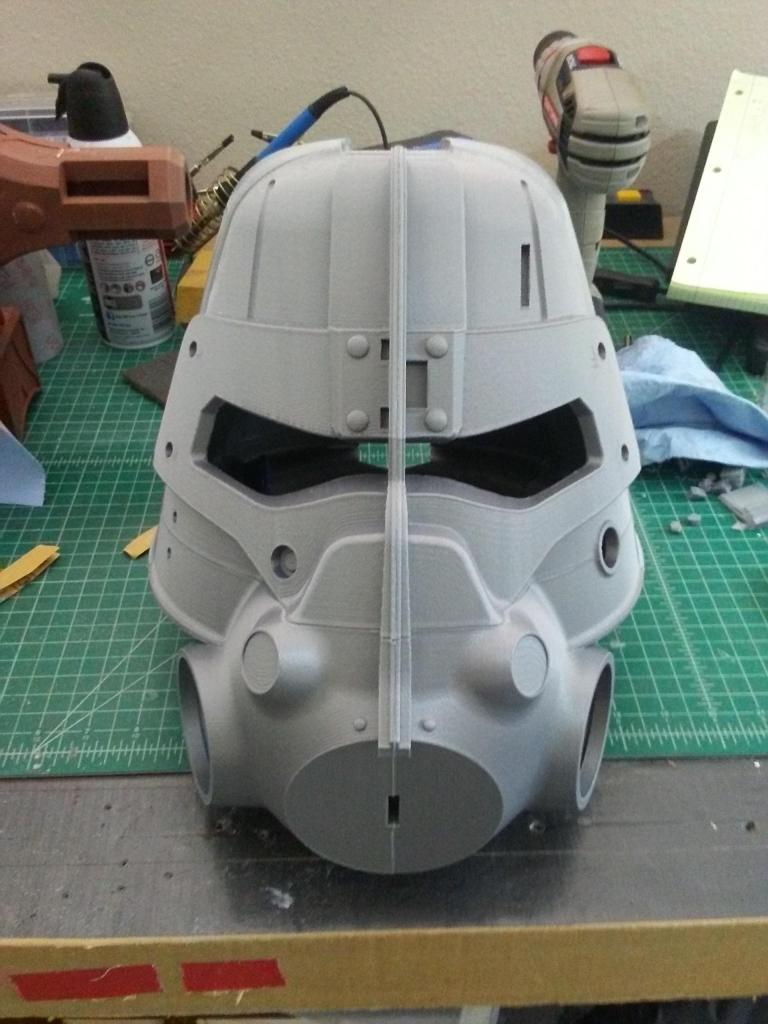
It was starting to take shape and was looking pretty darn good! Granted, there were a good number of the smaller details on the helmet missing, so, time to print those next.
I started with the front two inserts for the hoses. They were originally split from the main helmet model, and had a just slotted right into the large holes on either side. However, the pieces had an overhand around the registration piece and would have required support material, so I decided to split them again, so they could print flat on the bed and then I could glue the registration piece onto them before they slotted into the helmet.

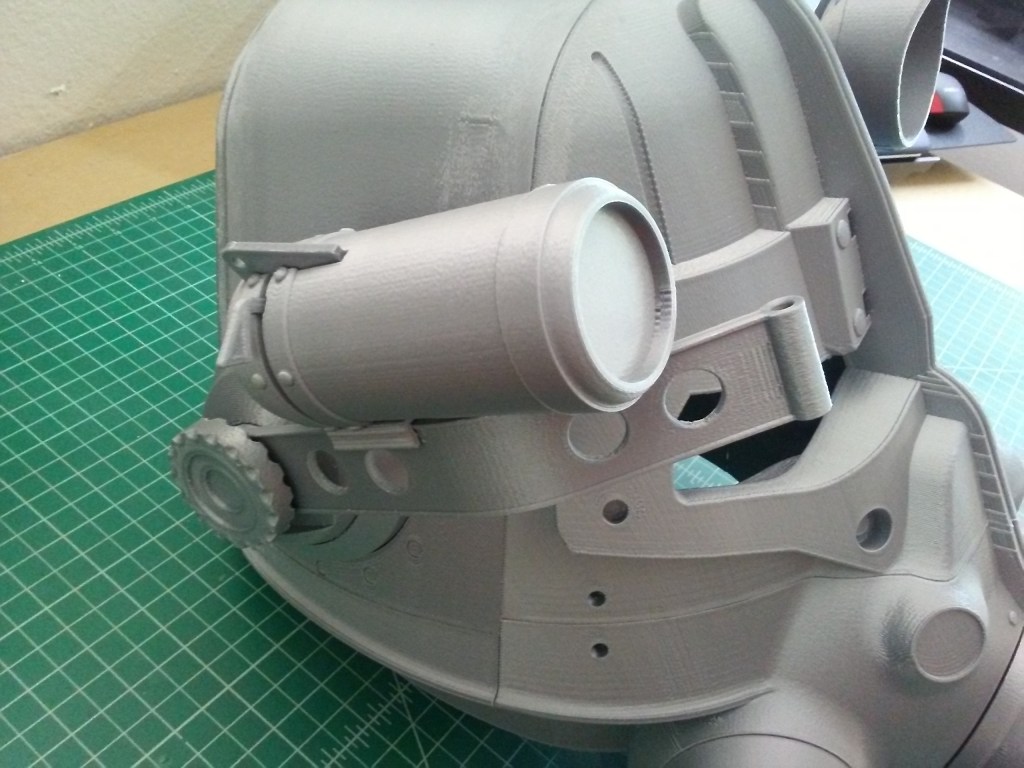
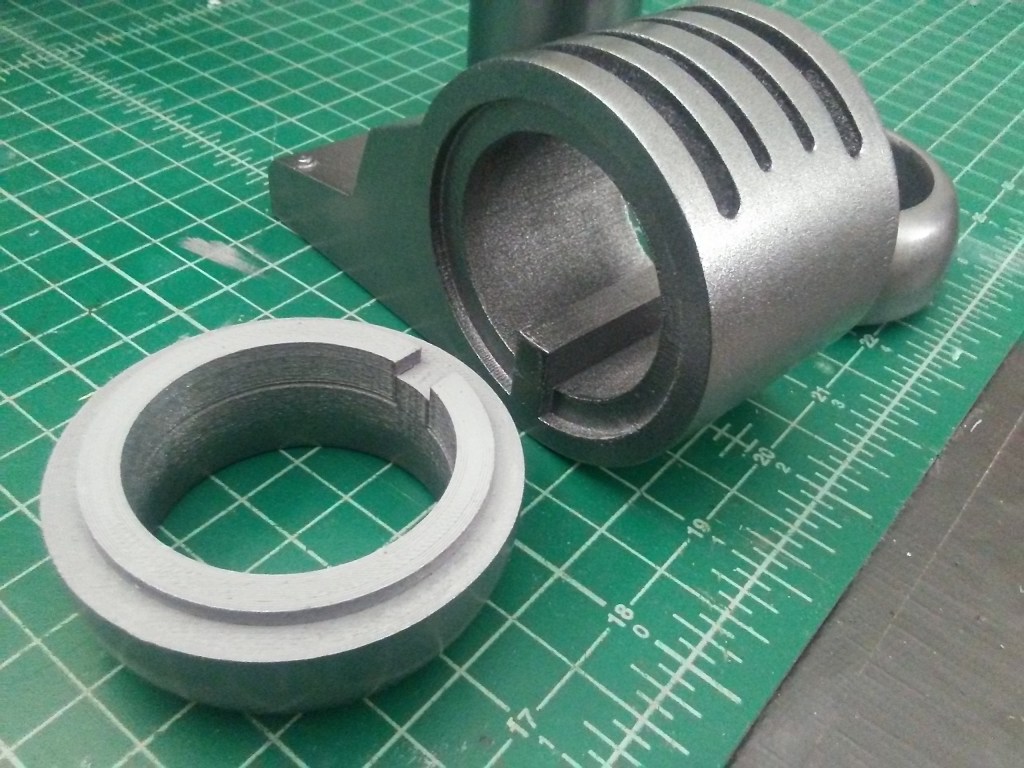
Next I moved on to print the canister-cylinder-thing that sits on the targeting-arm on the left side of the helmet. The canister in the original files, more-or-less, printed as one piece, but I’d split up even further at the seams so there would be no potential for rough overhangs where support material couldn’t read that I would have to deal with during post processing.
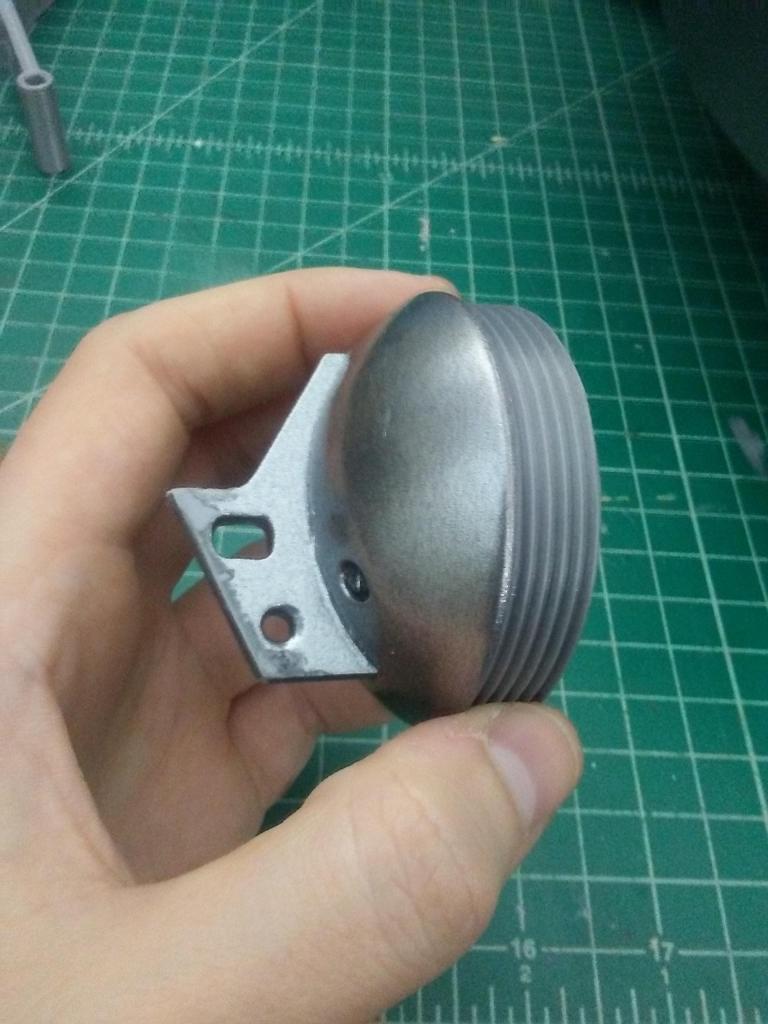
Along with the canister I also printed the targeting-arm. Originally the arm, the knob, and insert were modeled as one piece. I had the idea of wanting them to be separate so I could take the targeting arm off, adjust it, and to do all that with a screw and heat-set insert. So, I remodeled all those parts to be able to fit the adjust-ability that I wanted from it. Additionally, the targeting-arm itself had another downward bend in it (so if you can imaging it) it didn’t sit flat as it is in the picture below. That bend would have made it, in my opinion, a bit of a pain to print with the support material it would have required. I figured with the way I’d remodeled things to make the arm adjustable, it wouldn’t impact the look of the end result too much.


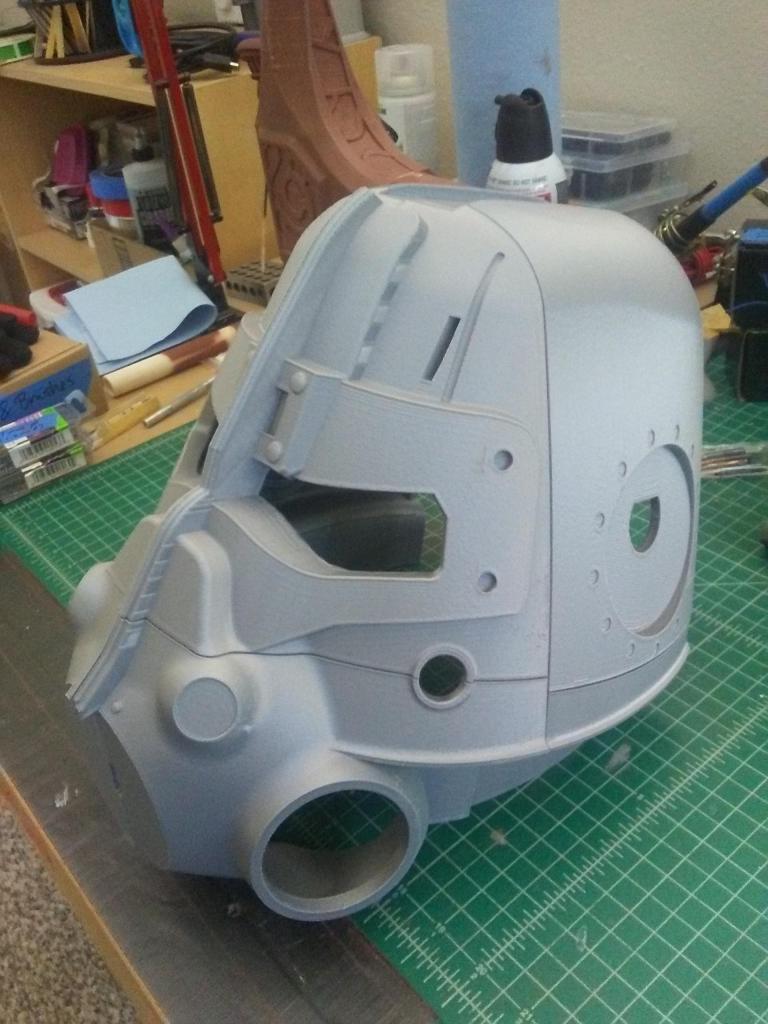
Meanwhile, waiting on all these detail parts to come off the printer, I’d delved into the long process of filling and sanding down the seams on the main helmet.
On my previous helmet attempt, I’d used Bondo brand filler spot-putty. Boy howdy that stuff was toxic smelling to the point I’d had to work in a well-ventilated area outside with it, and it was just overall a pain to work with too. Since then, I’d learned that wood-filler worked just as well and was much nicer and less toxic to work with. Especially as I could add a tiny bit of water to help work it into the seams and smooth it out.
Once the wood-filler was good and dry, then began the long process of sanding and coating the helmet in (a number of cans) of spray-filler-primer.

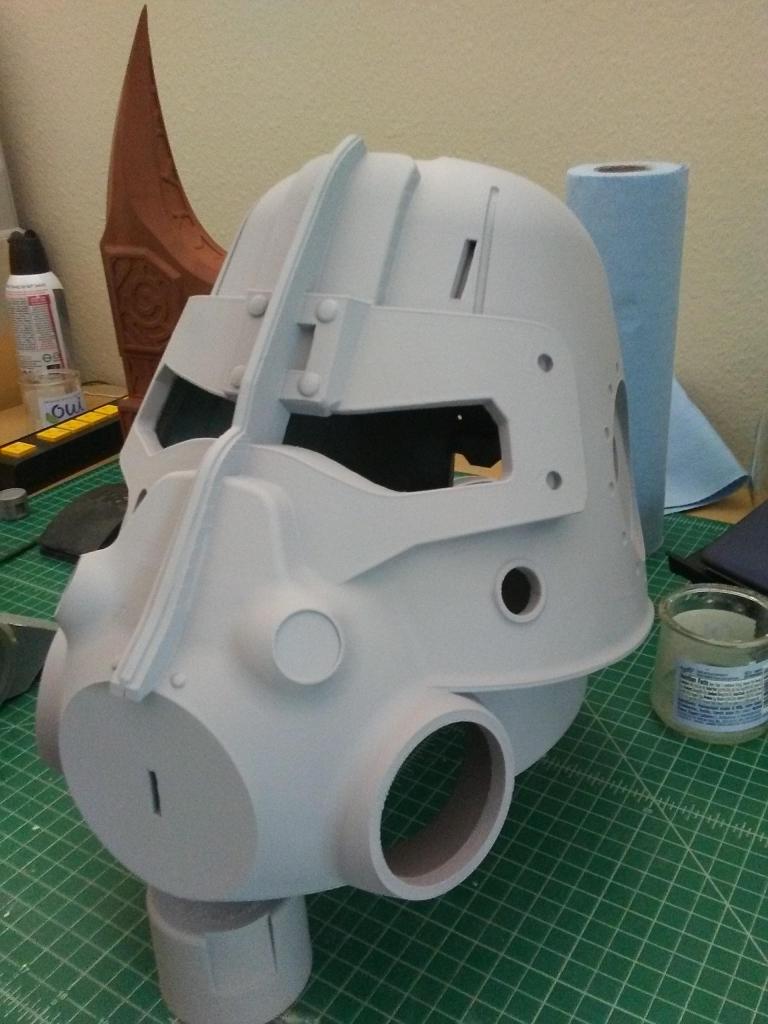
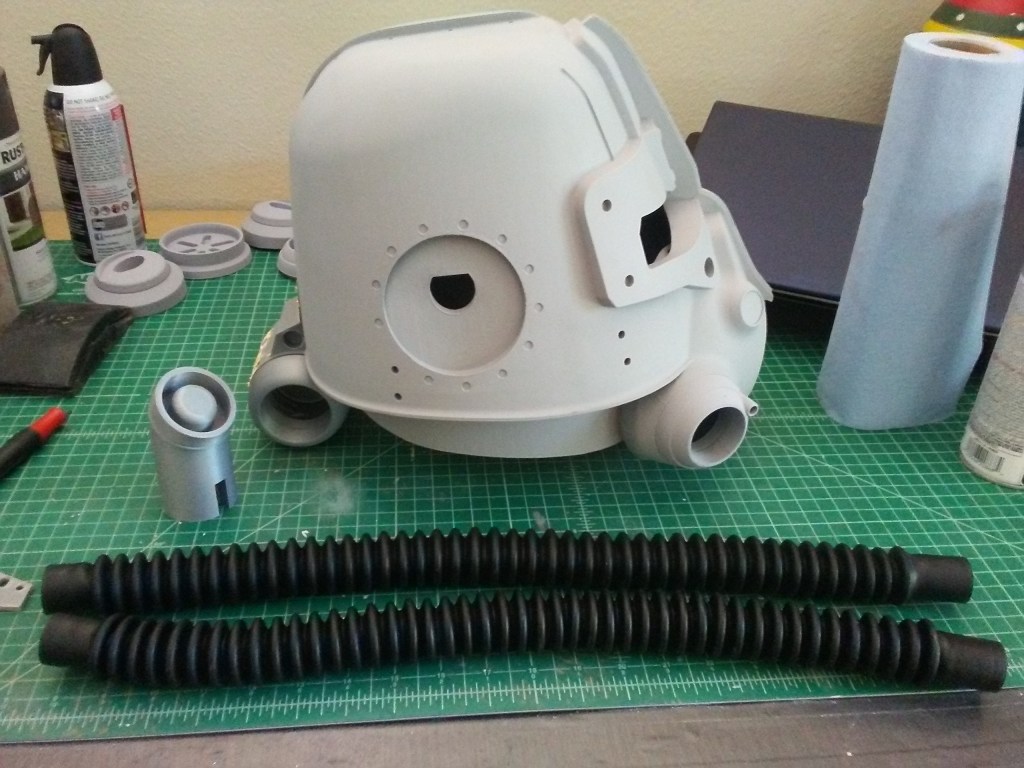
Between the coats of filler-primer and sanding, I went on an online search to figure out what I was going to source for the hoses on either side of the helmet. Some people had used old hoses from a spare shop-vac, or some other corrugated hose of a type. When I learned that some people had actually been able to source real-deal gas mask hoses, I just had to figure out how to get my hands on a couple of those same hoses as well. Surprisingly it was easy enough to find some surplus gas mask hoses on eBay; for pretty cheap too. One eBay purchase, and a decently long shipping time later, the gas mask hoses arrived and, despite their age and questionable cleanliness, worked all to well, matching pretty darn close to the style of hoses from the in-game model.
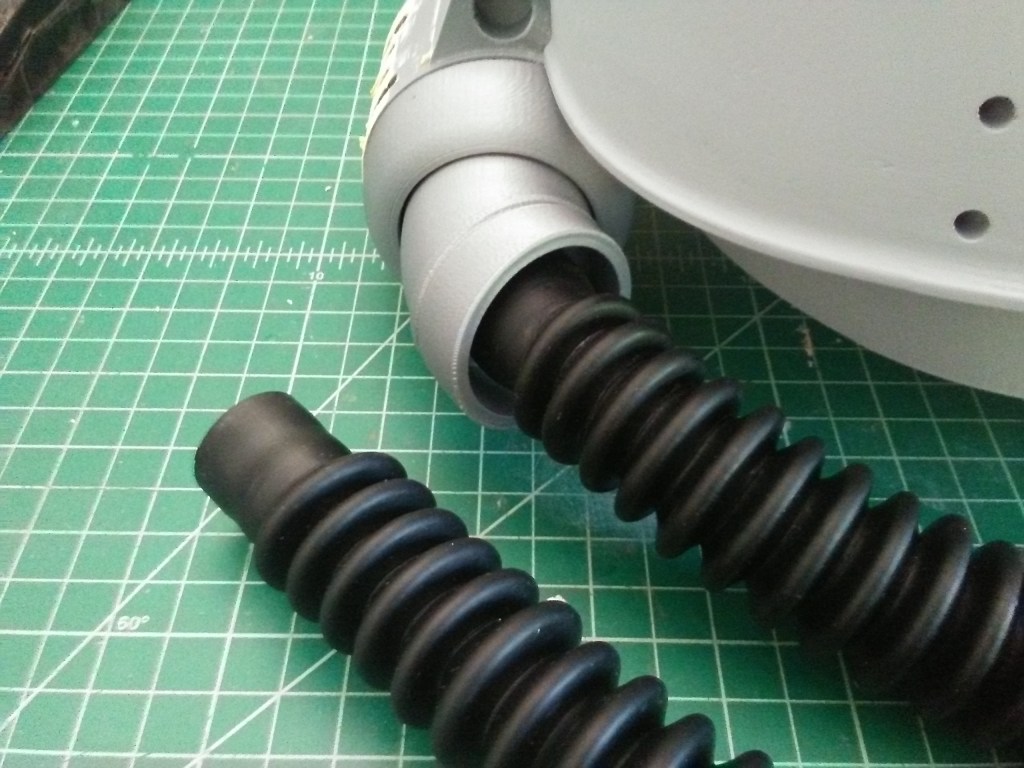
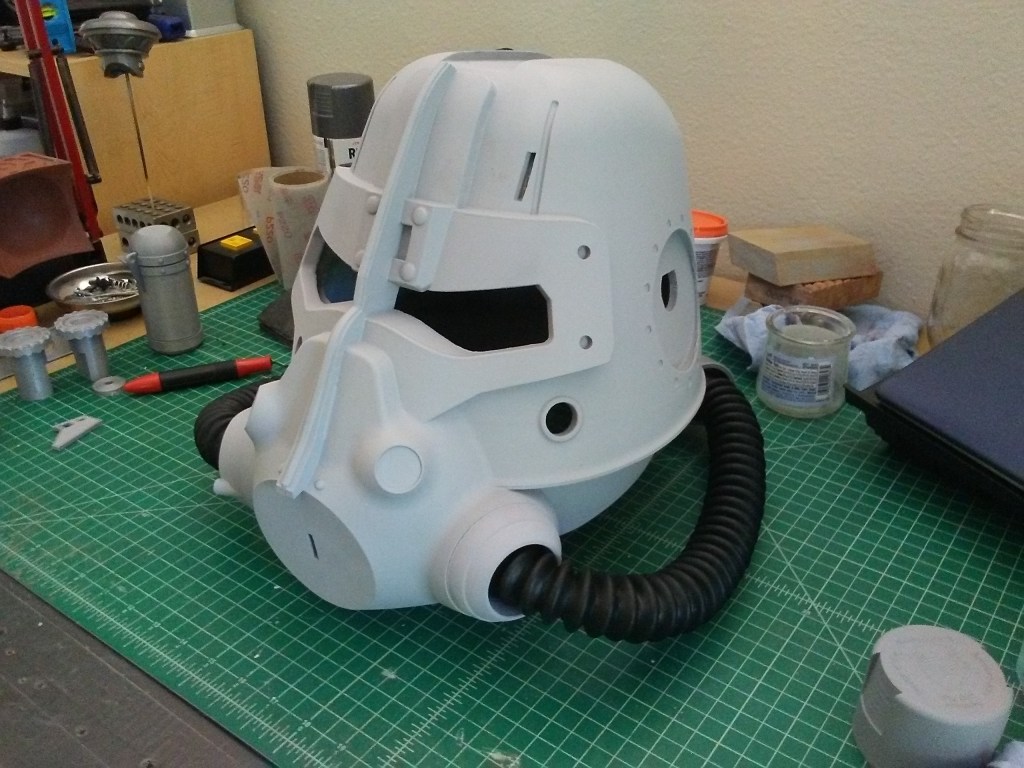
With the hoses sourced and test-fit, it was time to get back to painting.
For the Laser Rifle replica, to get a more gun-metal look, I’d layered a bright-silver and dark-silver metallic spray-paint to achieve the look I wanted. Perusing the hardware store for a longer time and stopping to take a better look at the spray-paints in the paint section, I found there was a steel-colored metallic paint that was what I was looking for. Coupled with a base layer of gloss-black spray-paint, it had now become my go-to spray-paint for a gun-metal look.
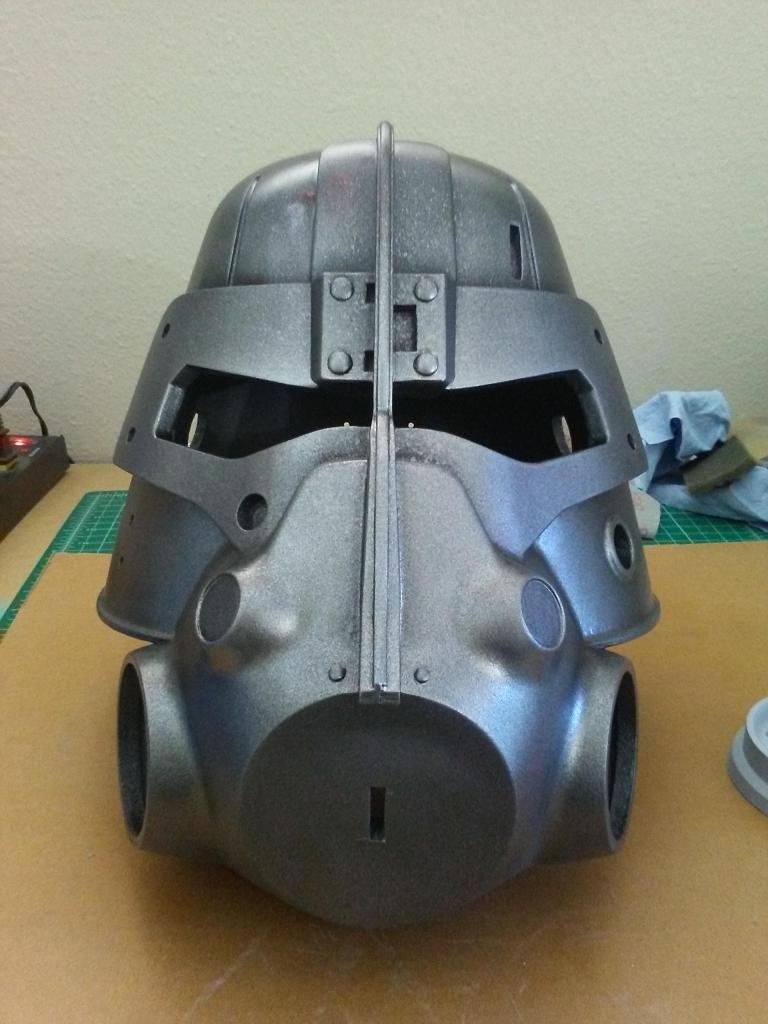
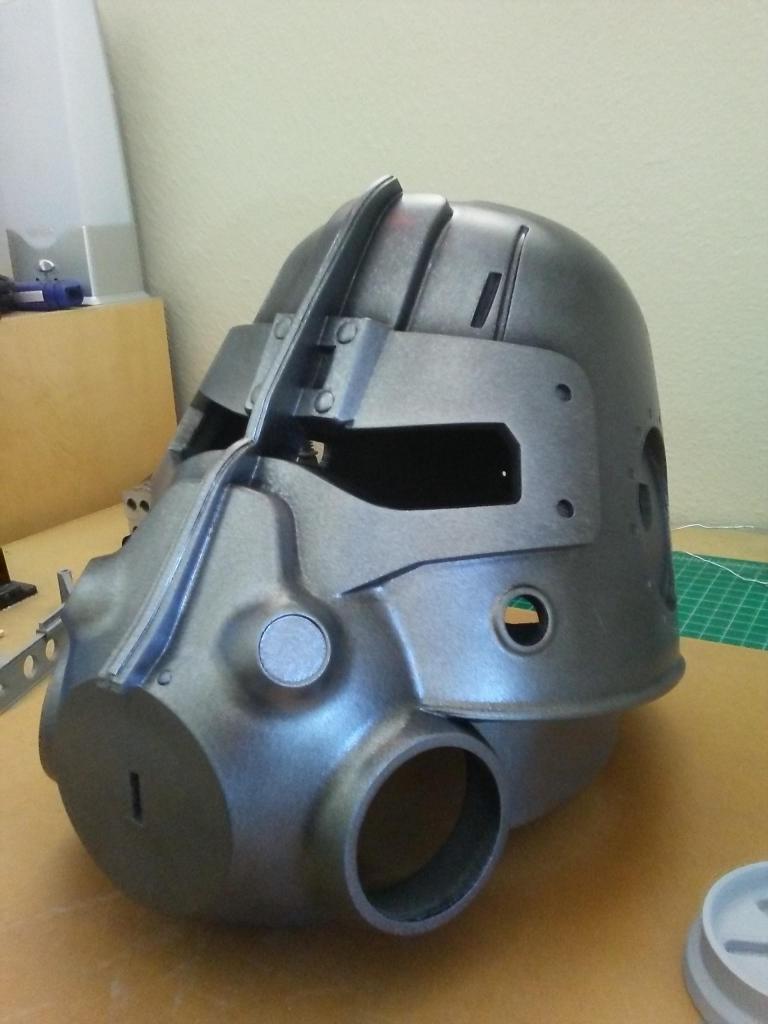
(Don’t worry, I evened out the top-coating of metallic spray-paint so it wasn’t so speckled.)
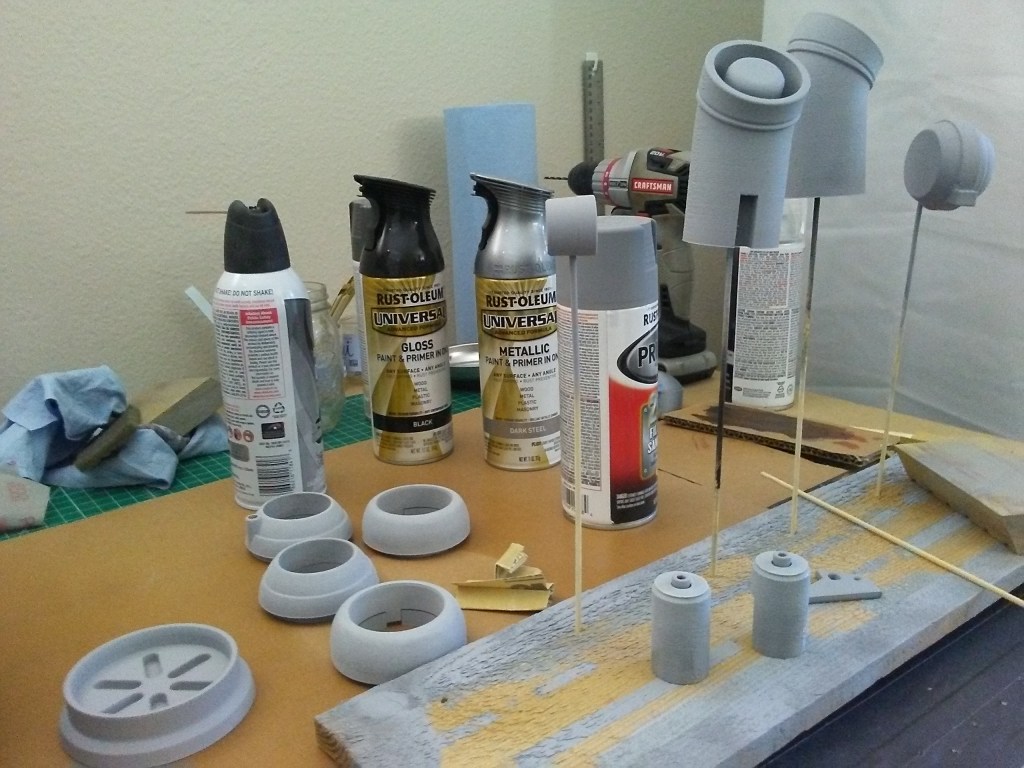
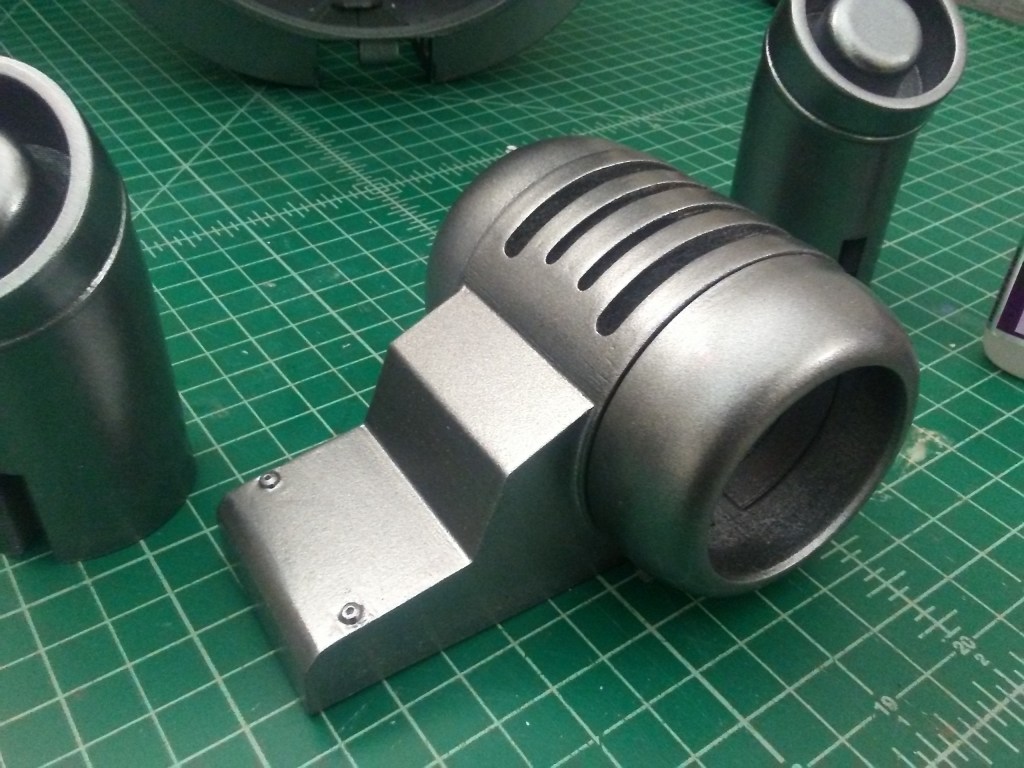
With the main helmet painted, it was on to the painting and finishing the detail pieces. Again, another long process of dousing with filler-primer and sanding the parts smooth, then finishing with several coats of the steel spray-paint.

For one of the smaller details, finicky details of this project, there were rivets that adorn the back panel of the helmet. These were 3D printed rivets in the original model, however, I’d seen someone online (with this same 3D print model) use real pop-rivets instead of the 3D printed ones. Now, I thought this was a brilliant idea, and a great excuse to buy myself a little manual pop-riveter and an assortment of pop-rivets. With the assorted pack of both steel and aluminum rivets, I went to town on the helmet.
One thing I learned about half-way through riveting the helmet; steel rivets are stronger than 3D printed plastic and, in more instances than not, in trying to pop the rivet, it would deform the plastic and rip itself out before it was seated correctly. It was an up-hill struggle trying to not damage the helmet and get the rivets to seat and pop properly. Deciding I should not damage the helmet any more than I had and try my luck with the aluminum rivets, I switched about mid-way through. The aluminum rivets, of course, worked much better and the process went a lot smoother at the end. Oh well, with a little touch up paint, I now had some battle scarring on the helmet. Perfect start to the weathering!

After a good long break from my riveting struggles, it was time to have some fun with electronics and see if I could add a light to the helmet lamp.
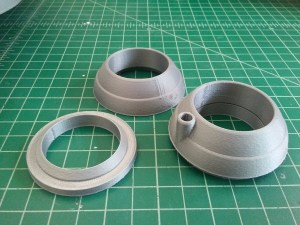
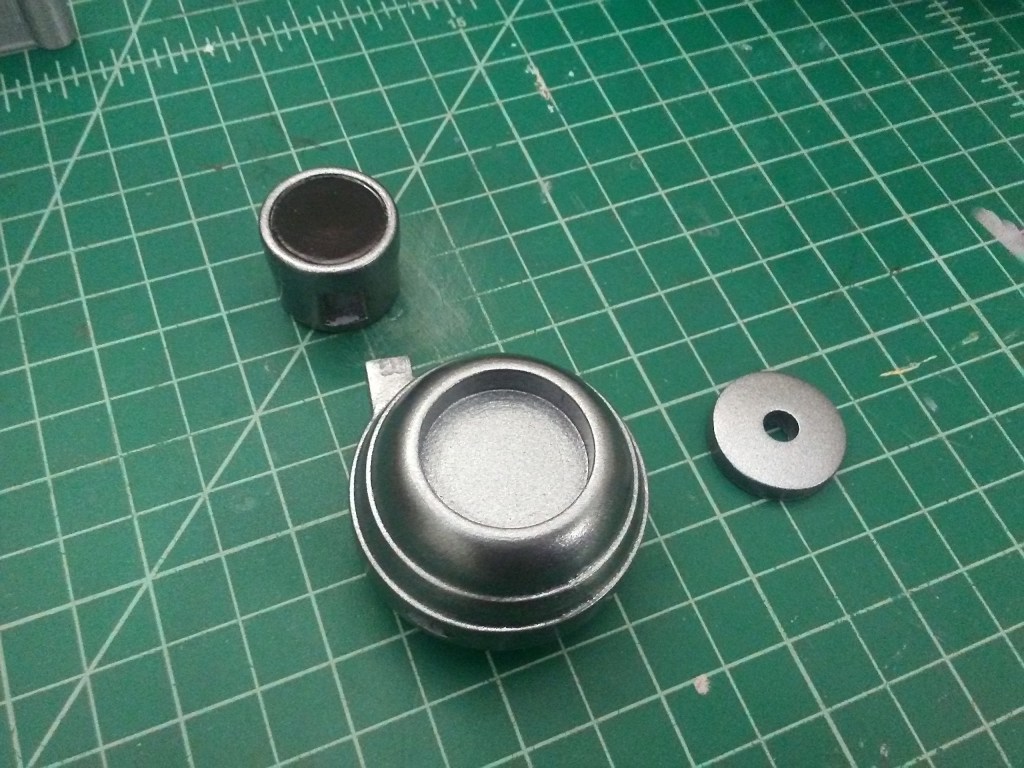
Originally the helmet lamp was print in three pieces, if I remember correctly, with the shroud being one piece, the lens being the second, and the third being the mounting bracket. There no room to add a light to it. I was feeling creative though, and wanted to attempt it. So, I set to work remodeling the light to add some extra depth to it to make room for LEDs. In the process I thought it would be neat if I could make the housing screw together, no glue involved, so I could open it back up in case I needed to replace the LEDs or lens for some reason. The 3D printed threads turned out well, though they were a little tight at the end, but after chasing them with my edge-break, to make the thread transition smoother, it came together quite nicely.
I’d decided to fit the LED cluster from inside one of those cheap flash-lights that seem to be present by cash registers in most stores. I had a spare one that the body had broken from getting tossed around too much, but the LEDs still worked. So, I tore it apart, and soldered wires onto the correct leads and hooked it up to a small battery holder, same three AAA setup it had previously.
After adding some foil tape to the inside of the housing to help reflect the light, and small circle of printer paper to help diffuse the light through the 3D printed lens, I strung the wires through the hole in the back of the housing and mounted the LED cluster to the inside with some hook and loop tape. Then, I was able to snap the lens into the shroud and screw the whole thing together.


Surprisingly, those little flashlight LEDs are pretty bright. Granted the camera makes it seem brighter, but they are diffused enough to not blind anyone. It’s enough to help you get around a dark room, but not nearly as bright as the one in-game, which seems more like a spotlight. It made for a nice addition once it was mounted to the helmet.
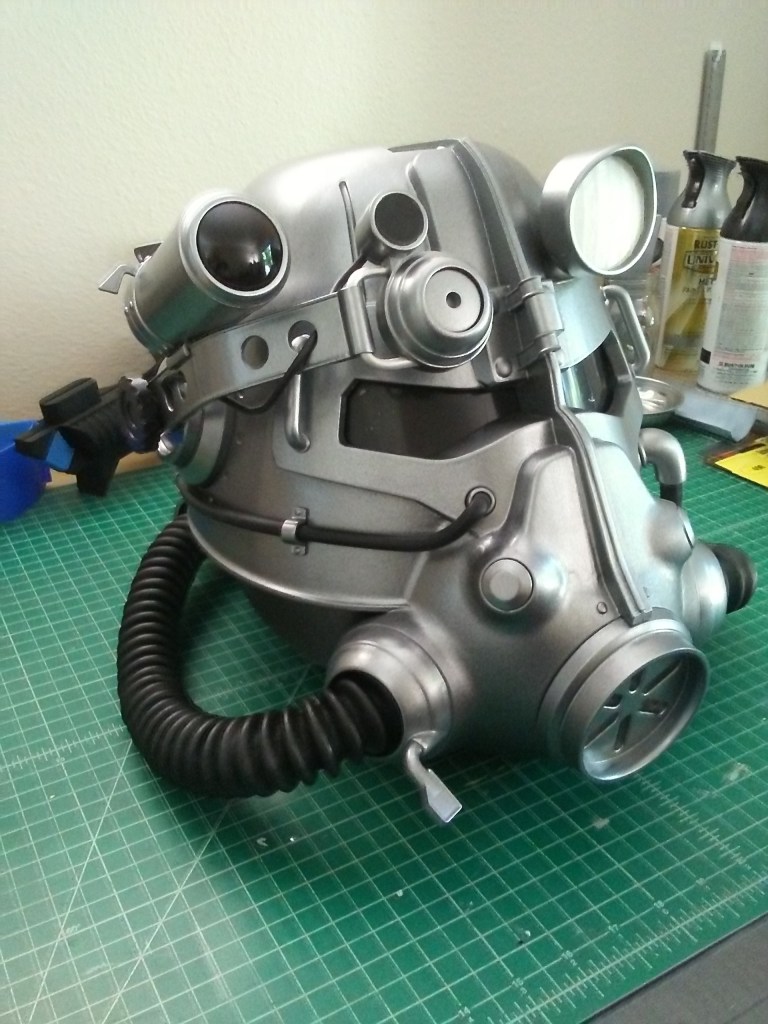
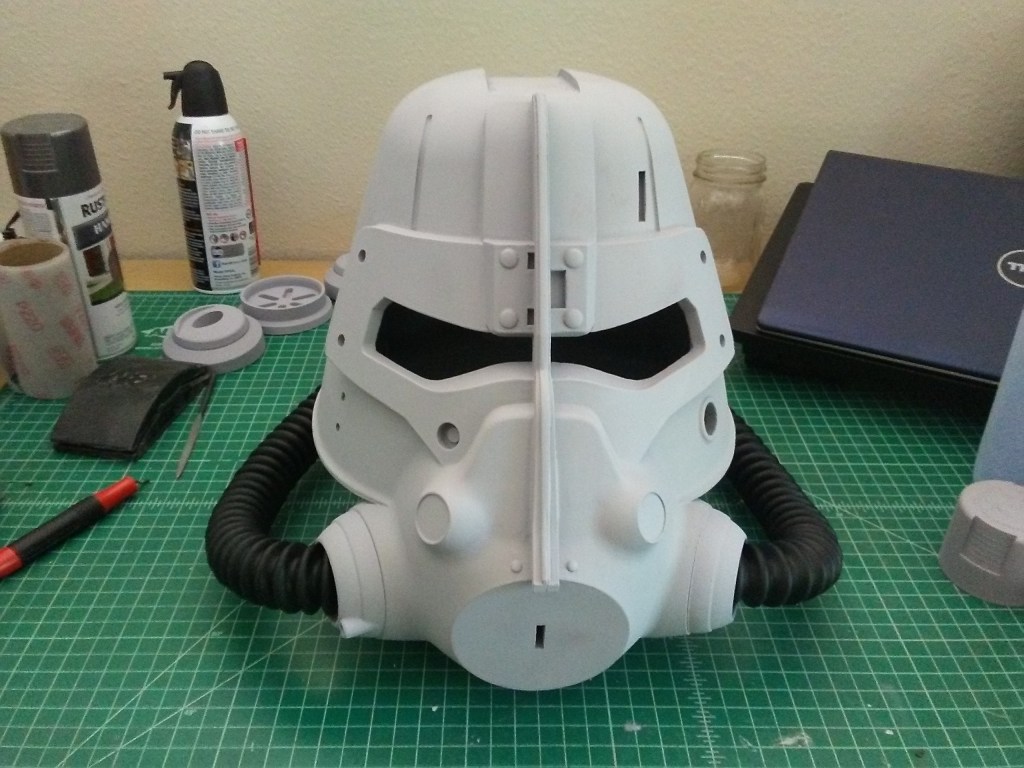
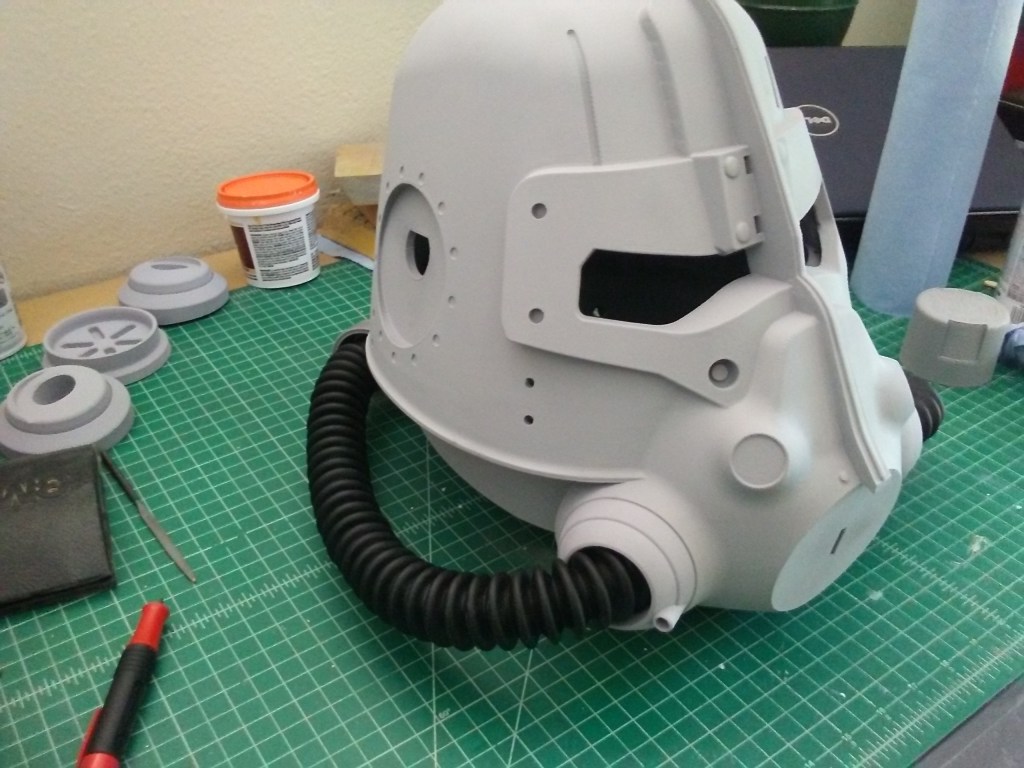
At this point, all the little detail bits for the helmet were coming along nicely in the painting and finishing process. And while, some of the smaller detail bits took me longer than I’d like to admit to finishing (mostly due to my procrastinating), I was able to assemble the helmet pretty much completely. Though, I was still missing a couple items that I wasn’t sure on sourcing or how I was going to make them work.
I had the gas mask hoses already, but there were a couple other hoses on the helmet as well; two smaller ones. I had a tough time trying to source them online just due to lack of knowledge of hose sizing and what exactly I was looking for. And the price and quantity of hose I could get online was far more than what I wanted to pay or needed. I only really needed about a foot of each. So, after perusing the hardware store and not finding what I needed, I decided to hit up an Auto-Zone. I bought the parts with me that the hoses needed to fit into, and they were nice enough to let me come back and take a look at the vacuum hoses and fuel lines they had on rolls on their back shelves. Of the hoses that I found, one was a vacuum hose for a car and the other a diesel fuel line. I was able to get just over the length I needed so I could cut-to-fit later.


The hoses fit quite nicely. To get them to better hold their shape, I strung some doubled-up steel wire through the hoses and bent them to the positions I waned them to stay in. With the wire and their sizing, they fit snugly enough to stay in place, but were still removable. Something I figured I would need to do later when I got around to doing the top coat and weathering on the helmet.
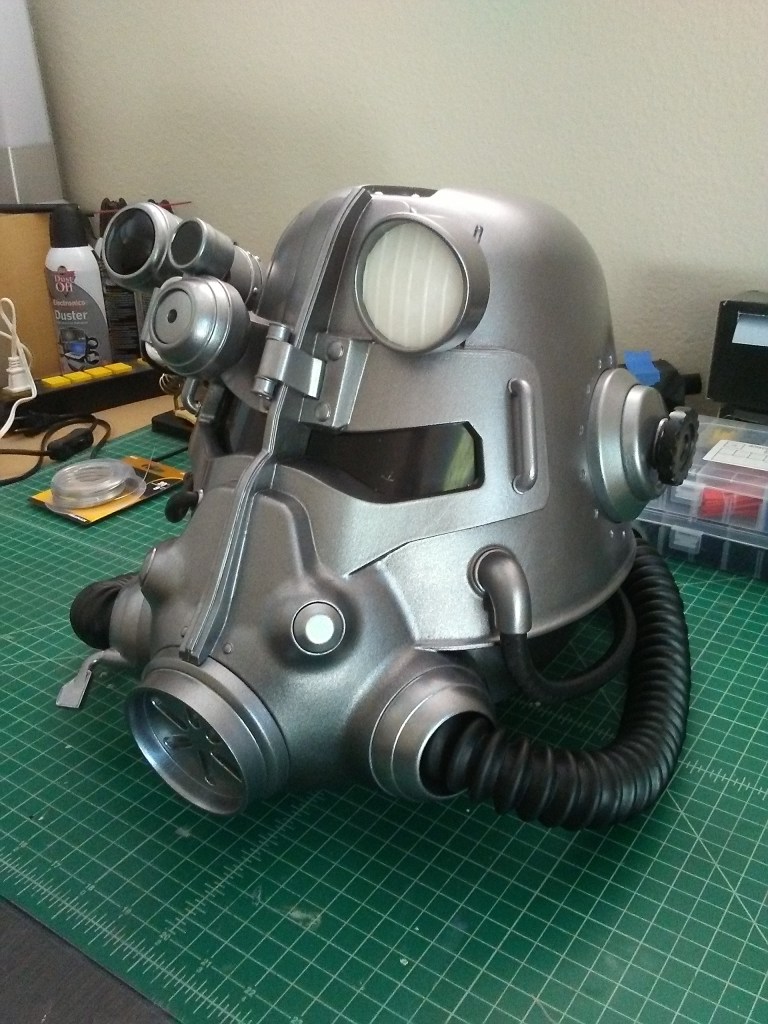
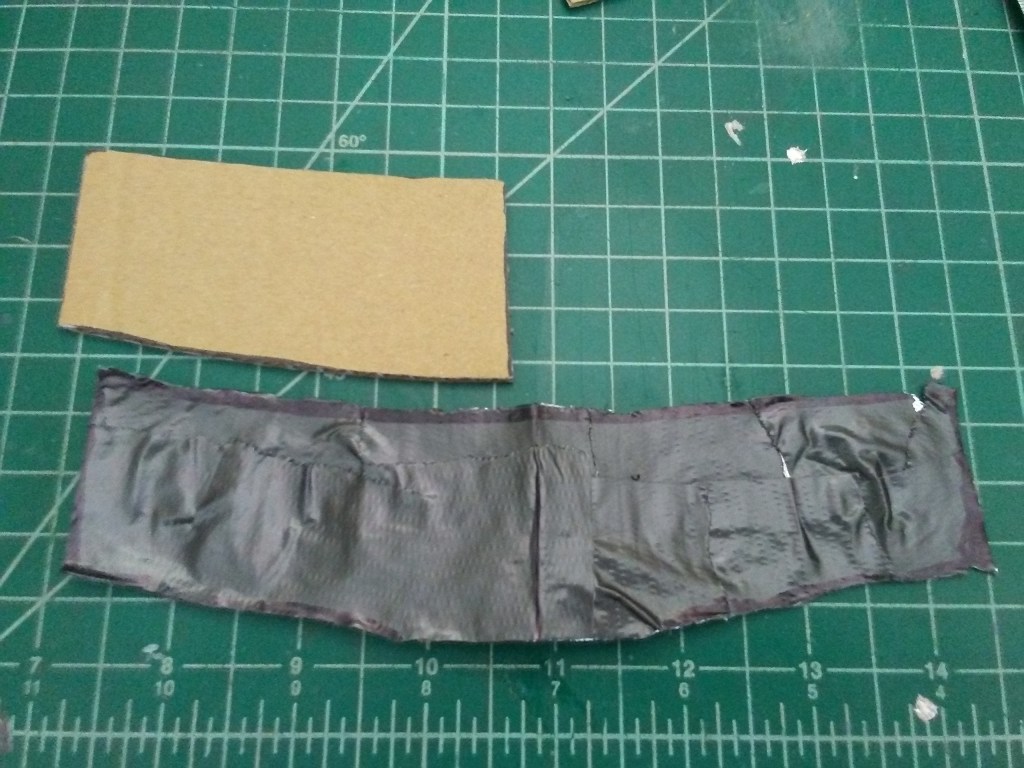
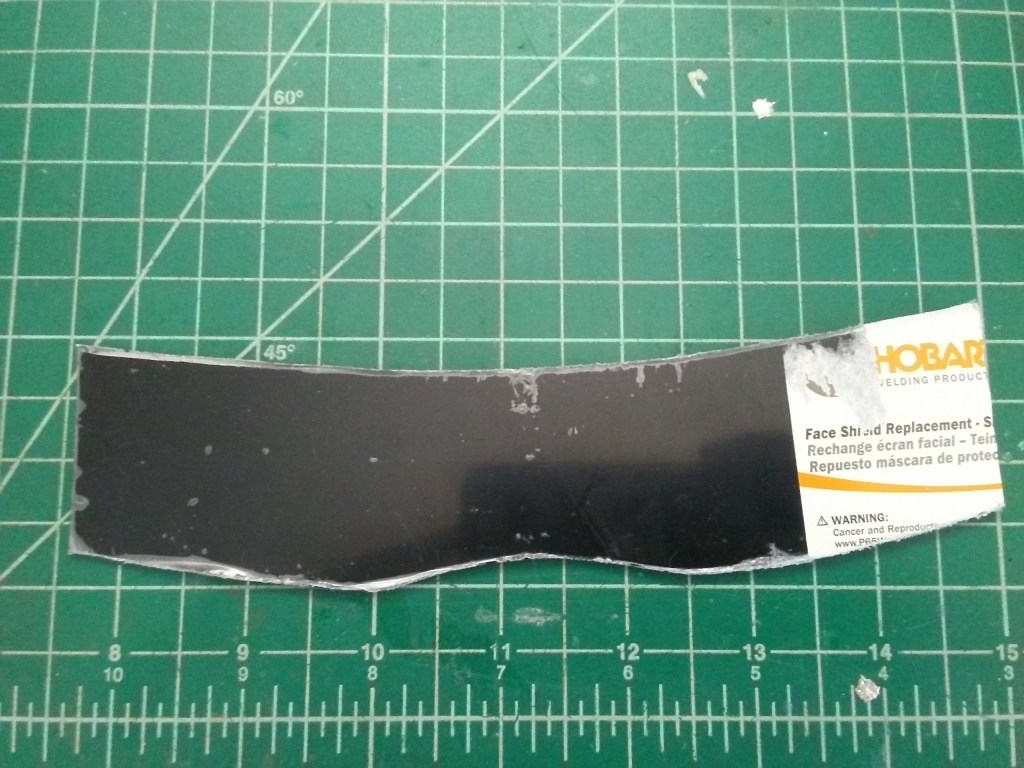
Next up was cutting out the visor. I did my best to make a foil and duck-tape template of the visor recess inside the helmet. Transferring half of that template to a cardboard cutout, I was to match it up and cut out a symmetrical visor from a welder’s face shield replacement window.
It snapped into placed inside the helmet after some fengeggling and made the helmet look that much more bad-ass while still allowing me to see out of it.
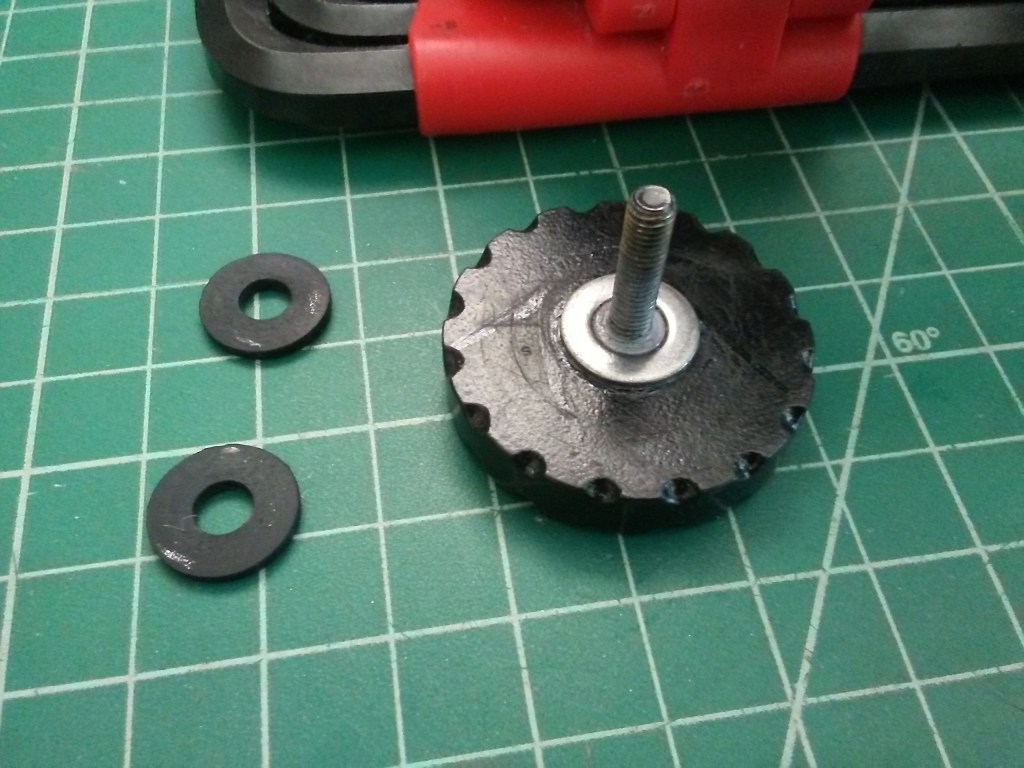
After that, it was time to mount the targeting arm and the canisters that sat on top of it. I’d decided to plasti-dip the adjustment knobs for a more rubberized look and grip on them; which turned out alright once the plasti-dip finally decided to stick to the filler-primer on the knobs and not rub off.
I’d originally been using washers to clamp the targeting arm, but the metal was cutting into the plastic and the paint when I’d tighten it down too much, so I opted for neoprene rubber washers instead to spread out the clamping force and hopefully hold it in place better. These kind of worked for the most part. I have another idea that I think will work better in the long run, but have yet to implement it. For now, these worked well enough without damaging the printed parts more.


With the arm mounted, I was able to fit up the wire running from the targeter to, well, somewhere not really shown on the helmet, so for now it’s just tucked between the arm and the helmet by the ear-piece.
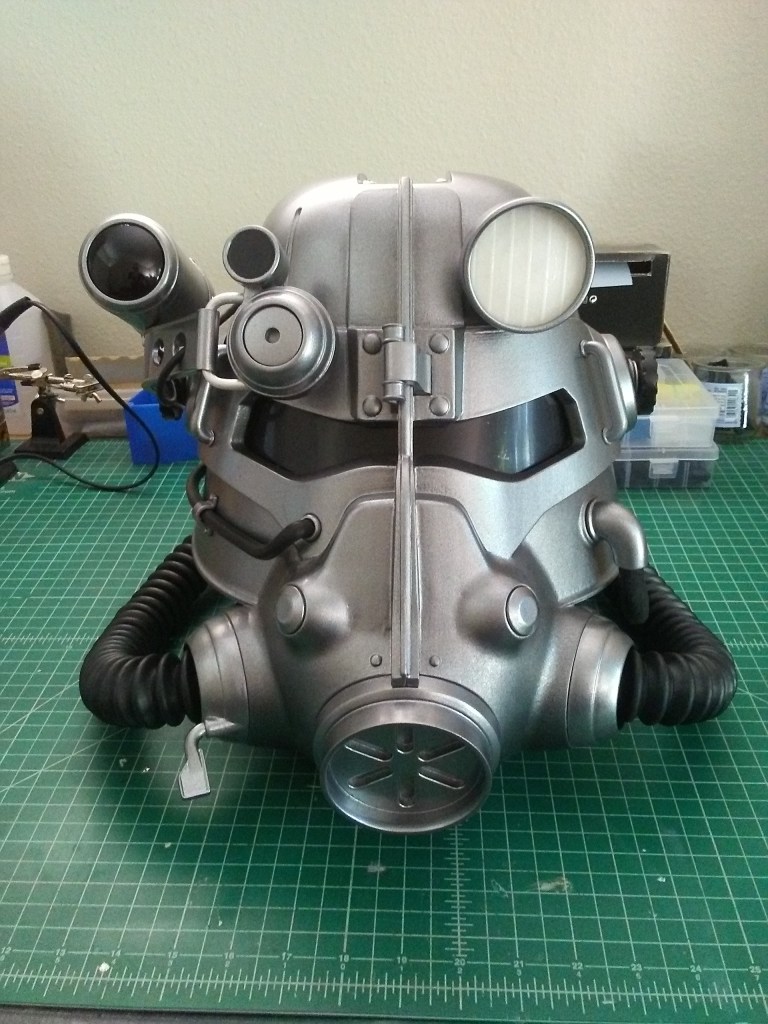
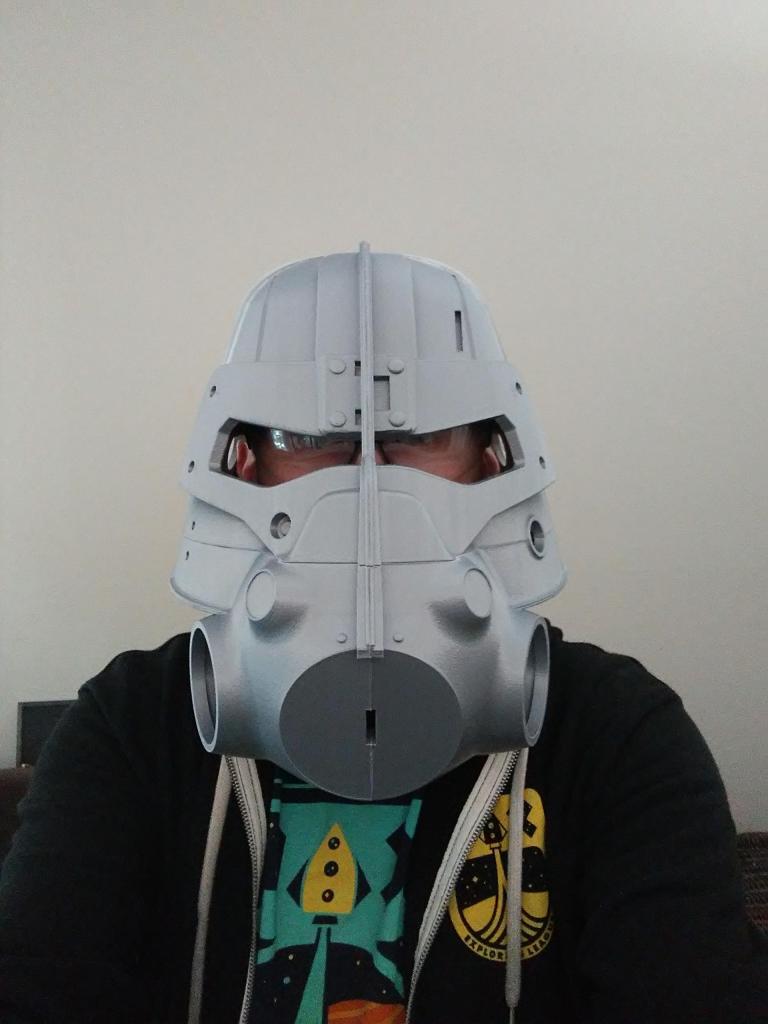
The helmet is really coming together at this point. All that’s left to do is throw some foam inside it and test fit it to my head. There’s plenty of space inside the helmet so for a snug and hopefully more comfortable fit, I’ll probably add more foam later, but for now this worked well.

Finally, with it painted and assembled, I was feeling like this project was nearly complete. I still needed to get to clear coating and weathering it, and there are a few things I’d like to adjust/redesign on it, but that’s for future me to work on. For now, I was calling it done. It was time to take a step back and admire this epic helmet from the Fallout universe that I’d been able to put together.