

If you never played Portal back in the day and are a fan of puzzle games, I feel like you might have missed out. At this point, it’s pretty much a classic in my book, and I highly recommend it. While the first game was more puzzle focused with a bit of a story-line, the second game was much more story heavy, but still retained a good balance with more great puzzles; and co-op, which was loads of fun! That said, on my quest to 3D print all my favorite video game replicas, I decided to take on this model designed and posted by Kirby Downey on MyMiniFactory (also on PrusaPrinters.org).
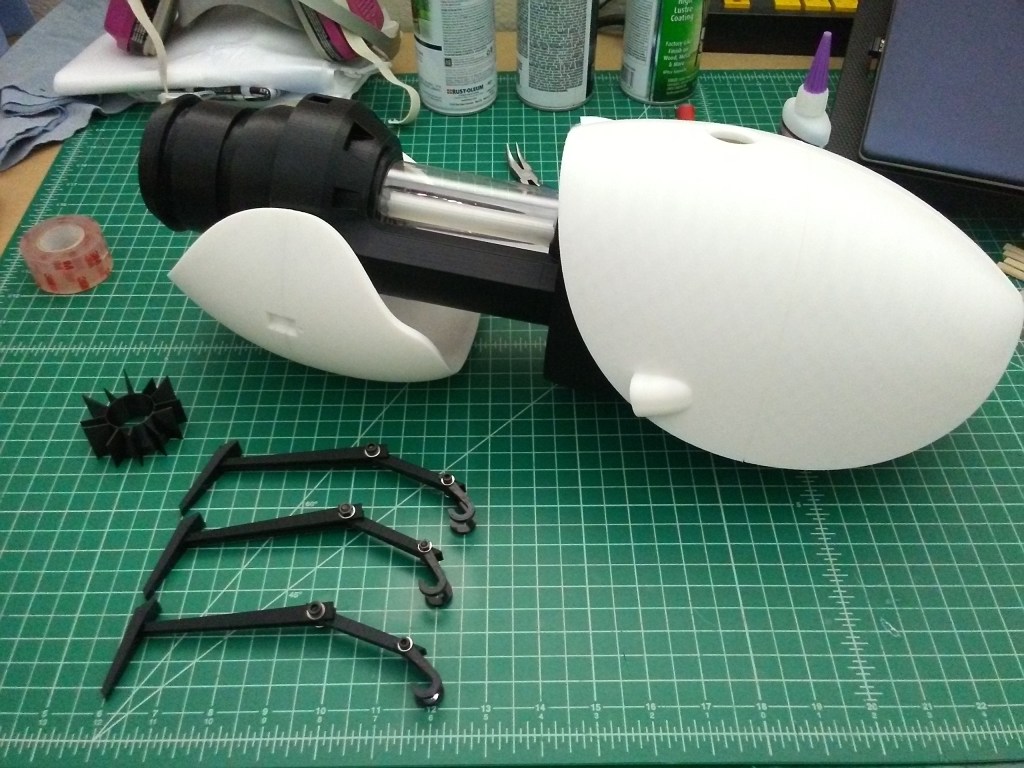
Overall, the model was well thought out with how it was broken up for printing and assembly. The size and proportions were also quite accurate in my mind to what the game model would have looked like in real life. Mind you, this was before I realized that there had been an actual Portal Gun replica released for sale to the public for Portal 2. Finding that out, I was pretty stoked to see how this model compared to that one. And honestly, I like the proportions on this one a little bit more. The longer I looked at it though and the more research I did while prepping the model for printing, I realized there were a few aspects of the design that I wanted to change. So, off to CAD to made some modifications and then to the printer!
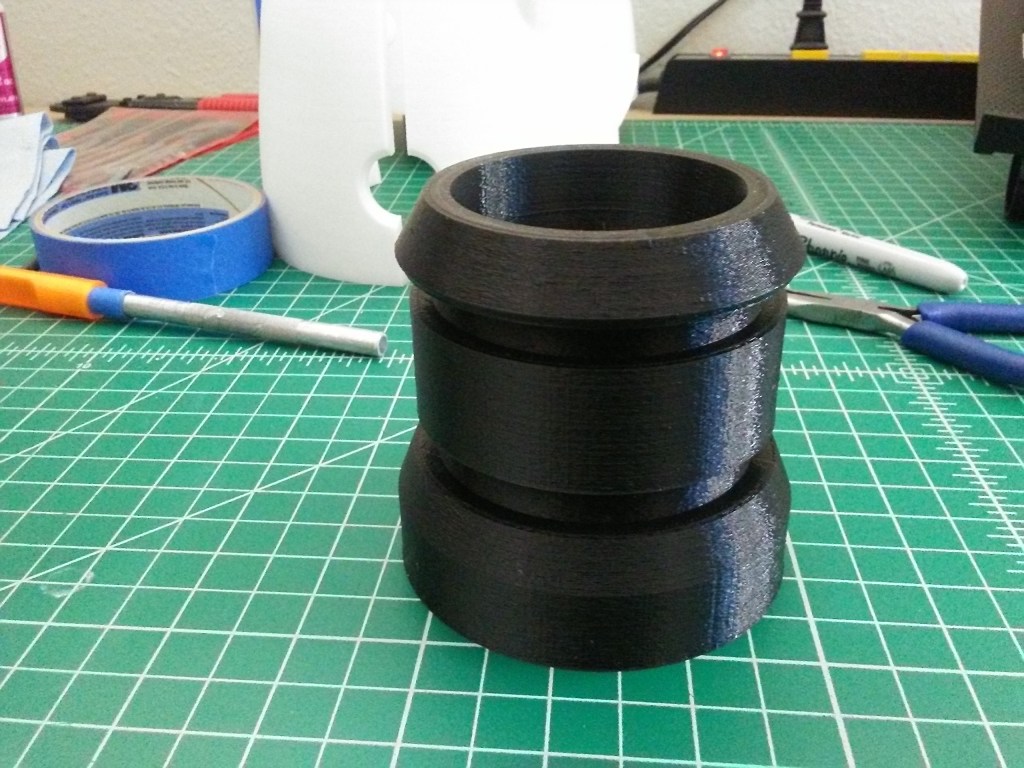

First part (or parts) printed. The first modification I made was to split the front barrel into 3 pieces so it wouldn’t have to print with any support material. I split the pieces in Netfabb, then modeled a registration groove in Fusion 360, and imported and added it to the split pieces (again in Netfabb) to make it easier to align when gluing together later.
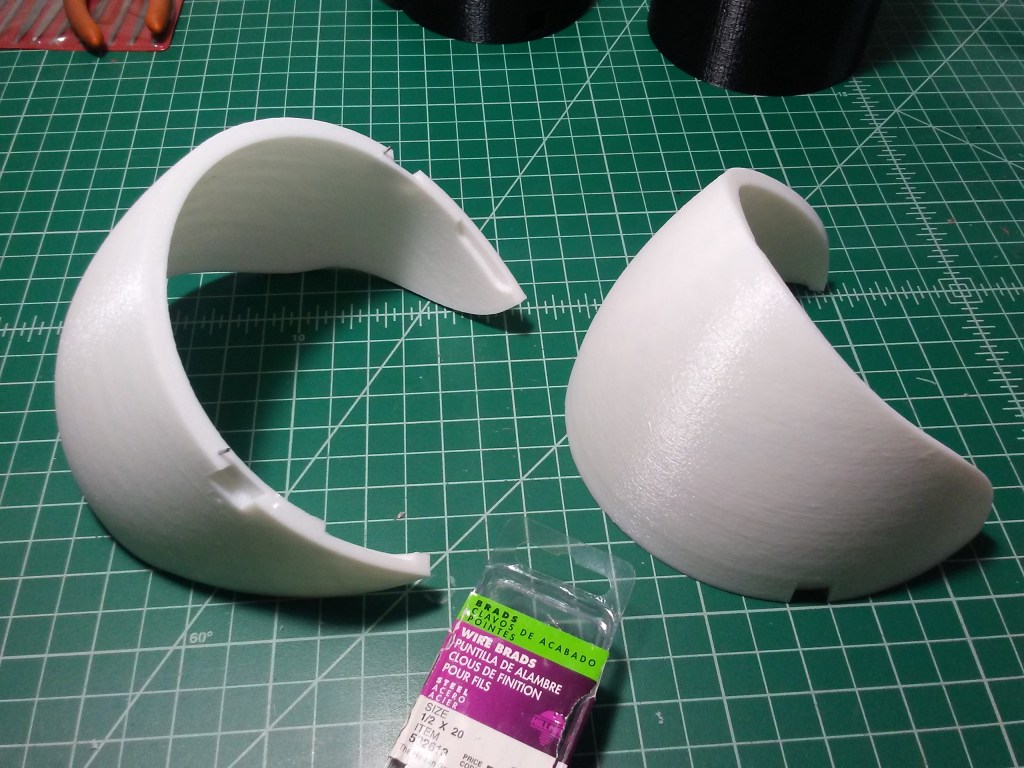

Second modification was to split the front shell that goes under the barrel into two pieces for printing. There was no good way to orient it on the print-bed and it would have required a bunch of support material which would have ruined the surface finish. Again, I split it using Netfabb, this time using Netfabb’s auto pin-generator to generate holes with which I used brad nails (cut to size) to assist aligning the two pieces for gluing.
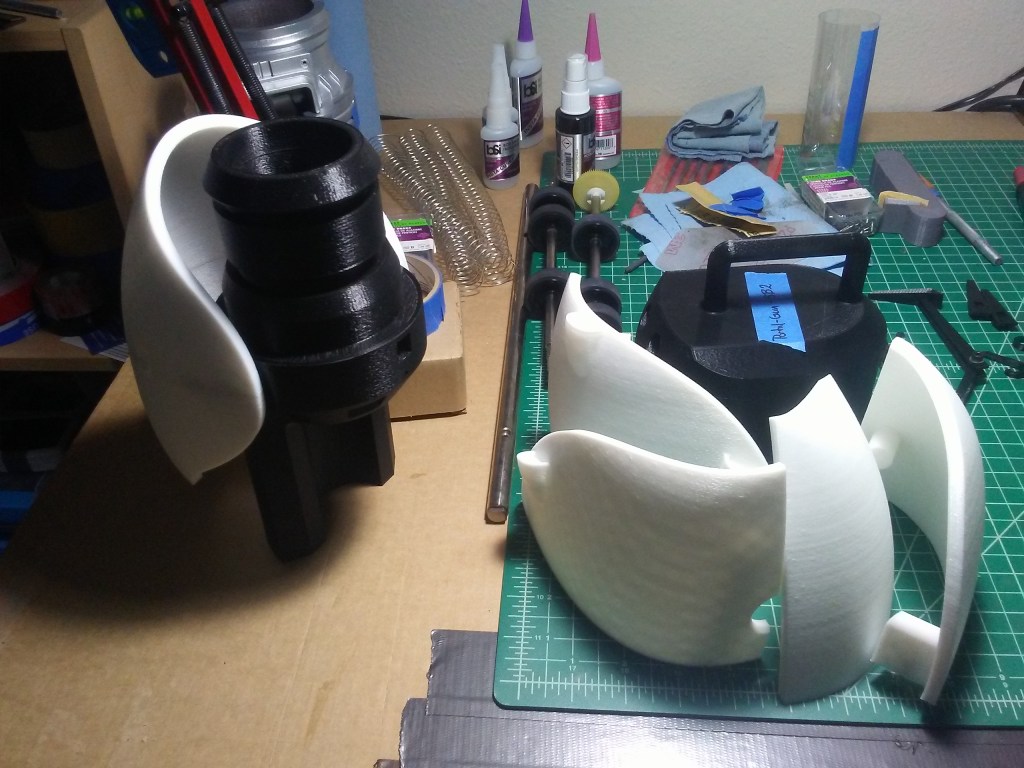

Test fit of the fins on the inside of the barrel.
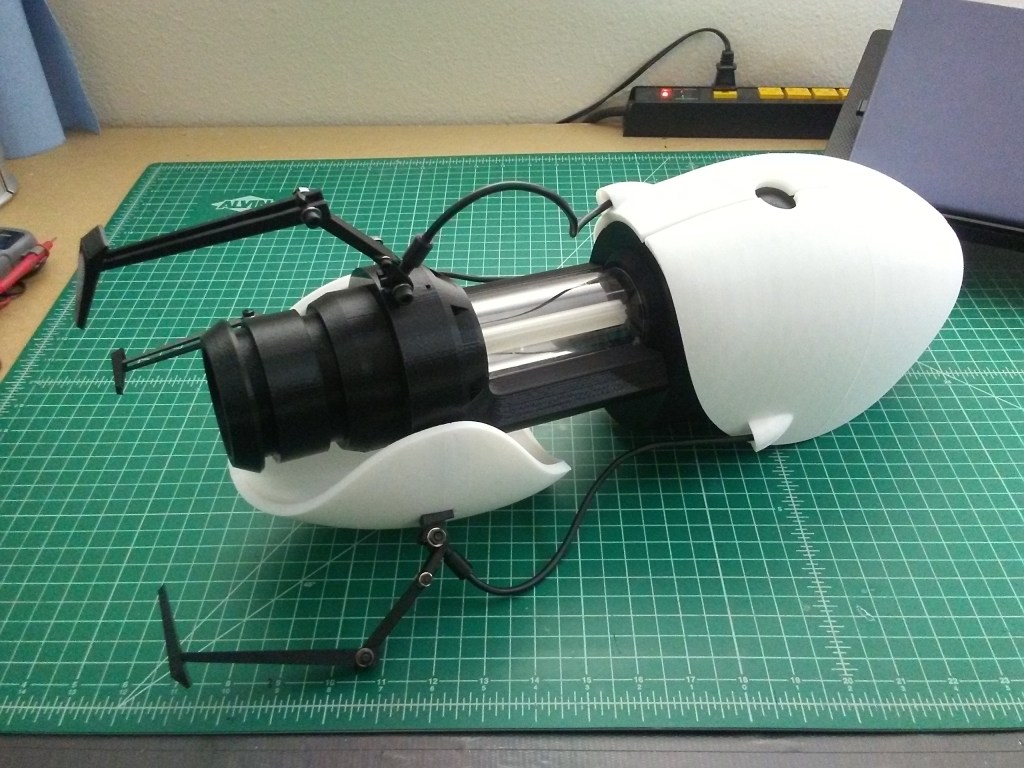
The back shell was already split with a hole for an alignment peg, which was quite nice. Those parts of the shell printed easily enough, along with the main barrel part. One thing that I liked was that the designer modeled the front shell to just snap in place on the body. Easy enough to remove, as well, for finishing and painting later.
With the main body finished printing, I was able to slot the back shell into place. The internal part of the clear cylinder in the middle of the device is printed with a clear PLA – which ultimately ends up more diffused than see-through. For the outside of the cylinder, I cannibalized a clear 2 liter soda bottle, cut and curled the plastic tighter into the correct diameter cylinder. At this point in the build, the cylinder is held tight with blue tape. Still trying to figure out a good way to glue it so it keeps it’s shape without the glue fogging the clarity of the plastic.
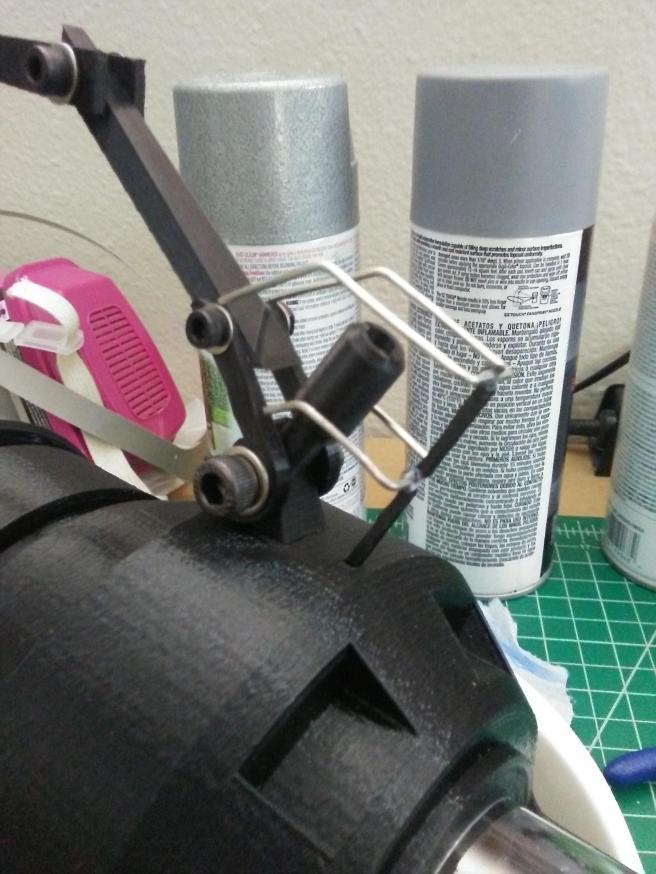

Both the claw arms and the attachment piece were modeled to use rather small printed pins for their hinges, and I was not confident they would hold up to any abuse, in addition to requiring support material to print. I knew from the start I wanted to secure the joints of the claw arms using something other than plastic hardware. After some online browsing and inspiration from the Volpin Props Portal Gun, I re-modeled the arms to print with different joints, as well as the attachment point (which also would require questionable support material) to be printed in several smaller pieces, and to use screws and nuts to attach the arm.
The little wire cage was also modeled to be 3D printed, however I decided using actual wire for this part would be better. I had a couple of notebooks I’d recycled and saved the wire spiraling from and it was just the right gauge for the job. The above was a test fit of the wire cage, before setting it aside for safe keeping to glue in place after painting and finishing sometime in the future.
To make the wires to the main body I cannibalized an old audio extension cord I had stashed in my box of random cables. The cable was just a hair too small to fit snugly in the holes, so I added a bit of heat-shrink tubing to the ends to give it a tighter fit.
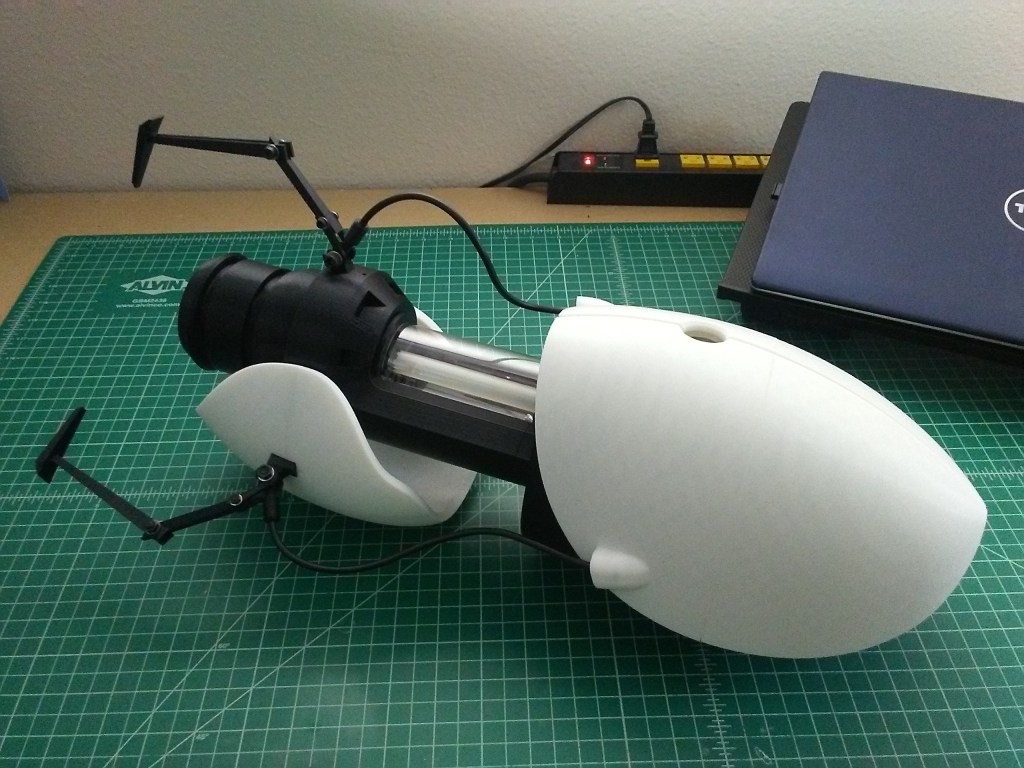
Finally, I did a full test-assembly of the the portal device. Next up, lights and sound! But, before that, there was still a few things I wanted to work out with the design. The creator of the model did hollow out part of the main body if someone wanted to add electronics to it, however, there were no holes for adding buttons or switches on the outside. In addition, the model was designed to use ~5mm rods for alignment and then be glued all together, so no way to change a battery for electronics. These were a couple of the aspects of the design that needed some improvement, and the next things I decided to tackle – but that’s for Part 2.

3 thoughts on “Portal Gun Replica – Part 1 – 3D Print & Assembly”