

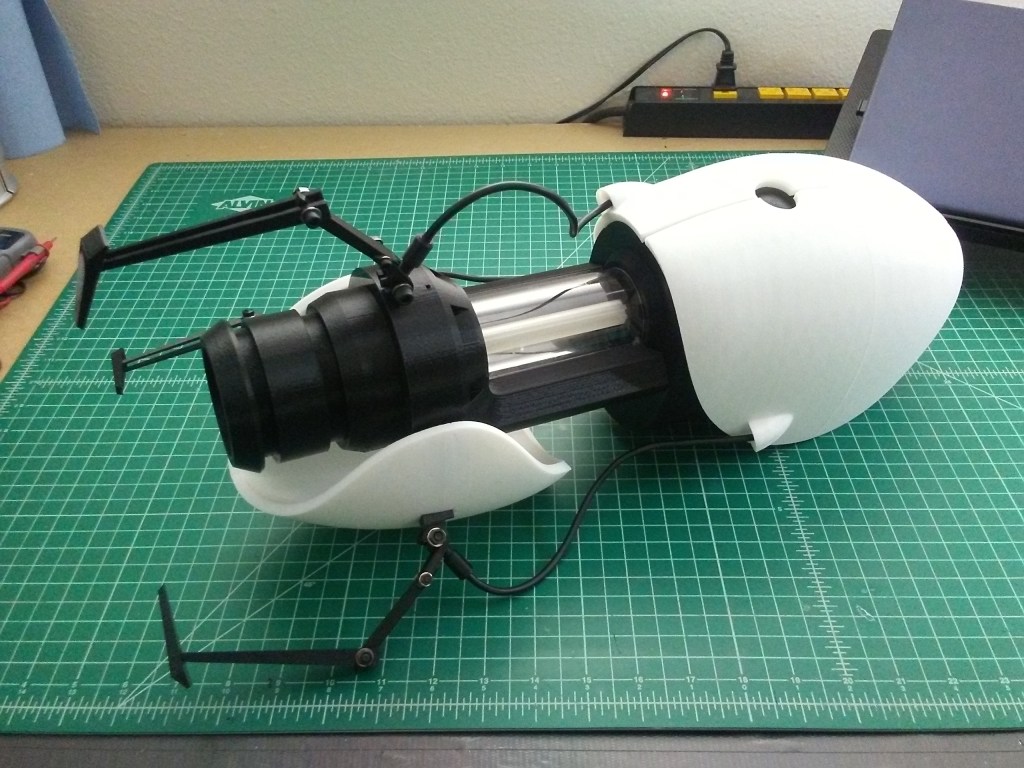
In the Part 1 post, I talked about how I’d printed and assembled a replica Portal Gun from the Portal video game series. So here I was with this really awesome replica that I was picking up and playing with, going around my apartment making portal gun noises and all, and having fun. And while I was doing this, in the back of my mind, I was wondering, “Where in the heck am I going to put this? Where am I going to display this thing?” Of course, there was the same shelf unit where I was displaying the Fallout replicas, but that was pretty much full up, and mounting it on the wall would be a bit of a challenge and wouldn’t look all that good in my opinion. Hmmm, what’s a maker to do?
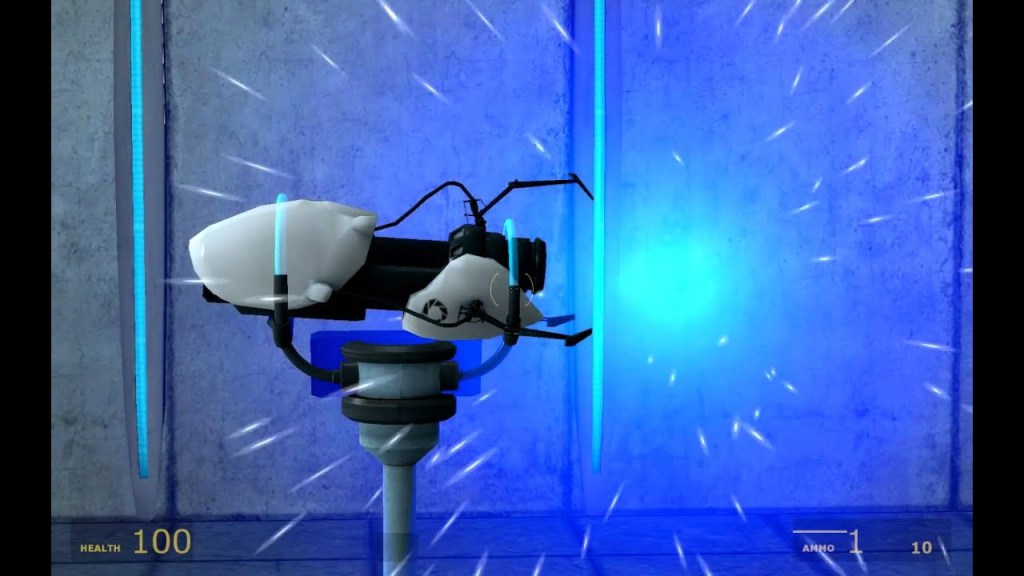
I forget exactly how the idea came to me, if I’d stumbled across it in my reference search when working on assembling the Portal Gun, or if maybe I’d always had the idea in the back of my mind. Either way, I thought, “It would be pretty neat to display it on something like the stand you pick it up from in the first game. I bet you I could model and build something like that.” So, back to the internet for more reference images, and to search for ideas and see what other people had done.
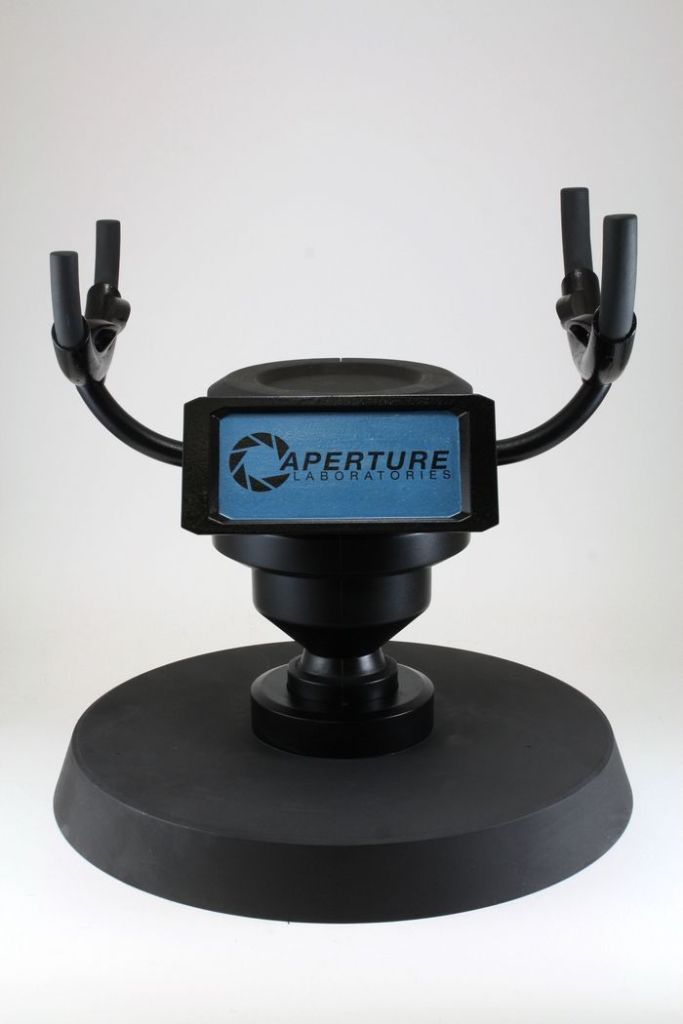
Apparently, sometime after NECA released their Portal Gun replica, they released a stand for it too, which resembled the one from in-game. Unfortunately, it was a bit on the short side, meant to to sit on a shelf instead of being free-standing. Either way, it would help as reference for building my own. I think it was after that, that I stumbled onto a post in the Replica Prop Forum (RPF) where someone had modified their NECA stand to be full height, like the in-game stand, and had added a motor to make it rotate. In their post, they modified the NECA stand to extend it using 2″ & 3″ PVC pipe to make it taller and free-standing. This was pretty pivotal for my thought process on how to build this thing, cause there was no way I was going to 3D print the full base and the upright for the stand on my printer. It was just too big and I would have to cut it into too many pieces to make it fit properly on my print-bed. That said, I now needed to figure out how to make a stable base to hold the PVC pipe, and I had an idea that I wanted to try.

Gathering my reference images, I was off to CAD! First, I used Netfabb to piece together most of the Portal Gun model from the STL files I’d downloaded, and then save those into a single file I could import into Fusion 360. This allowed me to get an appropriate scale for the design of the display stand and dimension everything out properly.
I had several goals for the design of this display stand (aside from making it look as much like the in-game model as possible); I wanted to make it as modular and as print friendly as possible, meaning little to no support material; I also wanted to design it so it could be taken apart, so no superglue for attaching large parts if I could help it; and finally, I’d been learning about heat-set threaded inserts, so I wanted to design it with use of those in mind as well, so I didn’t have to thread fasteners directly into the plastic.
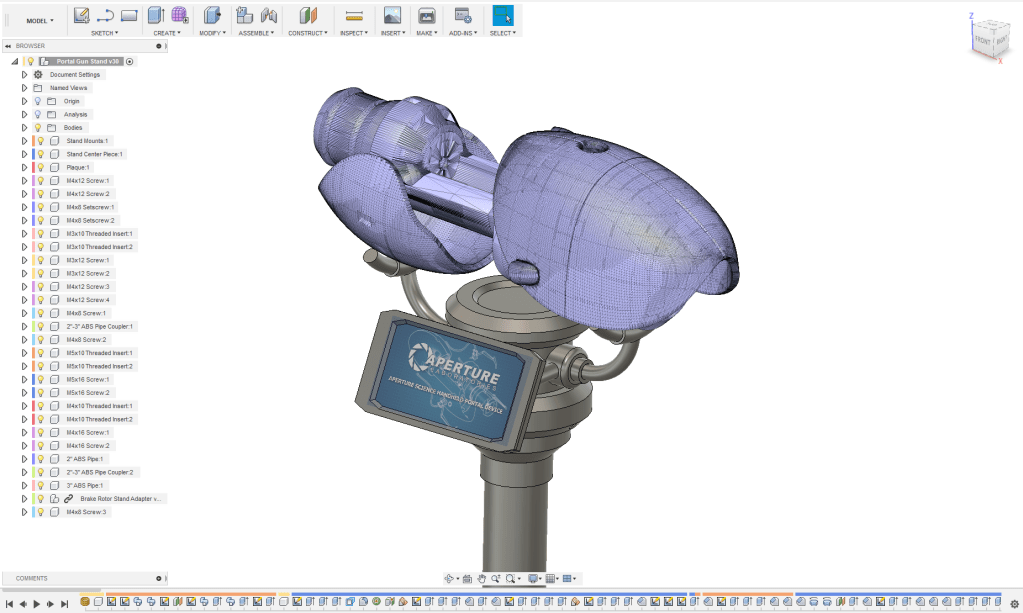
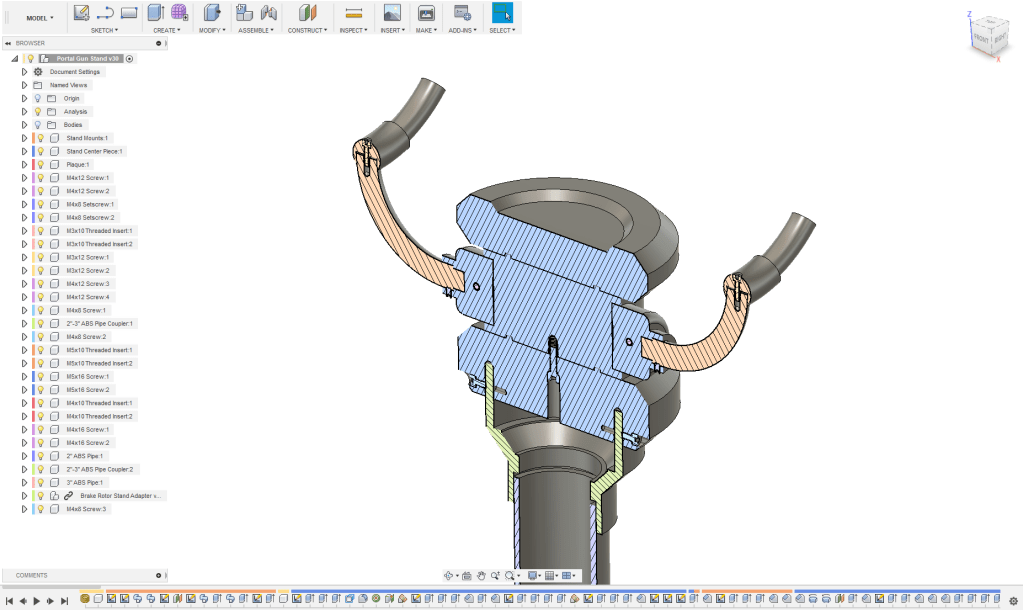

Thankfully the overall shape of the stand was fairly straight forward, lots of cylinders stacked on each other with some chamfers and radii on them. Some of the more challenging parts to figure out for the design were where to cut it for printing, and where to put the screws to fasten everything together. I did have to fudge on some of the proportions to make the portal gun sit correctly and have the plaque print as one piece (the in-game plaque was too wide for my print-bed).
One feature that I had fun with in Fusion was importing parts from McMaster-Carr. I might have gone a bit overboard adding all the different fasteners to the assembly, but it really helped to figure out tolerances and see how the whole thing would assemble. I was even able to spec out the piping and connectors I needed to make the upright for the stand.
Someday I need to pop back into Fusion and finish the design of the model, there’s a few things I need to change after printing it, and I’d love to do a blue-print of how to assemble it with a complete bill of materials for anyone else who would want to build their own.
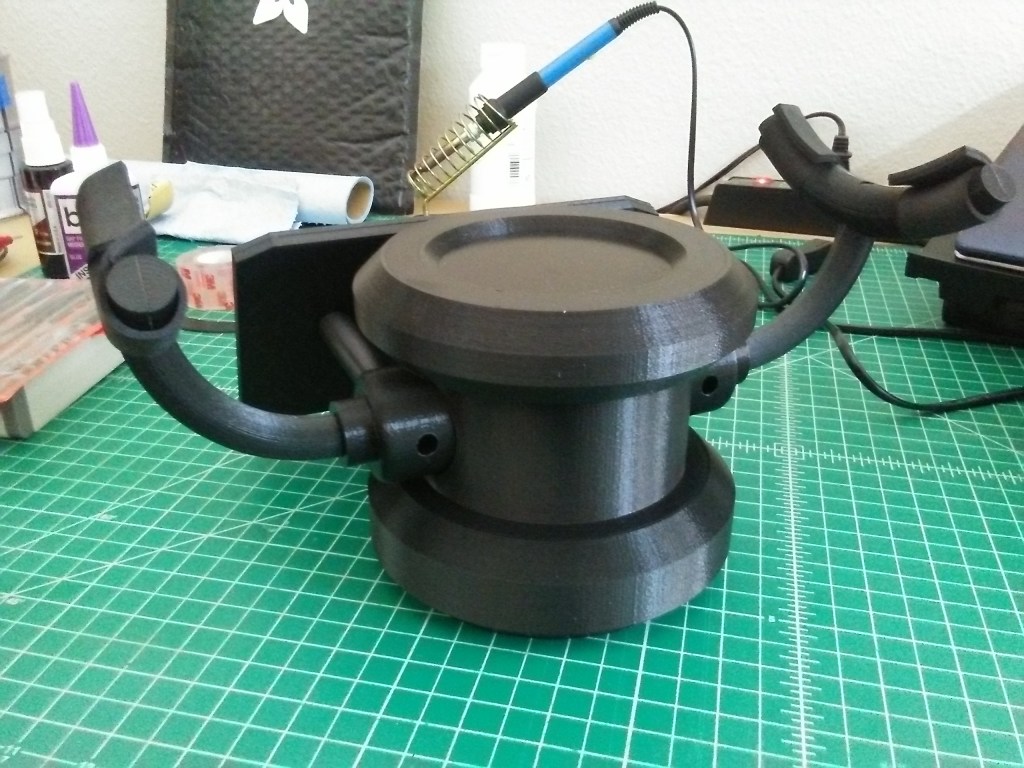
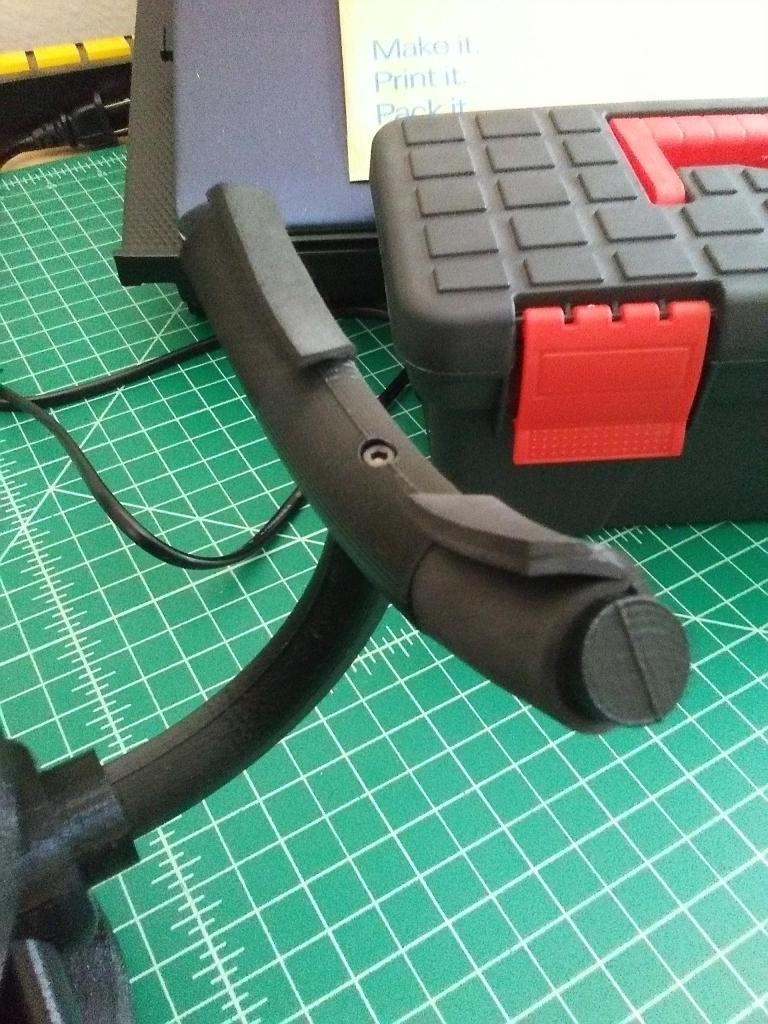
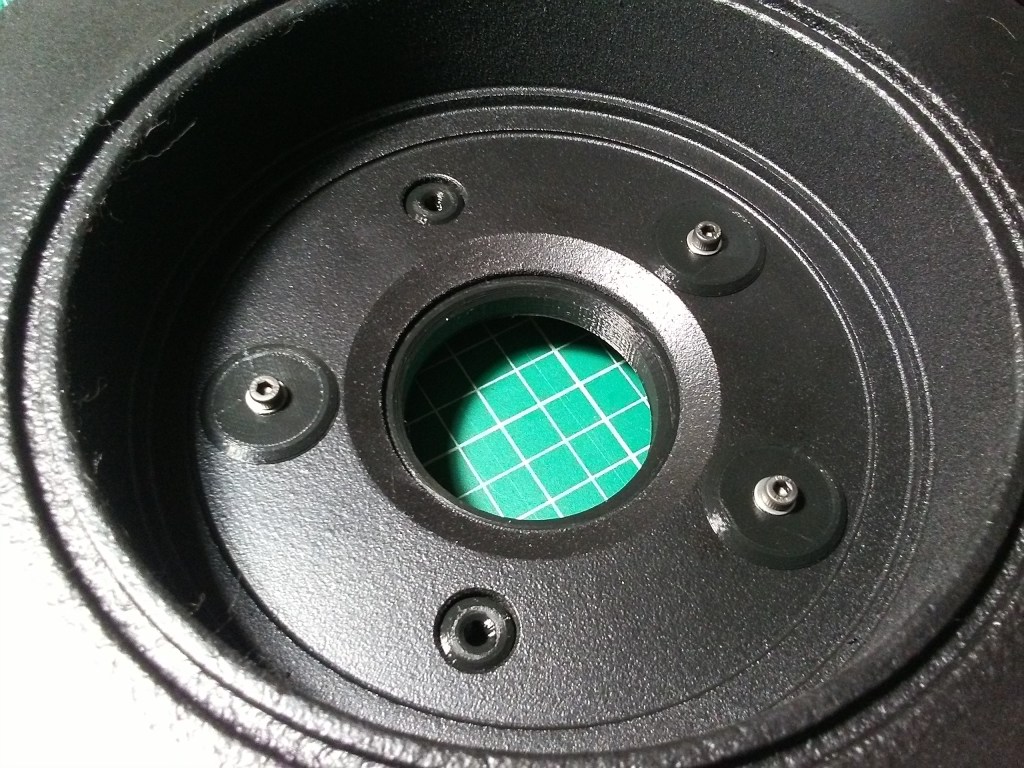
Printed and assembled – well mostly. Still a ways to go, but with most of the parts printed, it was fairly easy to assemble. I tried to design it with the holes for the screws in as inconspicuous places as possible, but that was easier said that done with some of them. Both the arms on the stand and the rods to hold the plaque required the screws to be visible, but at least the one set of holes will be hidden by the portal gun sitting on the stand and the other will be on the back side where you won’t readily see them.
Additionally, while one of my goals was to attempt to not have to use glue in the assembly, in the case of the arms with their curved shape, and for the plaque to make it so you could slide in a graphic, I had to models those in pieces and glue them together. In the second photo above you can see the seam line where I had to glue the two halves of the arms together. I modeled in holes for registration pins to each half of the arm so they were easily aligned when it came time to glue. And that seam will buff out in the post processing and painting phase.
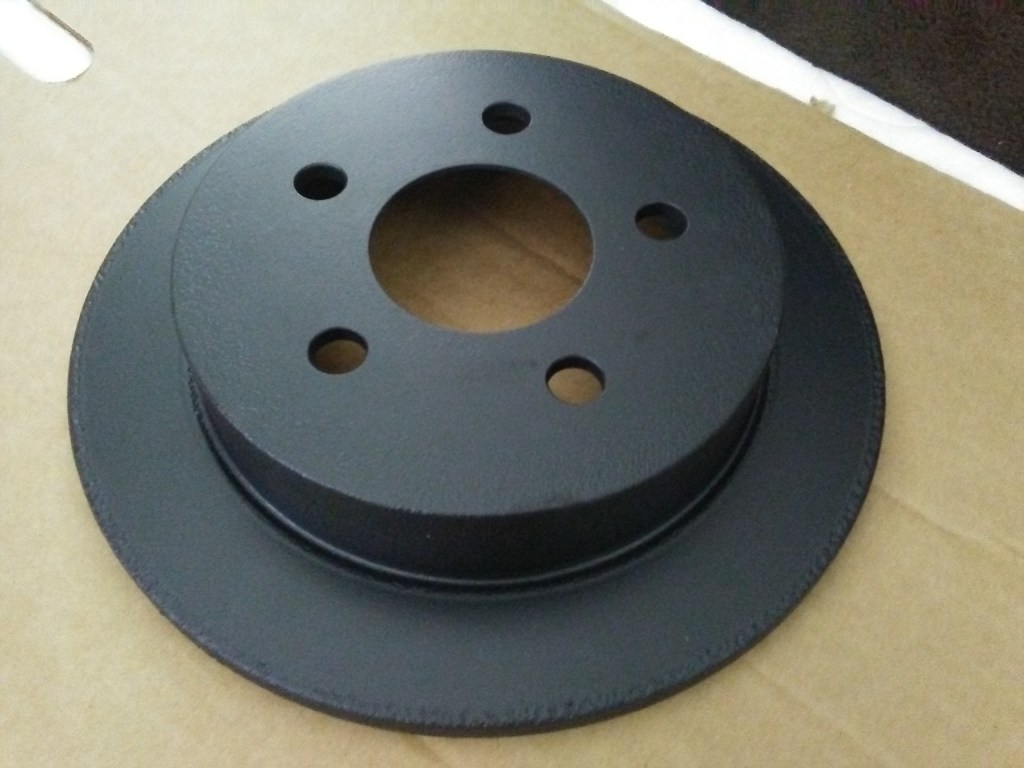

So, that idea that I mentioned that I wanted to try? There’s a bit of backstory for you on that; I had changed out the breaks myself on my 99′ Pontiac Grand Am some time ago (the whole deal, pads, calipers, and rotors) and had decided I didn’t want to just chuck the rotors in the trash. They were a bit rusty, but it was mostly surface rust and were in otherwise good condition. Granted I wasn’t going to used them on another car, but I decided to hang on to them thinking I could do something with them in the future. Well, in my thought process for trying to figure out how to make this thing free-standing, I was pondering how I was going to make it stable. I figured it would end up top-heavy and wobbly without some sort of weight in the base of it. I’d originally thought that I could try and tear apart the weighted base off an old standing lamp, but that idea really didn’t seem like it would work all that well.
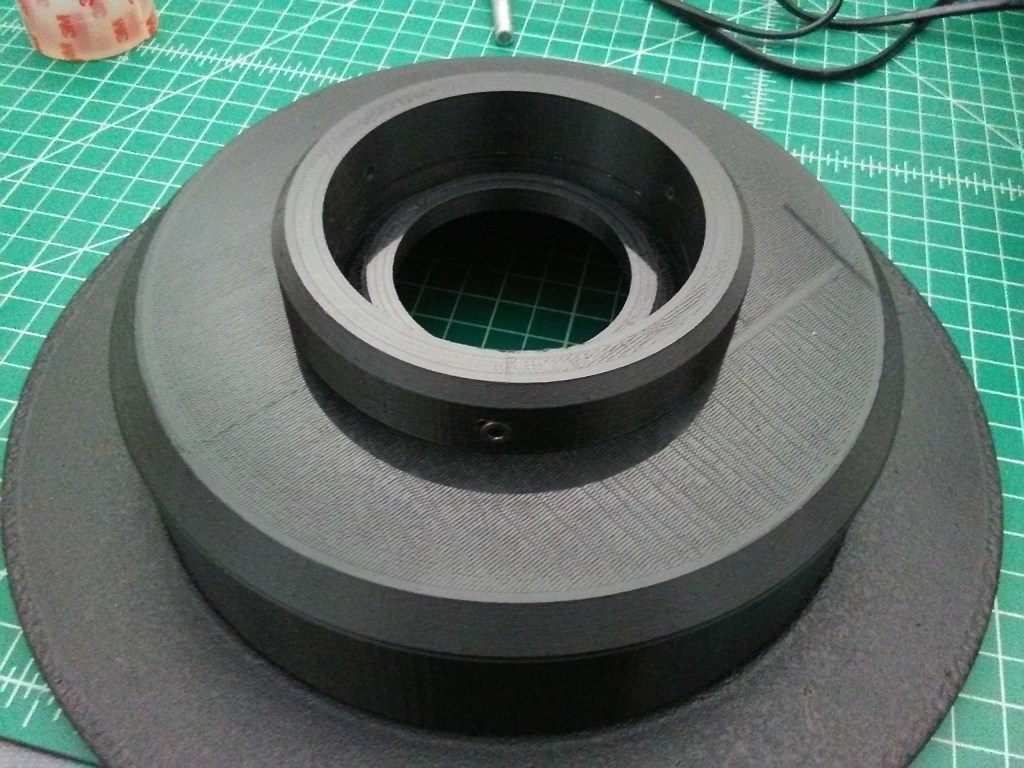
That was when my mind wandered to the brake rotors that I still had sitting boxed up in a closet. I fished one out, got my respirator, a wire-wheel on my drill, and some sand paper and decided to see how much of the surface rust I could sand off. Once done with sanding, I doused it in a number of layers of black plasti-dip (a rubberized spray paint) and let it dry. Getting some measurements off it, I headed into CAD again and modeled it up, and then designed an adapter that would fit the ABS pipe upright and screw onto the rotor so that it’d look like the black part of the grey upright from the in-game model. As luck would have it, the diameter of the rotor hub was the perfect diameter to fit on my the print bed and I could print the adapter all at once as one large piece.
Doing a test fit of the stand on the rotor, it turned out better than I expected. It made the perfect base for the stand and wasn’t too wobbly at all. I could not have been more excited that I’d been able to make it work out and had found a use for at least one of the old rotors.
Next, it was on to the plaque, and what type of graphic I wanted to have in it. I could have just done the arrow as is displayed in the in-game model, but that felt kinda boring.

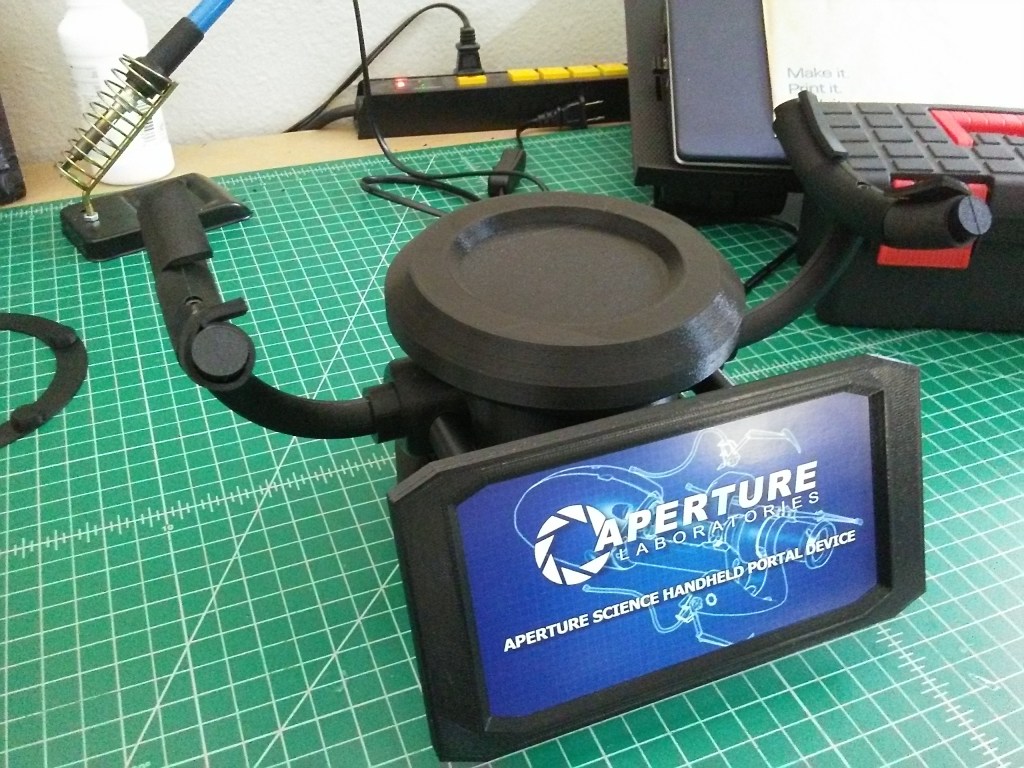
I’d had somewhat of an idea of what I wanted on the plaque, but it took me a fair bit of searching to find a vector graphic of the Aperture logo and name. The background took me a bit more searching. I’d remembered seeing the blue-print style expanded views of the Portal Gun from one of the Aperture Investment Opportunity videos and I really wanted to see if I could get my hands on an image of that. Took me a bit, but I found a screen-cap of it that I liked. Then it was off to Gimp, to attempt to create the plaque. After a couple attempts, I landed on the current design. To give it a nice look, I had it printed up on glossy card stock and cut to size so that it slid right into the plaque frame.

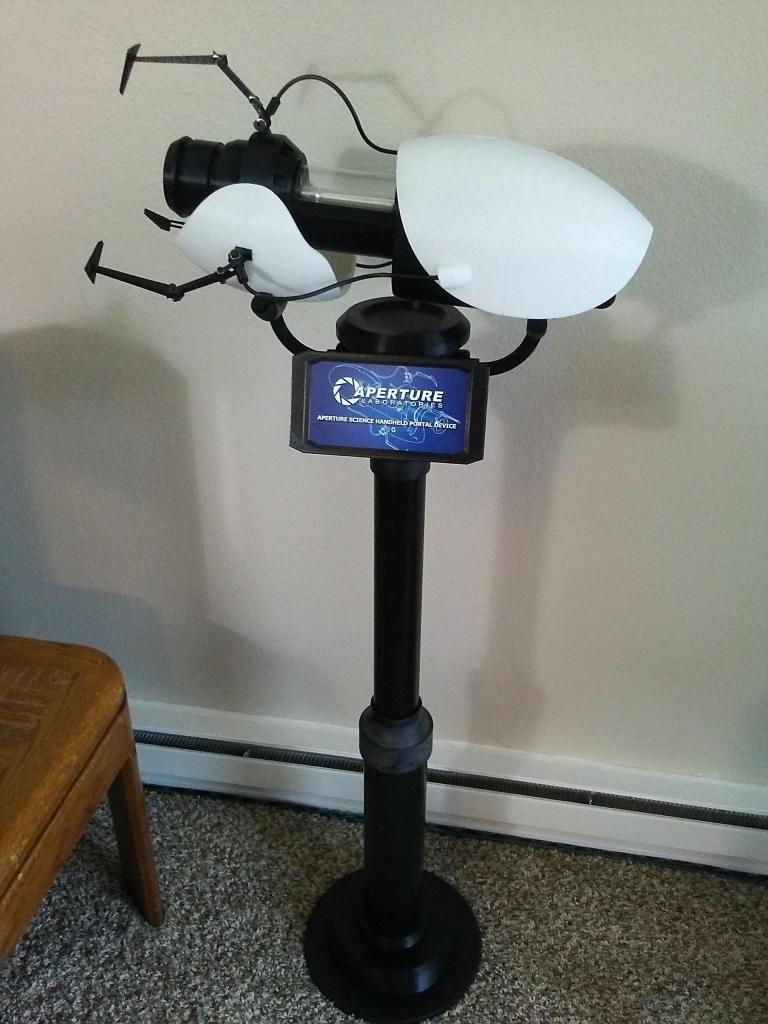
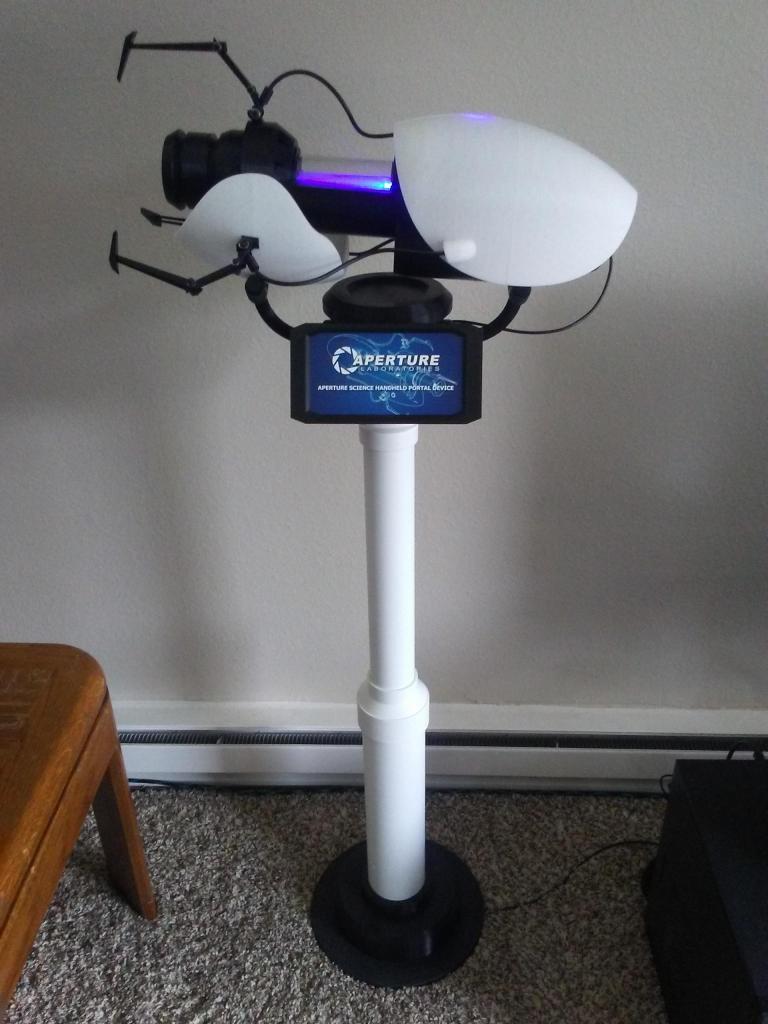
With the plaque in place, and portal gun on the stand, it was looking quite nice. All that was left was to mount the display stand on the upright and find a place in my apartment to display it. Oh, and I suppose paint the upright as well. I decided on continuing the white/black theme instead of going with the gray from the in-game model, as it just didn’t look quite right to my eye. Overall I think it’s a fitting way to display the Portal Gun. And in that last photo, there’s a bit of a spoiler for Part 3 of this build, so stay tuned.
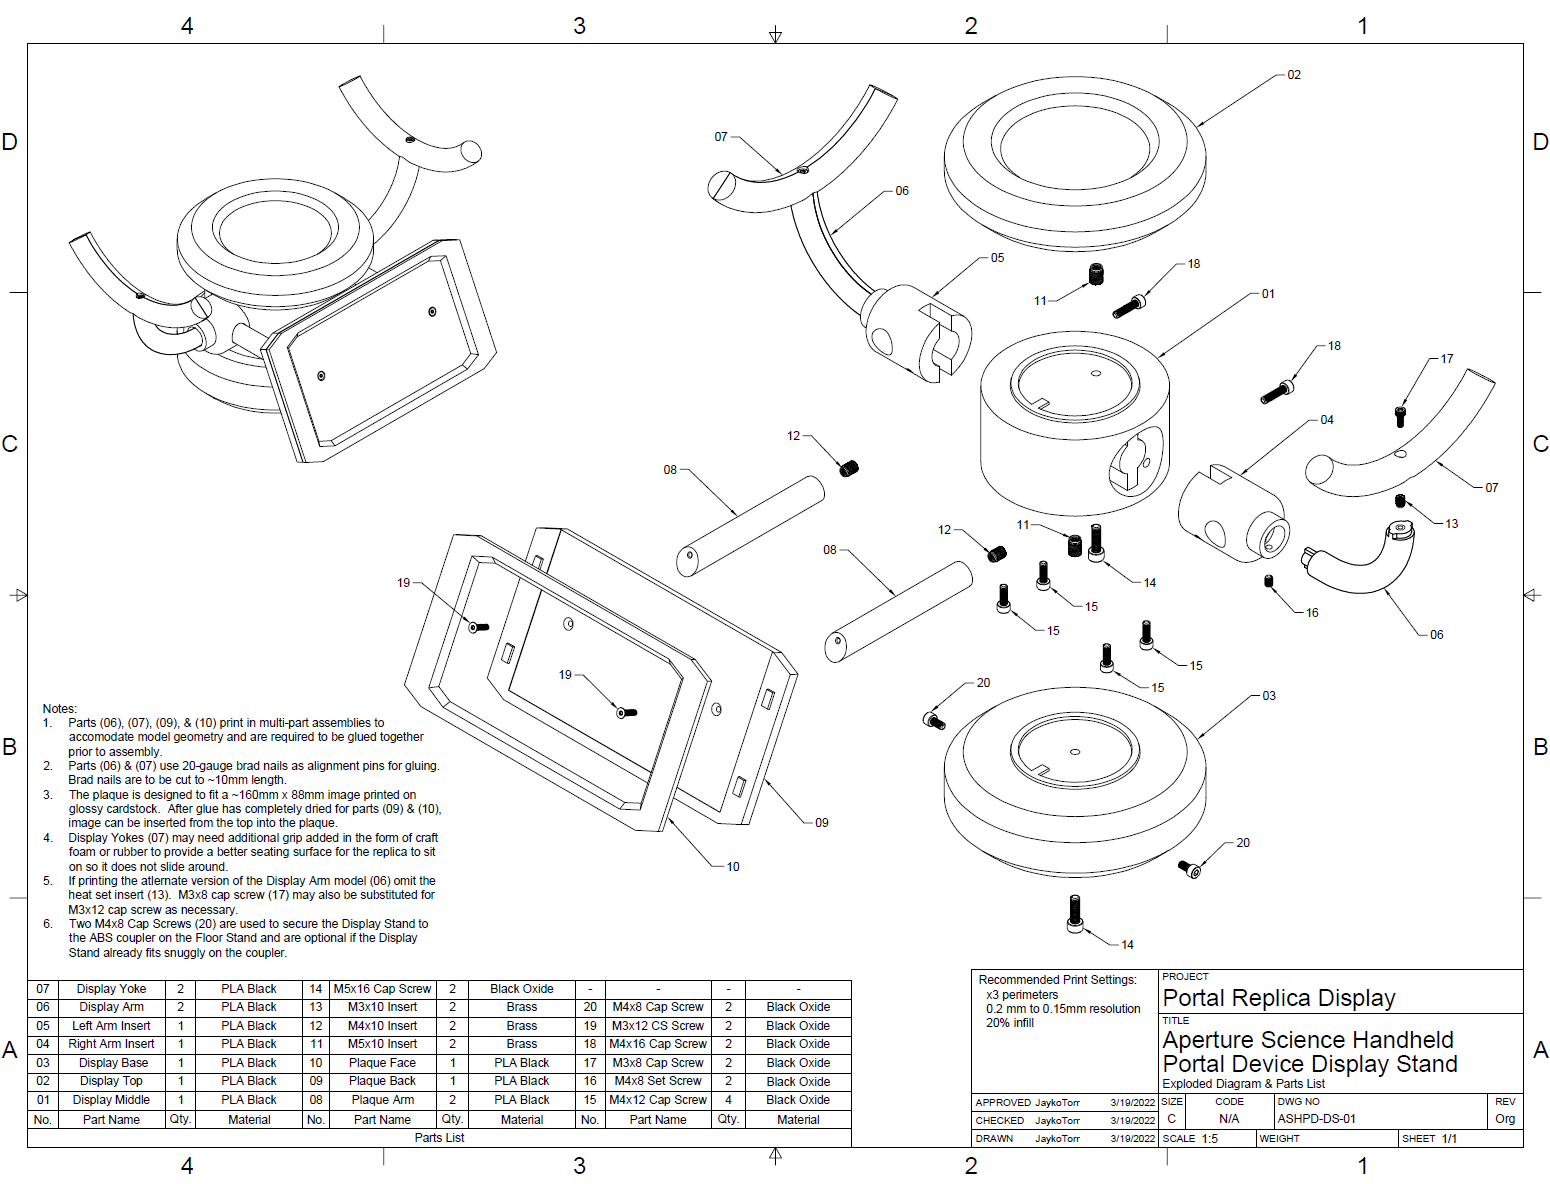
Edit: While it’s been almost two years since I made this post, I figured I should add on to it to say that I finally got around to cleaning up the files for the display stand and posting them for download here on the site. So, if you have a replica of your own and need a fun way to show it off, give it a download, print off the parts, and see if it works for you. And if you encounter any issues with the 3D model, let me know and I’ll see what I can do to help fix it. Anyway, the files up for download are for the display stand, the floor stand with the rotor adapter, and some of the negatives I used to modify other STL files along the way. And I did up a quick exploded diagram to show how the display stand is assembled. I’m leaving the floor stand for you to figure out yourself. That part will need some creativity since I don’t think everyone has changed the rear brake rotors on a ’99 Pontiac Grand Am. Anyway, happy printing!


One thought on “Portal Gun Replica – Part 2 – Display Stand”