After I’d completed my Laser Pistol replica, I decided I wanted to tackle a larger project (now mind you timeline-wise, this was before I started work on the Portal Gun which ended up as a decent sized project itself) and I was completely taken with the Laser Rifle that Yvo de Haas had posted over on his site, Ytec3D.com. Not only was it a large print, but the prop had some functional bits to it too, that made it more on the complicated side of things to assemble, specifically the working reload mechanism for the energy cell. I wanted a challenge though. I wanted to build myself a Laser Rifle from Fallout.
[Note: I did post an album of this build to Imgur a while ago, but I wanted to post it again here explaining the build in more depth and detail.]
Almost all of the parts for this project were 3D printed, and I say that because of the all the fasteners, aluminum stock, linear rods, and bearings this build called for in it’s design.
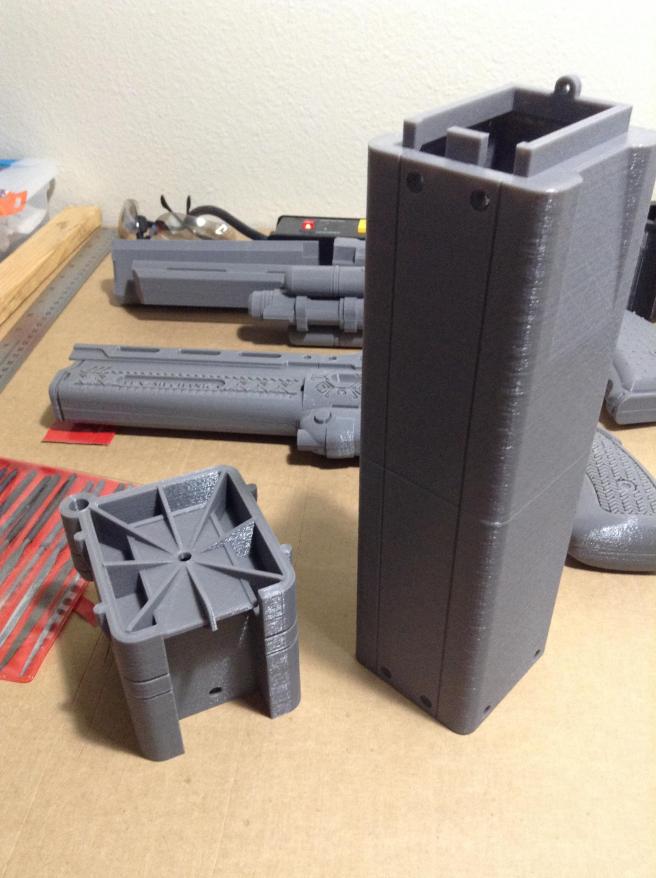
For the 3D printed parts, I started with the barrel and muzzle of the rifle were. Due to it’s length (height?), the barrel was designed to print in two pieces, and be slotted and glued together. After those larger pieces, I worked my way down the rest of the long list of parts.
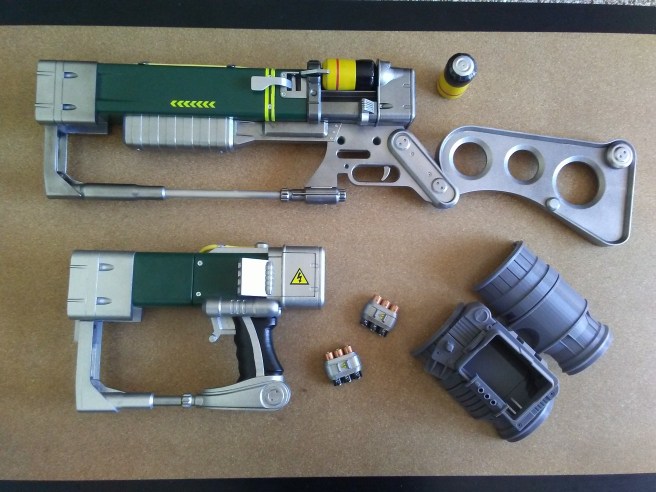
The barrel wasn’t the only part to print in multiple pieces. The stock was also split into several smaller parts that had to be glued together. Those part were designed to print standing on end which would have created a number of overhangs that would need support, and would just not be nearly as strong in the long run. So, I took to Netfabb to split the parts length-wise in half, that way I could print them lying flat, resulting in a nicer print without major overhangs. After gluing the halves together, I then assembled the parts long the original seam lines (as seen in the second photo).

With most of the parts printed and partially assembled to test fit things, I was getting pretty excited seeing it take shape. Now it was time to start priming and sanding each piece. A larger project like this, especially with parts that had smaller crevices, posed a challenge to my sanding skills and took me far longer smooth out and hide all the print lines.

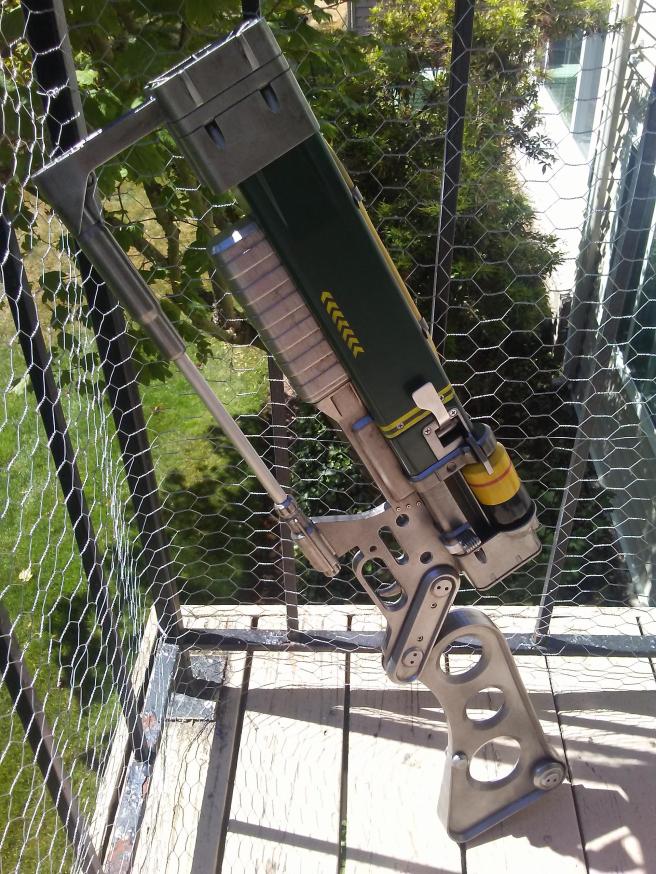
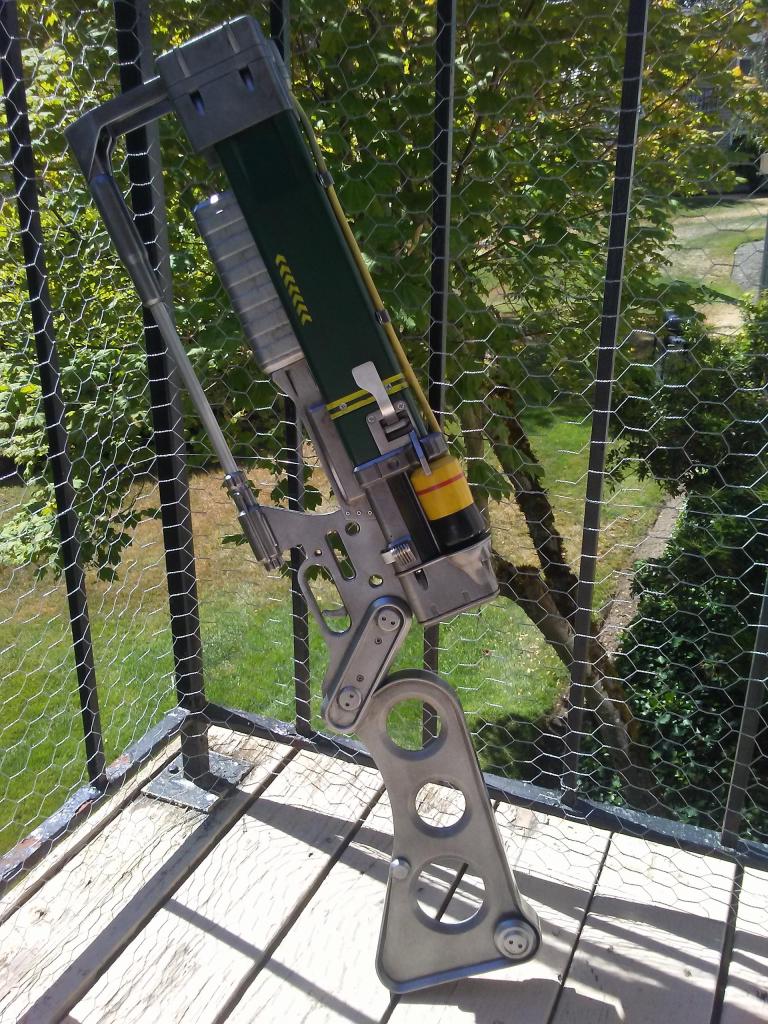
Once primed and sanded I moved on to painting each of the parts. I alternated between a bright silver and dark metallic spray paint to get a more gun-metal look for the “metal” pieces. I used a nice forest-green for the barrel, and some yellow in the right places for the highlights.
With that was done, it was on to assembly of the reload mechanism. This was one of my favorite and most challenging parts of the build, more so than sanding it. The assembly appeared straight forward, thanks to the instructions provided by it’s created, but there ended up being a lot of tweaking, disassembling it and re-assembling it to get it working correctly. I sourced the parts from a number of different places on the ‘net, Amazon, McMaster-Carr, and even eBay.

Release Mechanism Actuator 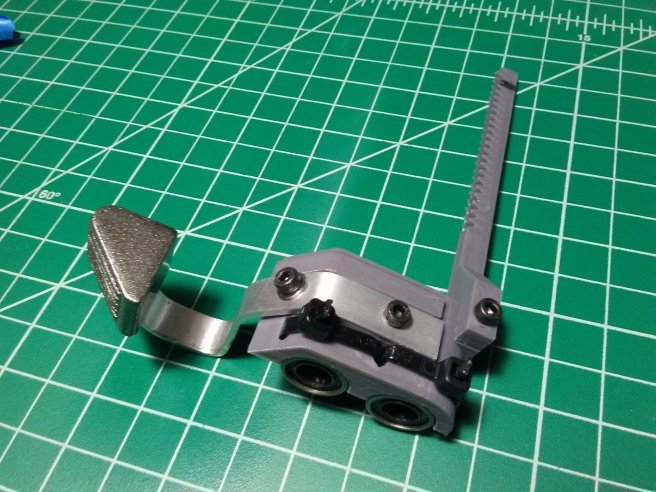
Locking Slide 
Locking Slide Rods
First, thing I assembled was the release mechanism actuator, consisting of a threaded rod slotted into two bearings, that a cam and lever rode on. The release lever itself was to be made out of aluminum stock and glued into the slot on the cylinder. Much more robust than attempting to 3D printing a lever arm and a great design choice in my opinion.
Next in the assembly, the locking slide, which interfaces with a gear/pulley system to lock the fusion cell into place after reload. Originally the bent aluminum arm was designed to be screwed in with one screw between the two bearings. After some testing, I felt there was a bit too much wiggle in the aluminum arm with only one screw, so I drilled a second hole and had just enough room to heat sink a nut, and add another screw on the angled part to give the arm more rigidity.
Thirdly, the rods for the linear bearing assembly set into the back piece of the rifle. More or less self-explanatory.
After that, it was on to the assembly of the more complex gear/pulley system with linkage arm attaching to the little catch lever and plunger arm that hold the fusion cell in place. This mechanism took a bit for me to get assembled and seated correctly, and with copious amounts of silicone grease, working smoothly and correctly.
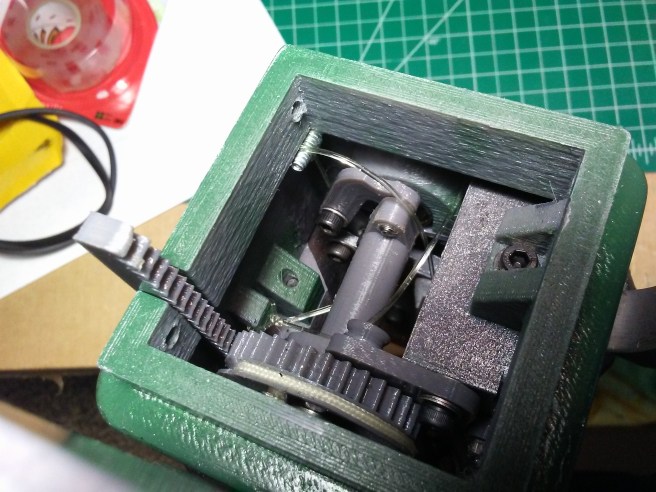

The photo I have here looking into the housing at the gear/pulley and linkage arm, with assembled locking slide, was the best, and only photo I had of that part of the process. I was rather preoccupied trying to assemble and get it working correctly to take more photos. Either way it was finally assembled! I did modify it just a bit; the design called for elastic string, which I had difficulty obtaining a product that felt correct. I ended up attaching a string to tension spring and was able to get that work as an alternative.
With the reload mechanism finally assembled it was time to move on to other detail parts, weathering, and electronics!
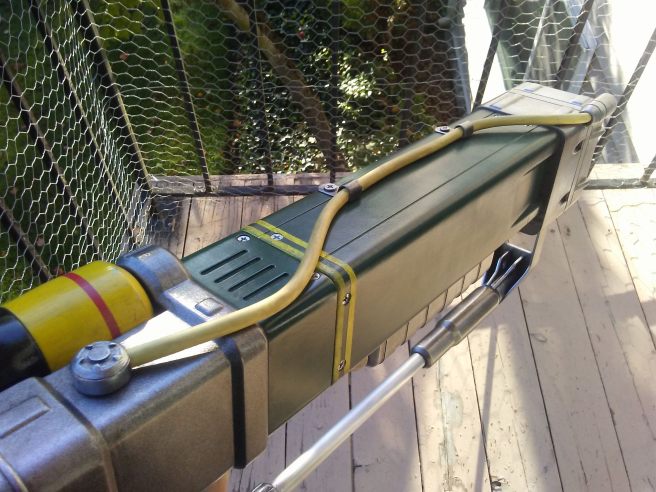
Similar to the Laser Pistol replica, for the yellow wire along the top of the laser rifle, I cut a spare DVI cable to length for use; this time however, I had an idea I wanted to try to make it yellow. I purchased a long roll of yellow heat shrink tubing. Sliding the DVI cable into the heat-shrink tubing and using a heat-gun to form/shrink it around the cable worked much better than my previous attempt to paint a coaxial cable. I was thrilled I’d been able to come up with this solution.
Now it was time to weather the laser rifle! I did a quick black/brown wash over-top of the assembled rifle, trying to get the dirty paint down into the crevices and blot up a much as I could with a rag. It turned out alright, but I don’t think I weathered it enough. I’ll have to do another weathering pass some day when I get actual oil paints that might help make it look more dirty, greasy, and oily.
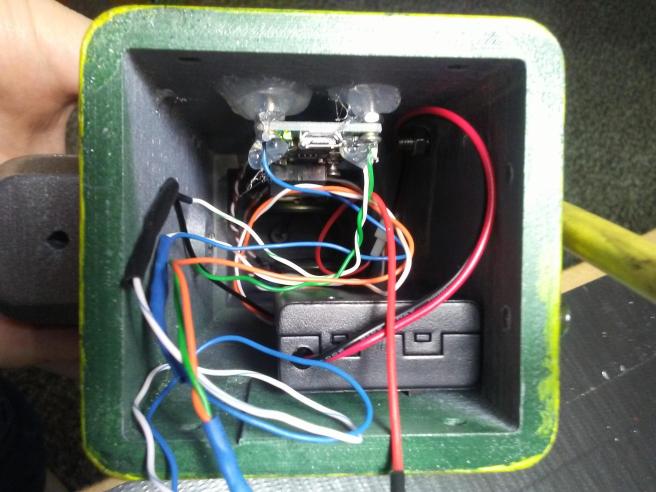
The electronics for this were purchased from Adafruit and consisted of a sound board, two small speakers, a AAA battery case, and a small 5mW laser pointer. For the sound, I decided I wanted the actual in-game sound from the laser rifle, so I did some research on how to get into Fallout 3’s game files on my PC and extract the sound files I wanted. Then, I uploaded them to the sound card and with some janky creative wiring, wired up the sound card/battery to an on/off switch on the back of the rifle and to a momentary switch for the trigger.
Laser Rifle – Check! Laser Pistol – Check! Energy Cells – Check! Fusion Cells – Check! Next up – Pipboy 3000. Then I’ll be ready for the nuclear apocalypse!
Quite the challenging project to put together, but so satisfying with the working reload and laser. I’m super happy with how it turned out in the end.