In my 3D printing adventures, I’ve printed replicas from Fallout, Destiny, and Portal, but I had yet to do anything from Skyrim. Problem was, I wasn’t quite sure what to make, though I knew I wanted more bladed replicas. I needed more swords and the like to hang on the walls of my apartment. That said, I figured I’d start small and go with a steel dagger model I stumbled across in my 3D model browsing.
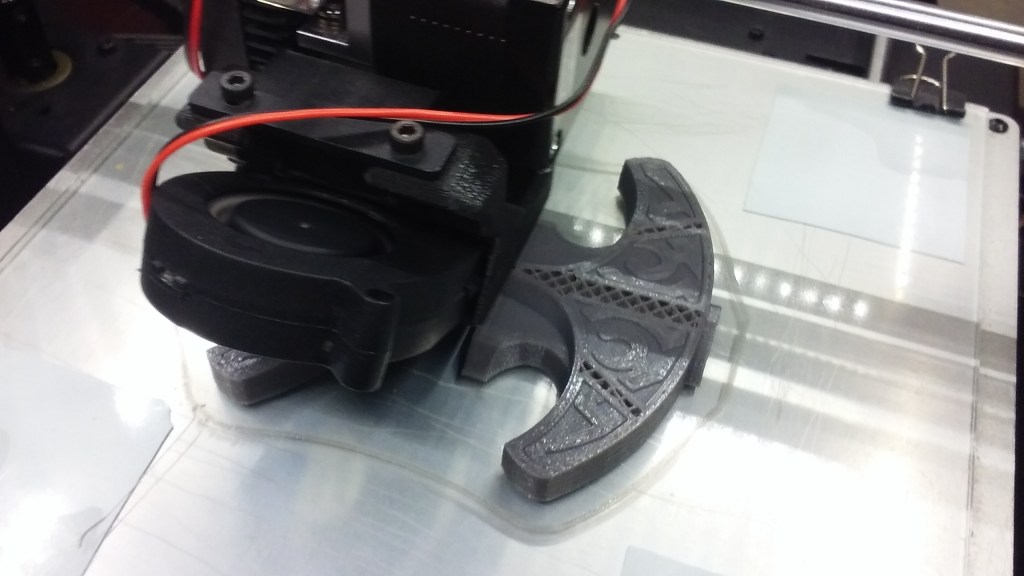
The model I found online, on MyMiniFactory, contained both a split version of the steel dagger ready for printing along with a complete (un-split) version of the model. This was key, as even though the original uploader split the model nicely, I wanted to add a couple steel rods to give more weight to the model and help align all the parts. Off to Netfabb I headed with the STL file. Using Netfabb I created two cylindrical voids running down the length of the blade and into the handle, then went to work splitting the model to make it easier to print.
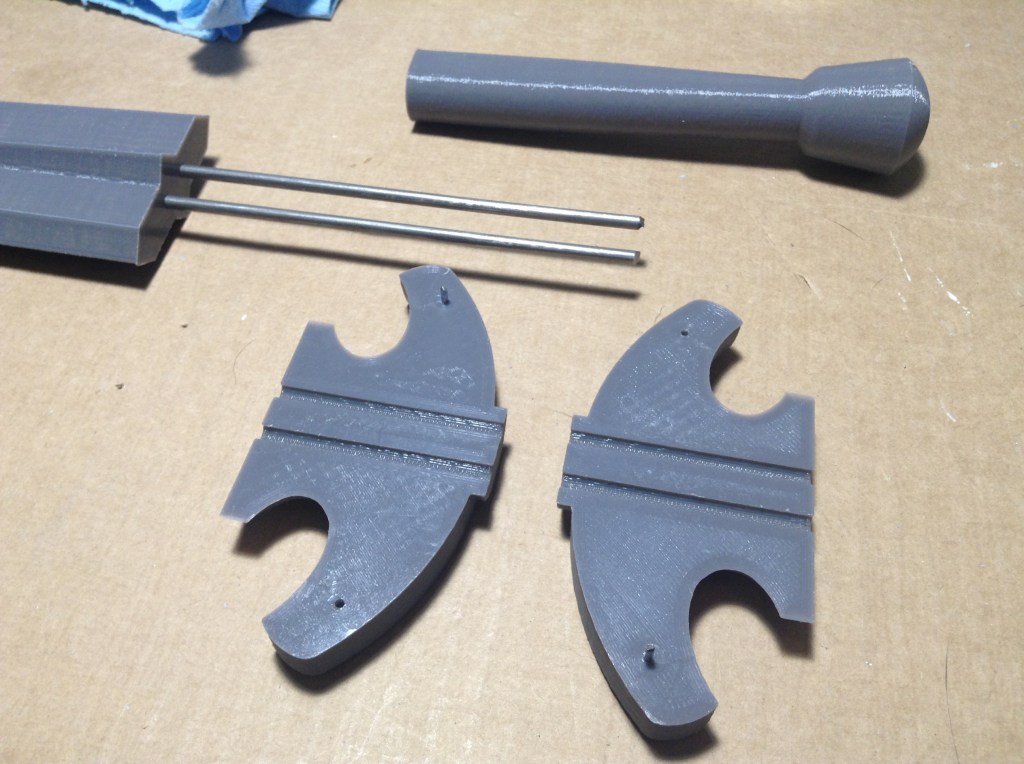
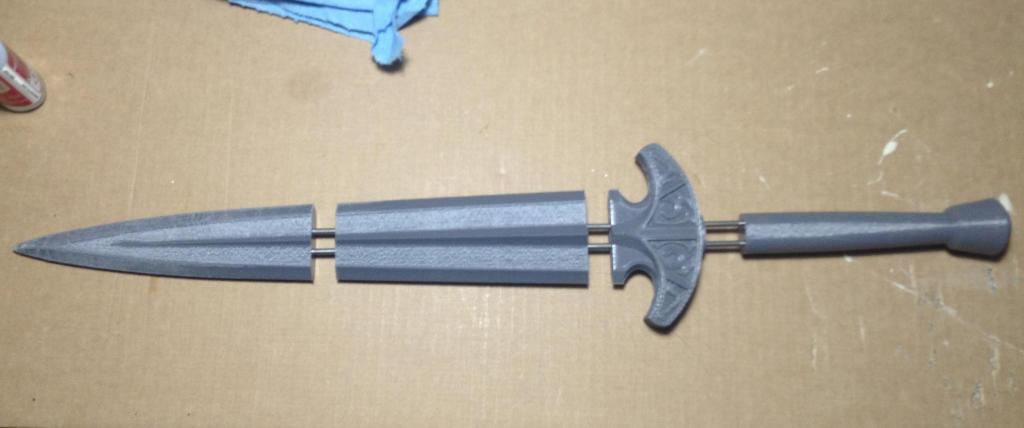
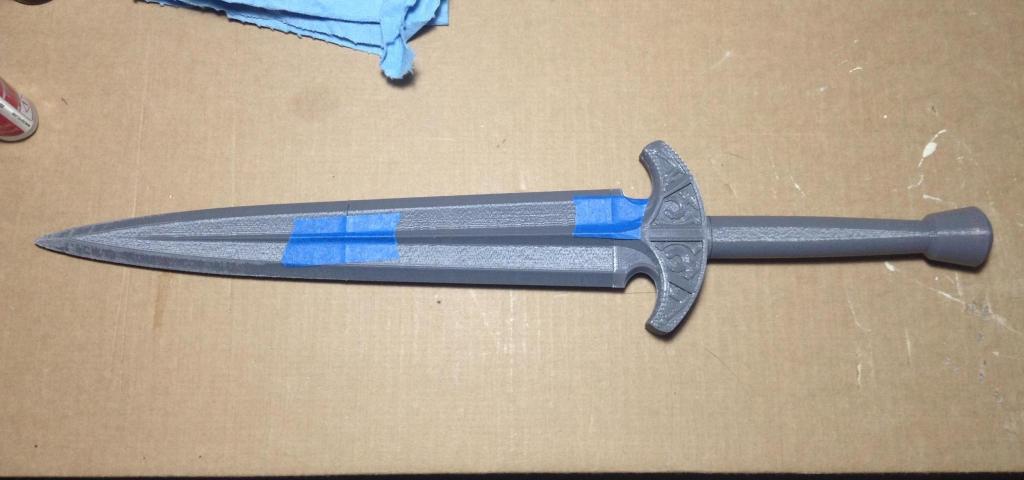
In addition to the holes for the steel rods, I split the guard in half, so I could print it with the detail sides up. Using brad nails for registration pins, was able to glue the two halves back together and slot everything over the rods. Test fitting it with some blue tape to hold the pieces in place, I was quite happy with the weight and feel of it in my hand.
On to filling and sanding. To fill in all the seams, I used wood filler, then sanded that down and added coat after coat of filler primer, sanding after every two coats or so.
For this model, I wanted to try out something different than just spray-painting it. I wanted to try out a dry-brushing technique I’d seen on a channel I watch, Punished Props. They’d painted a Skyrim Nordic dagger, and the dry-brushing technique they used really made it look awesome!
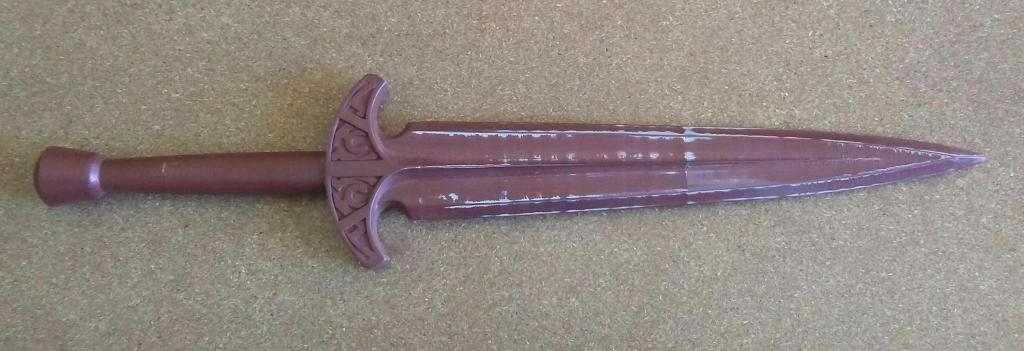
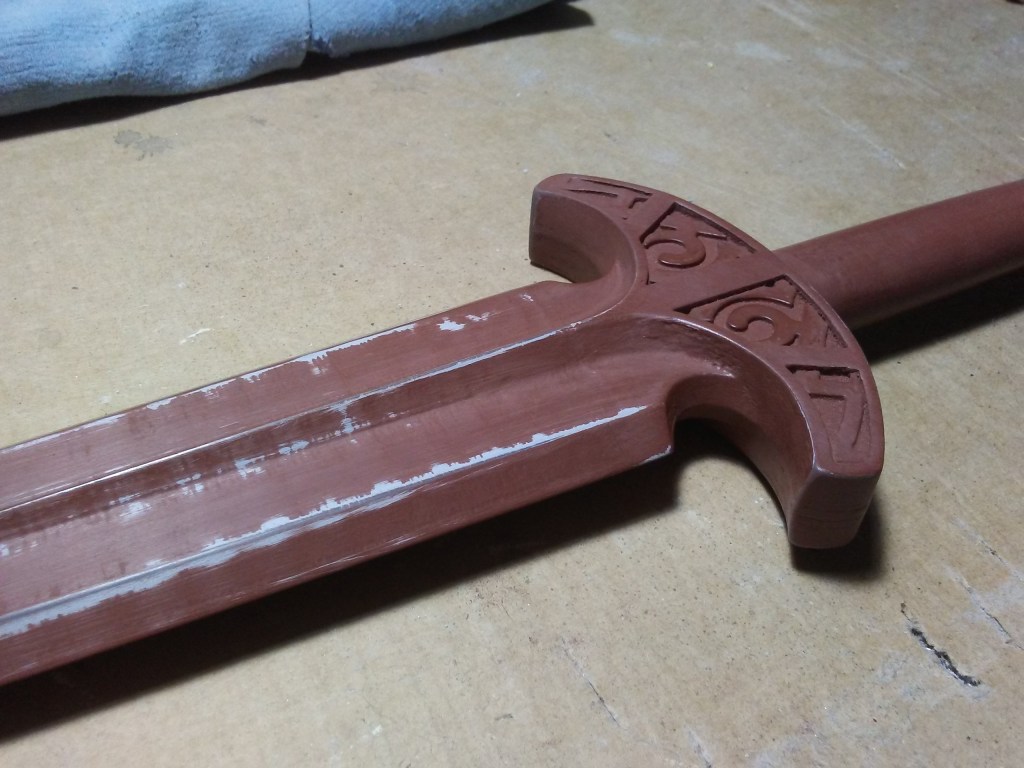
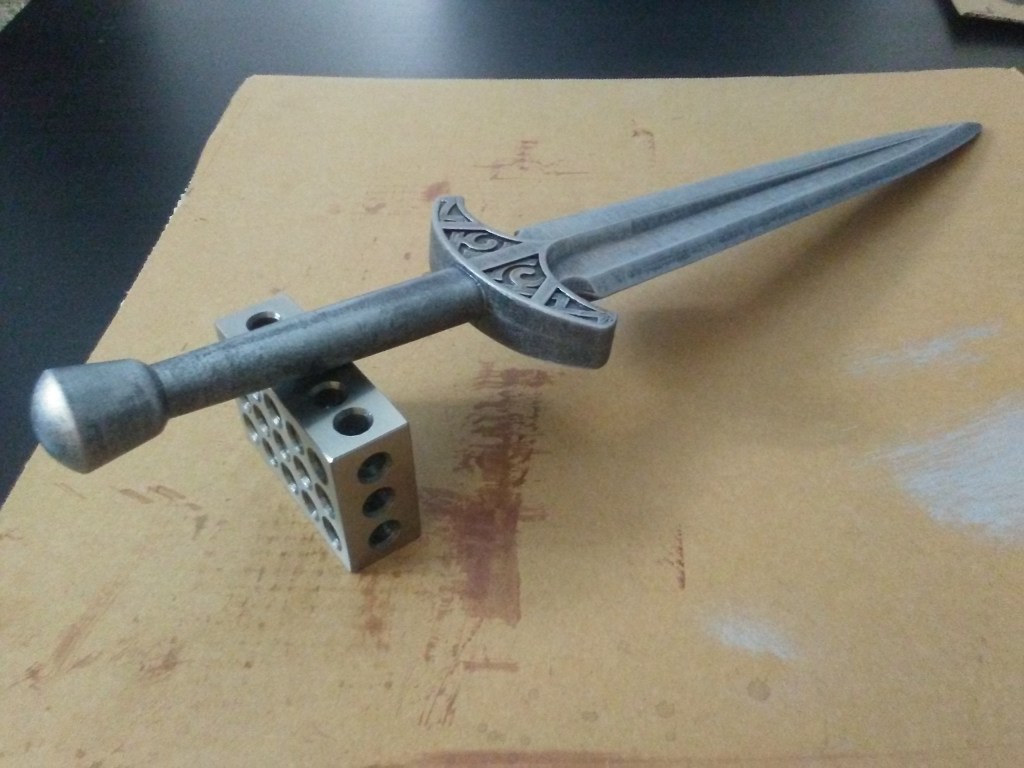
To start, I covered the dagger in a base coat of black spray paint. Once that was dry, I got out a bright metallic acrylic paint. Using just a touch of paint on the brush, with most of it stippled off on the cardboard I was working on, I lightly brushed across the face of the blade, hitting the edges and brushing inward. Most of the paint came off on the edge leaving streaks on the faces of the blade.
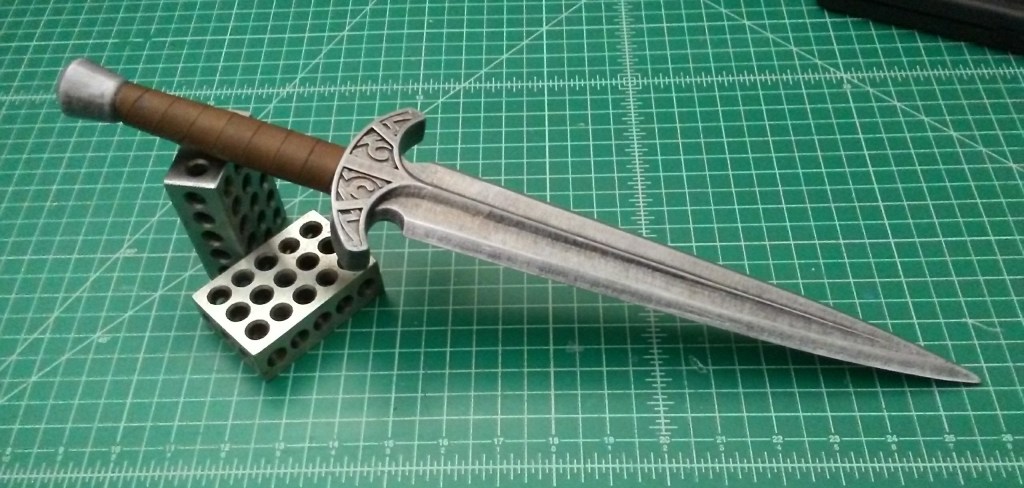
The first layer didn’t look like much, but as I added more brush stroke layers, the black and metallic paint started to look more like the weathered and worn metal the dagger was made from in-game. On the handle and the guard I tried to stipple the brush more into the crevasses of the guard pattern, and then brushing lightly over-top to hit the edges and highlight them as best I could. After completing the layer of silver, I took just the tiniest bit of burnt umber acrylic paint and stippled and brushed it lightly in areas to give the blade a bit of rust. Finally, a top coat of acrylic sealer to protect the paint job.
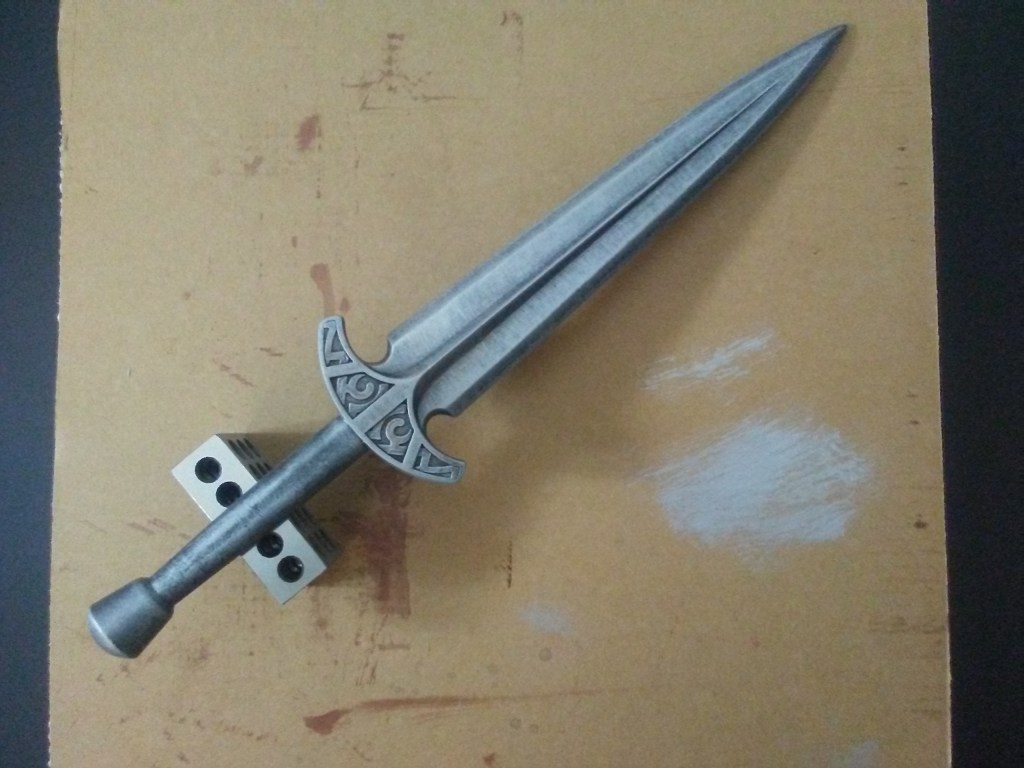

And, the finishing touch for the dagger was to wrap the handle. I didn’t have a large patch of leather to wrap and tie it up like the in-game model, but doing a spiral wrap with the small roll of leather I’d bought felt just as good for me. Applying contact cement to the handle and the leather, I waited for it to set up enough for it to adhere to itself, then started wrapping.
In hindsight I should have sanded off the paint on the handle of the dagger, as it didn’t react well with the contact cement. Doing my best to recover, wiping off the handle and using some strategic super glue in places, I persevered and finished wrapping the handle.
Once the glue had set up, it felt good in my hand. The right weight, the right balance. And the right look. All-in-all, it turned out well and was fun to try a different painting technique.