

I would like to think most people have heard of the Nanoleaf LED light panels by now, but maybe not. If you haven’t they are pretty snazzy! Though, maybe like me, they are a bit out of your price range.
I can’t remember if I stumbled across the open source clone first, or if I stumbled across the actual Nanoleaf first. I think it was the clone that I found, though; I’d spotted it as I was browsing Thingiverse. And from the Thingiverse post, I found my way to the Moodlite forum, and eventually to making a set of Moodlite tiles for myself.
The open source Moodlite project (started by CdRsKuLL on moodlite.co.uk) aims to provide a clone of the Nanoleaf that one can make for themselves. Being the maker that I am and thinking it would be neat to have something like that as well, I figured I’d attempt to jump on the Moodlite bandwagon. Especially, since I had a roll of individually addressable LEDs I was looking to do something with and I needed another 3D printing project to keep my busy. The only components I was really missing were a suitable power supply and a wireless controller; both of which were quite easy to get a hold of and not too expensive either.
Browsing the Moodlite forum, I spent my time soaking up all the different builds and info posted by the members there, planning out how I would factor in some of the modifications they’d made to the original project files. A number of members had opted to use more than one LED in each corner of the Moodlite triangle panels for a brighter display. The roll of LEDs I was going to use had the actual LEDs spaced a fair distance apart from each other and it wouldn’t have been feasible to cram more than one in each corner, so I was more or less locked into that design decision.
Additionally, I opted to use a different set of programming on the wireless controller. I had a bit too much difficulty wrapping my head around the process of getting the Arduino sketch they were using uploaded to the controller properly. However, I’d noted that someone had successfully used a different program called WLED, from another open source project that was geared toward similar LED setups. It ended up being much easier to flash to the wireless controller board and set it up with the paired app.
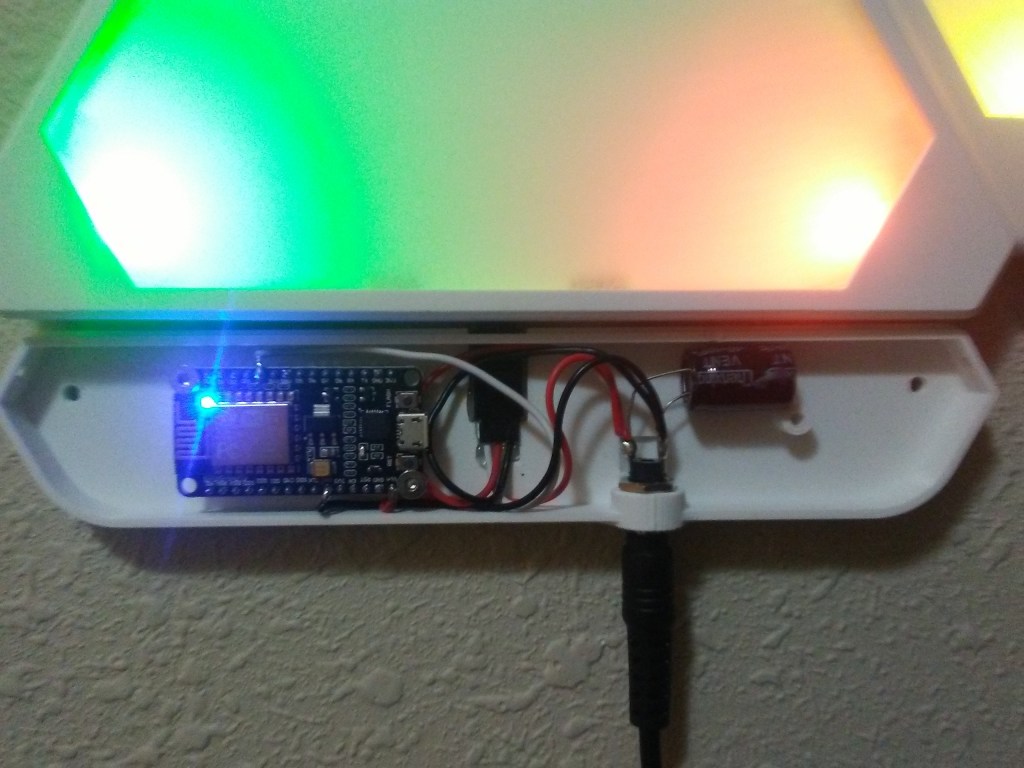
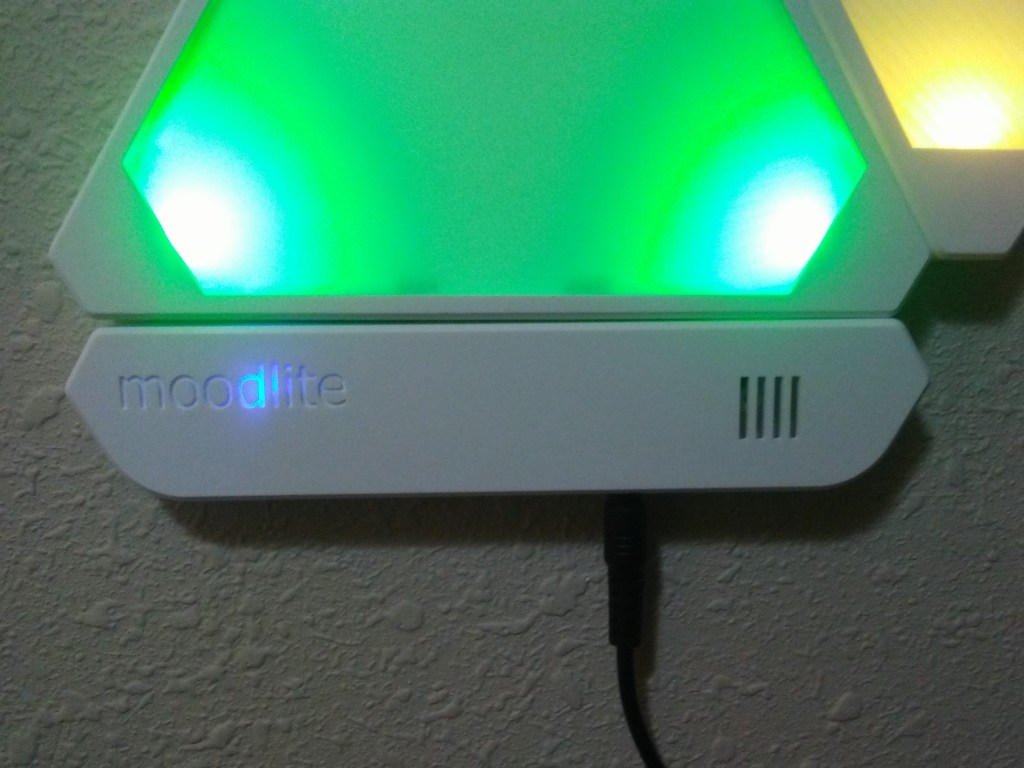
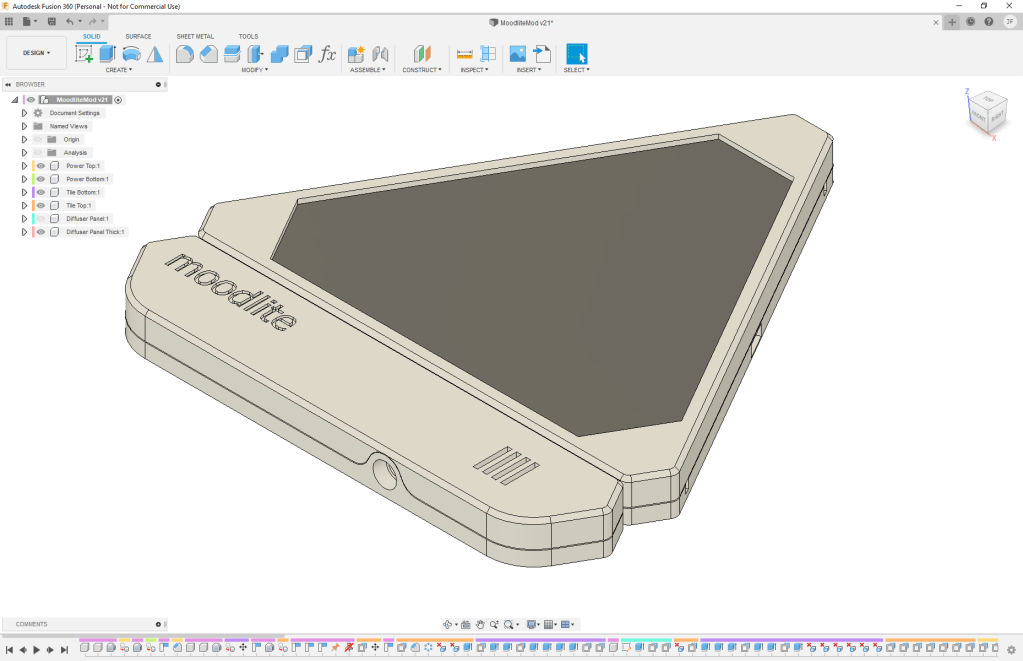
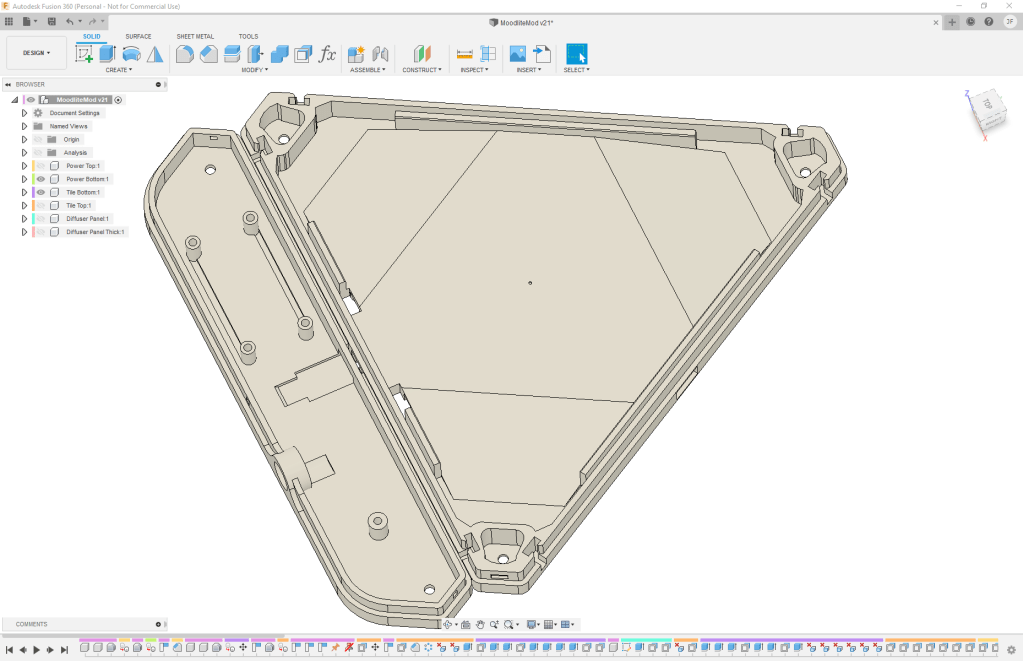
Once I had the electronics side of things squared away, I decided I wanted to tweak the CAD files (as I seem to do with most of my projects) for the Moodlite panels and come up with my own diffuser cover design. Similar to some other members on the forum, I found I got more uniform and better diffusion of the light with the top panel being a greater distance from the LEDs. This made the overall panel thicker than the original design, but kept it flush with the thickness of the controller case. I’d also decided to print the diffuser panel in a natural clear filament as a separate piece than the white top frame. While this worked out quite nicely with me hot-gluing the diffuser panel into the top, I really think I should go back and take the time to model in some snap points to properly hold the panel instead of just relying on glue. Anyway, with my tweaks made, it was off to do some test prints and get everything soldered together.
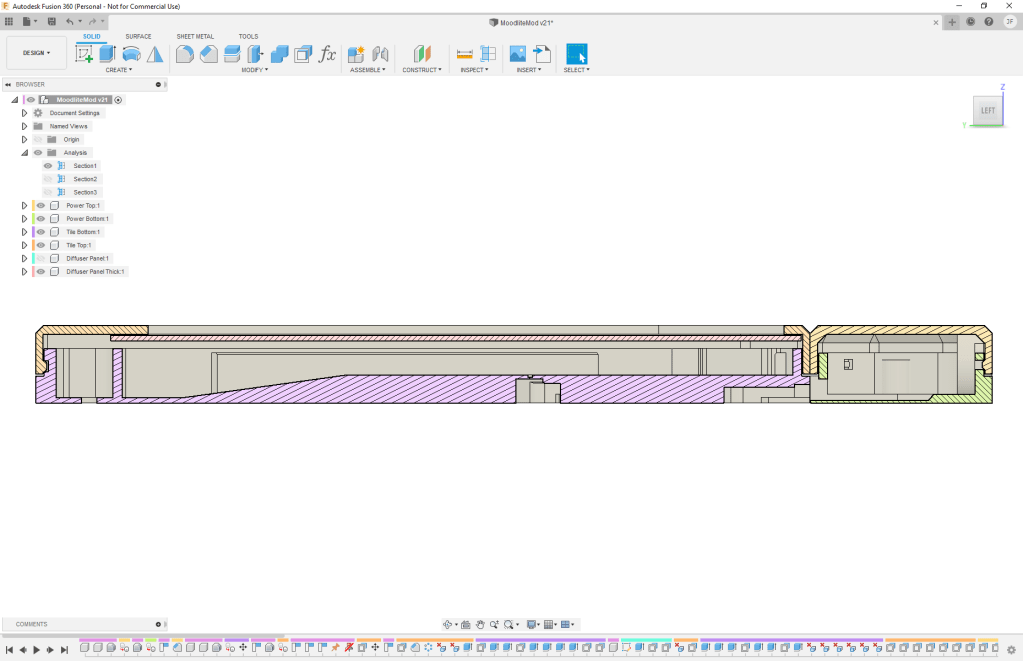
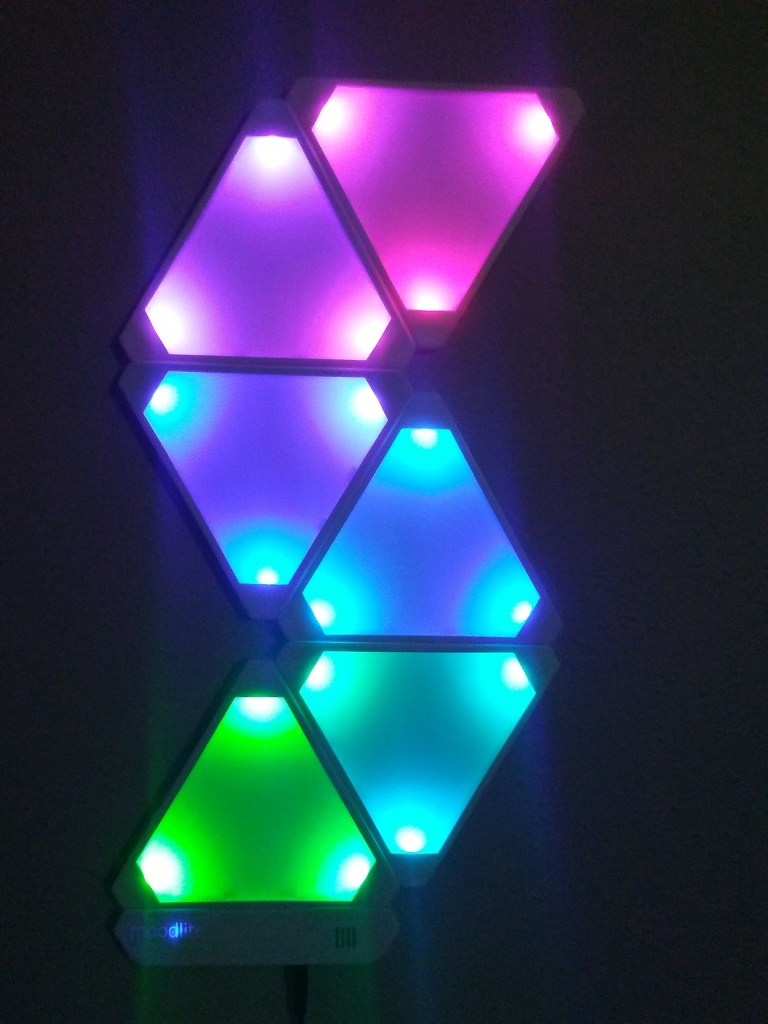
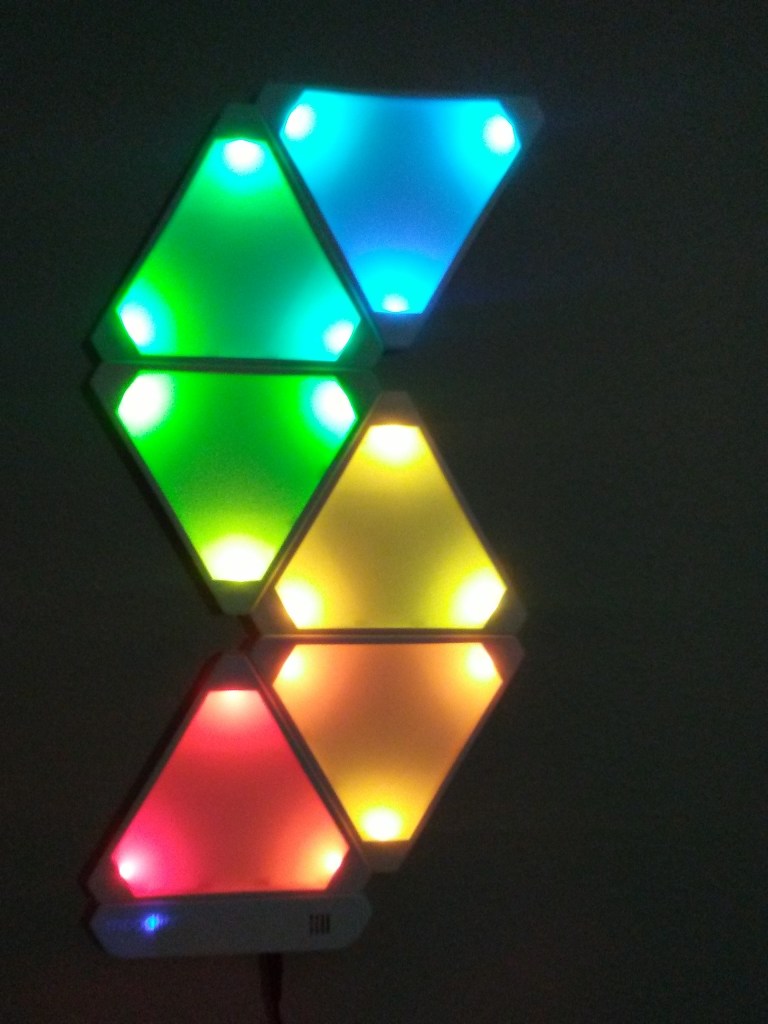
So far I’ve only taken the time to print and solder up 6 panels, however, I’d like to make some more, maybe another 6 or so; just to fill out the wall a little bit more. With the little time I’ve spent playing with the WLED app, I’ve figured out how to set them up to automatically turn on/off and have several preset programs picked out to run already. Every now and again, I’ll stop to play with the app and explore what other lighting patterns I can set them up with. All-in-all, a fun and de-light-ful project. I recommend hopping over to moodlite.co.uk to check out all the different build logs and pictures the members over there have posted as there are some pretty neat setups that they’ve shared.
Short post, just wanted to share this little side project. Stay sane out there!
