A short post about something I’ve struggled with – getting rid of old shirts. Over the years, I’ve collected, been gifted, worn through, etc… lots of graphic-tees. Mostly video game related tees, with some anime interspersed. I wear them and wash them and the graphics crack and fade and the shirts wear out eventually. And I hate to throw them away, but I wasn’t sure what else to do with them. I looked up some things online, and there were posts about how to save and mount them, which usually ended up needing the shirt to be cut apart and glued to poster-board or something else. Not something I wanted to do. I wanted something less permanent and destructive. But a shadow box or a shirt frame is honestly too expensive for the number of them that I wanted.
Anyway, it took some thinking, but I finally was able to rub my two brain cells together long enough to spark an idea and come up with a way to do it with what I had on hand… namely a 3D printer, and a bunch of EVA foam floor mats I’d bought telling myself I was going to use them for helmets or armor back in the day (and then never did… yet).
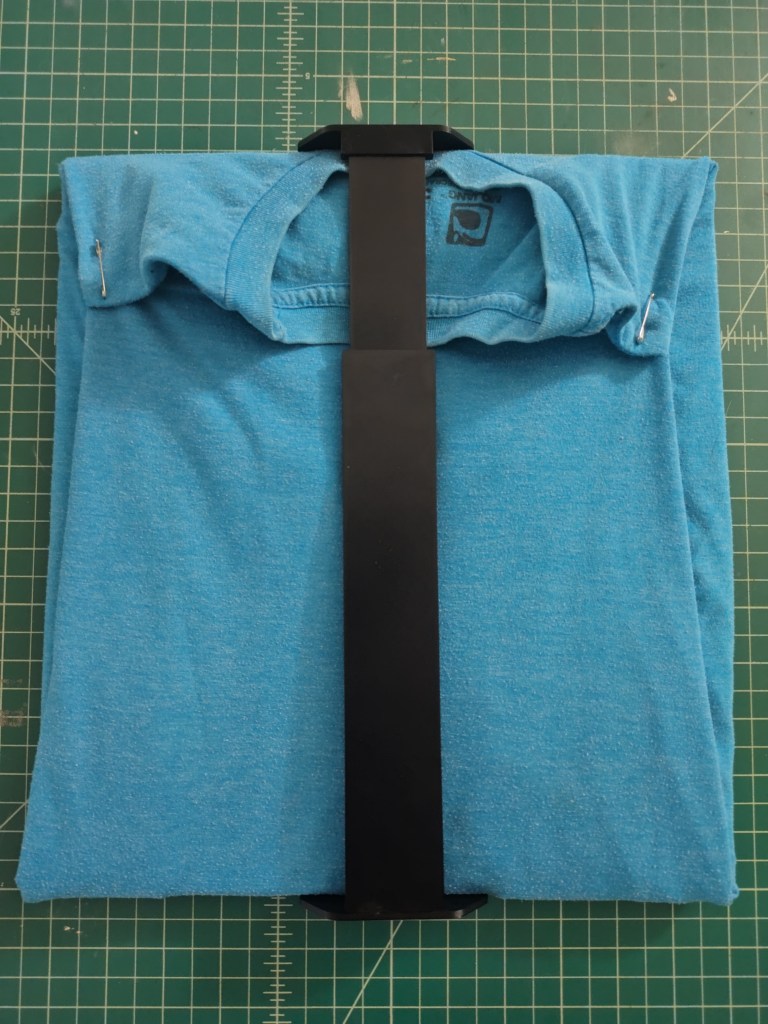
In CAD, I whipped up a quick-ish, 3D model of a sliding dovetail and some top and bottom brackets that I could just super-glue in place. And the whole thing would be adjustable for varying sizes of shirt displays.
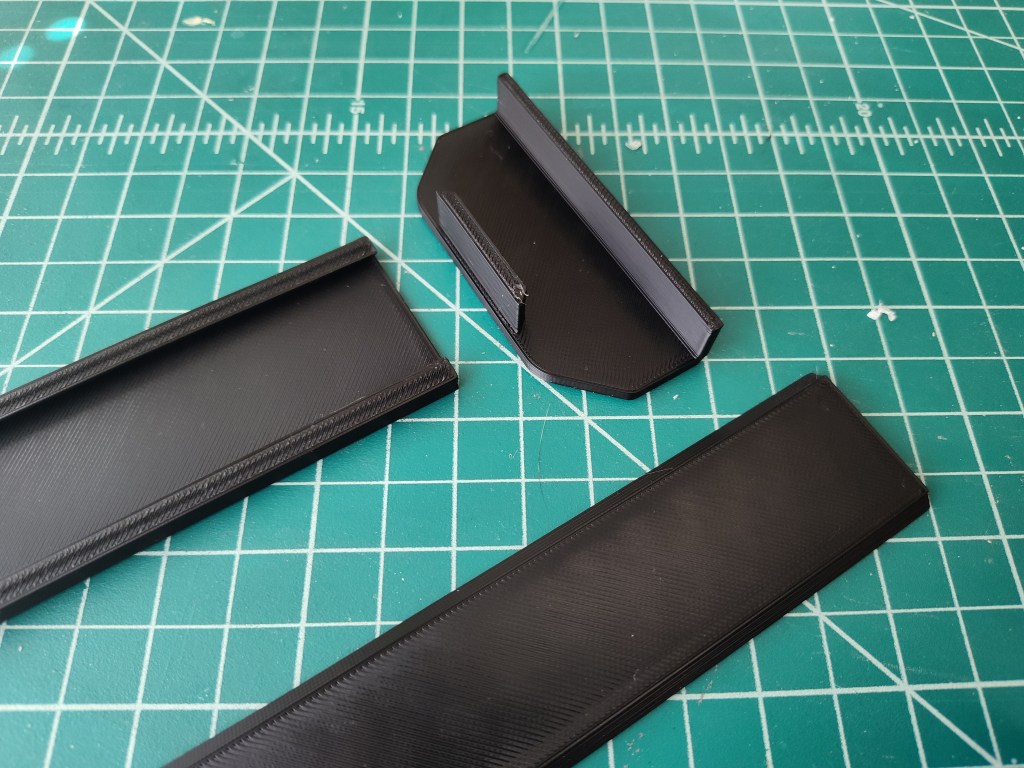
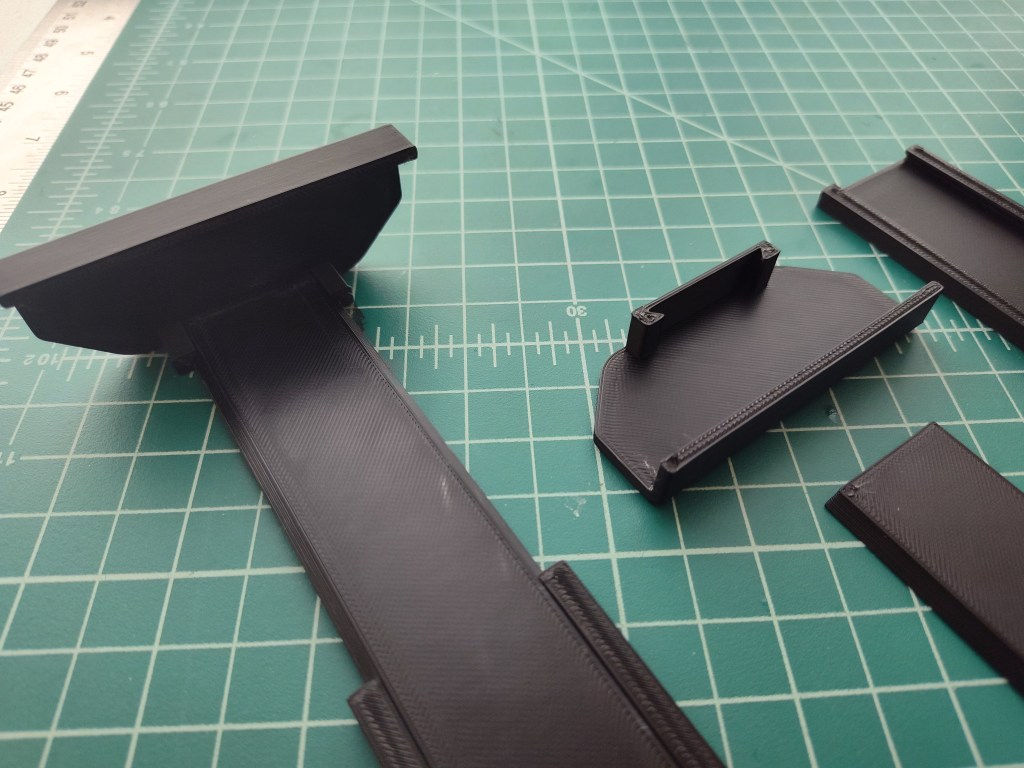
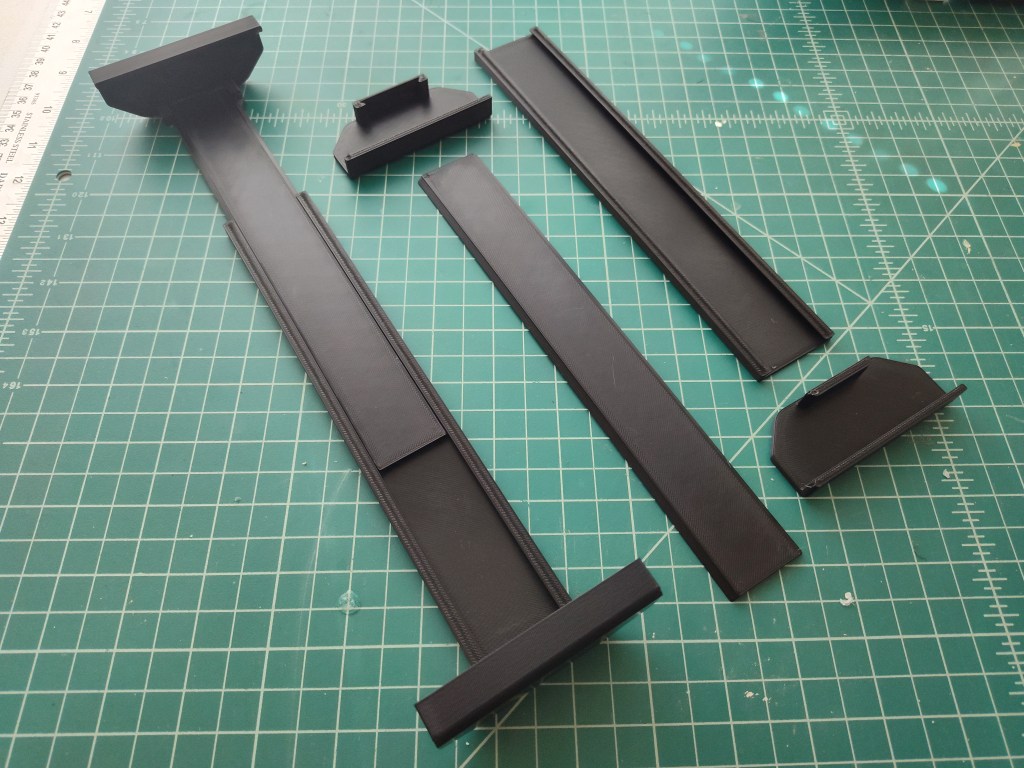
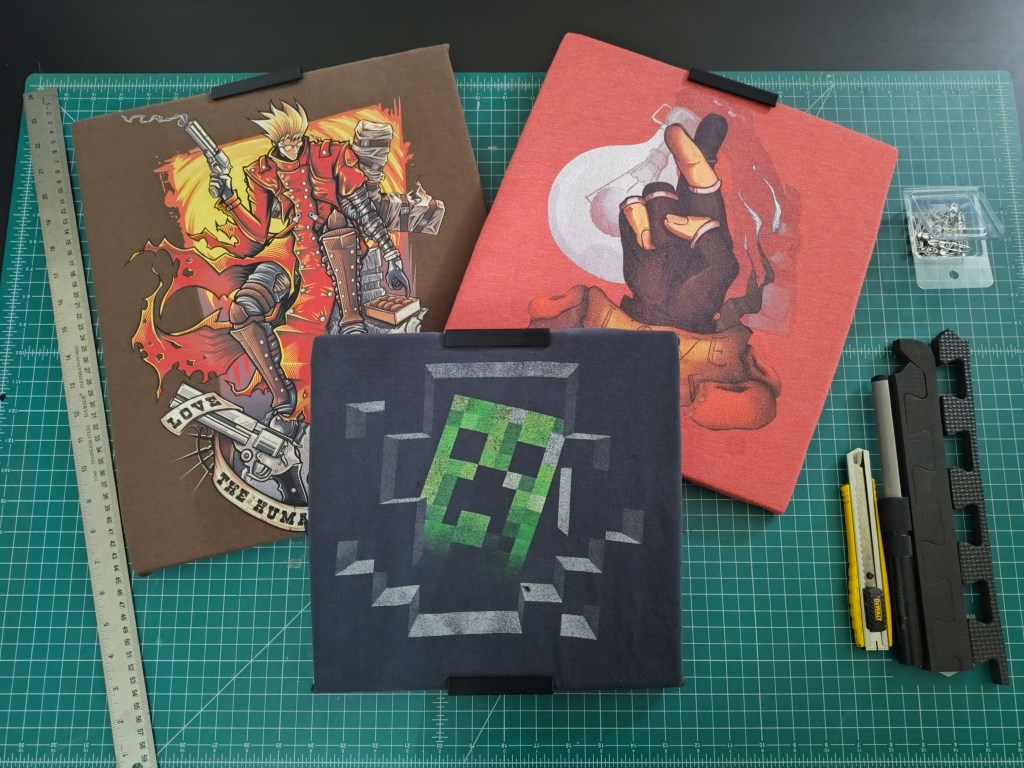
After a test print to ensure it would work, I started printing off as many as I could while I went and cut the floor mats to size. I eyeballed the size as much as possible for the shirt designs I wanted to display. And then cut the floor mat as square as I could. Shocker, I am not that great at cutting things straight, even with a metal-edge ruler. I did my best and it was going to be hidden by the shirt anyway. I think I was maybe able to get about four shirts per floor mat.
I don’t really have any good tips for how to fold the shirts… I just did my best to get them centered on top of the foam and then flip them over with the foam, and fold the sides in as best and as cleanly as possible. Then folded the bottom of the shirt up and the top over that. Depending on where the graphic was on the shirt changed how the back was folded a little bit, but just do your best… that’s my advice. I had to flip the thing over to double check the graphic was still centered the way I wanted and stretched appropriately many times during the process.
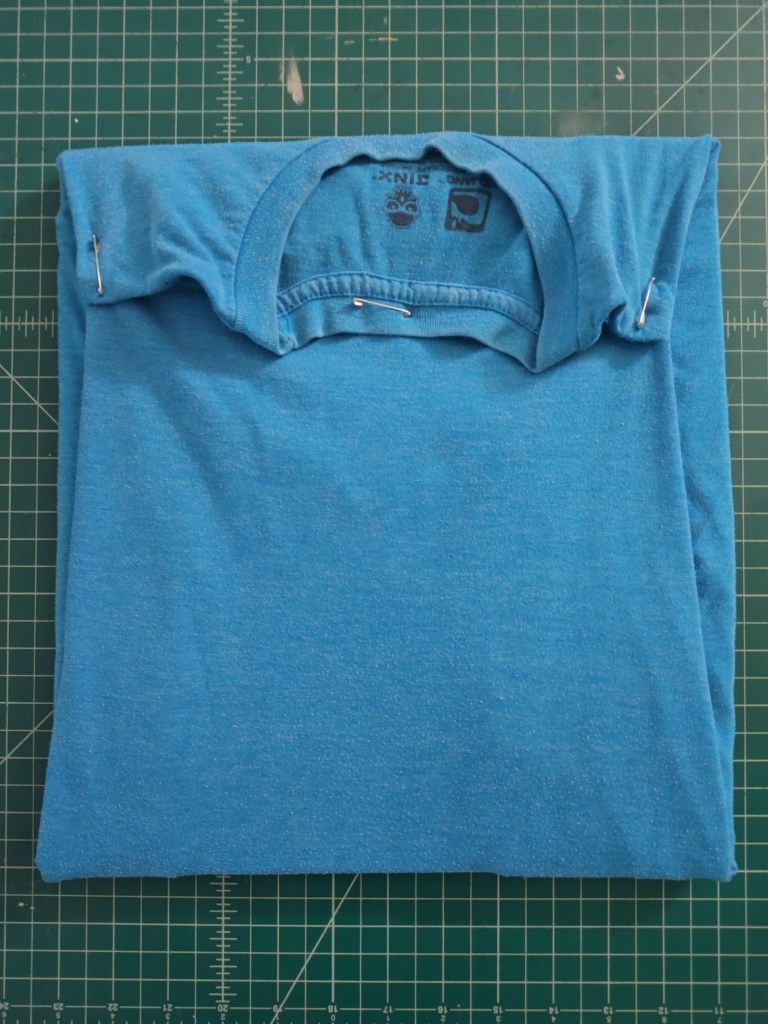
Getting the fold right, I then did my best to bobby-pin the shirt to itself, top to bottom, or in some cases, I just sunk the sharp point of the bobby-pin angled into the EVA foam floor mat to secure the shirt when I didn’t have enough shirt to pin to itself. The goal was to secure the shirt as best as possible without damaging the shirt too much. Just in case I wanted to take it off to wear it again in the future.
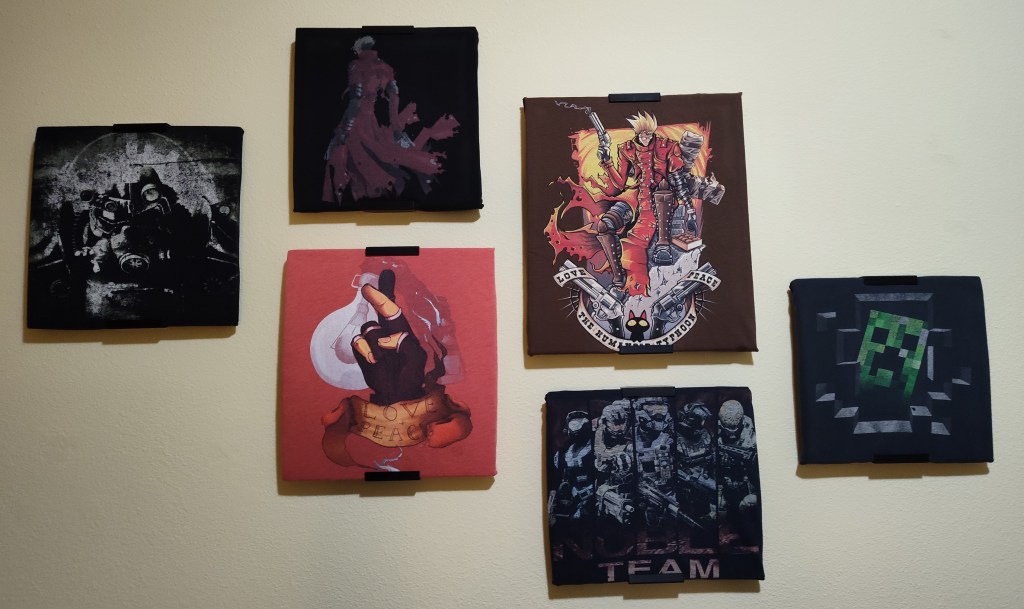
From there, just clamp the 3D printed mount around the shirt and foam floor mat. Gravity and the tight fit of the dovetail more or less keeps the mount clamped around the shirt, and the whole thing is light enough that I was able to hang it on the wall with a single poster command strip.
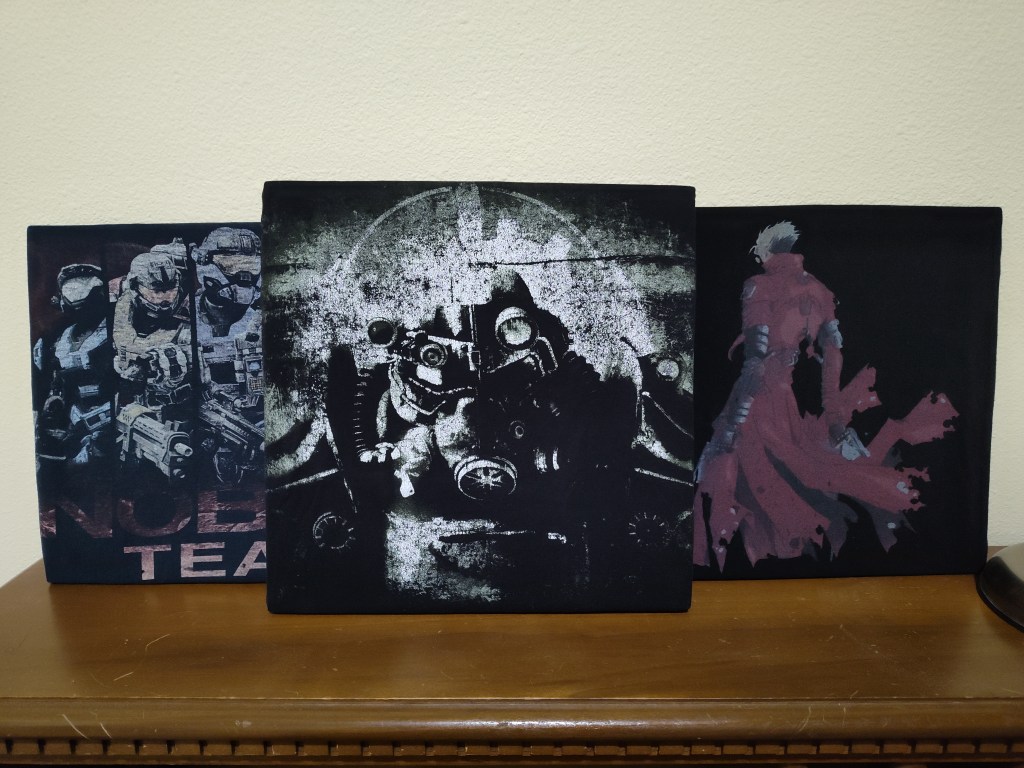
And that’s about that. I quite like how I’ve been able to save and repurpose some of my old favorite shirts and get new wall art out of it at the same time.